
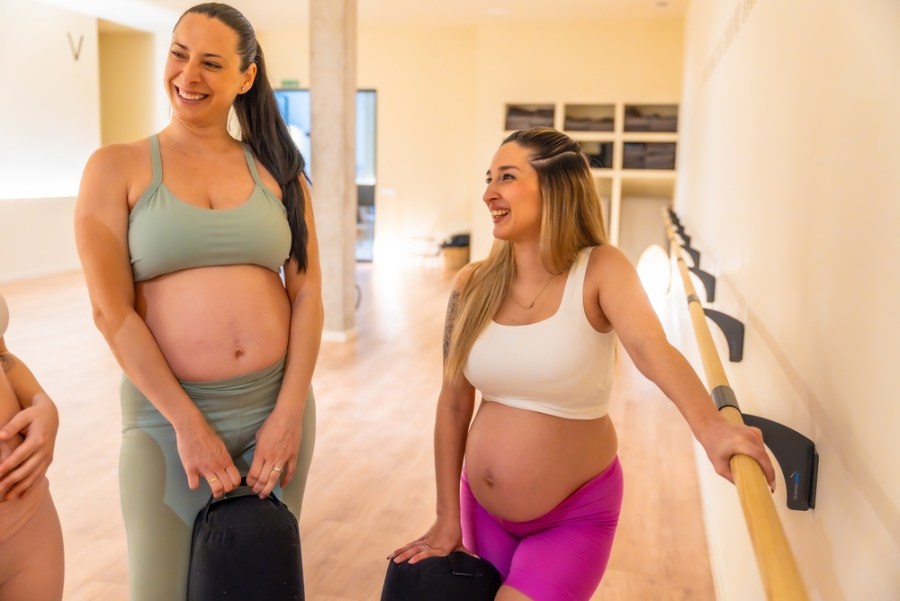
Ease back and hip pain with these prenatal exercises from Sarah Campus to strengthen posterior muscles and decrease tightness
Got a pain in the back? You’re not alone. According to research, up to 70 per cent of mums-to-be will experience back pain at some point during their pregnancy*. This is, in part, because the ligaments in your body stretch and become softer in preparation for labour, which can strain the joints of your lower back and pelvis and result in pain. But it’s also because your centre of gravity shifts as your bump grows, which puts extra strain on the back and hips. The good news? You can help to relieve the aches.
‘Stretching can offer pregnant women many benefits – it can help you stay fit, relaxed and prepare you for labour,’ raves Sarah Campus, PT and founder of LDN MUMS FITNESS (ldnmumsfitness.com). ‘More importantly, it can help ease some of the aches and pains you might be experiencing.’
But there are some things to keep in mind. ‘During pregnancy, levels of the hormone relaxin increase,’ explains Sarah. ‘This helps the body relax the cervix and ligaments during delivery. However, it also lubricates and loosens the joints and ligaments of the pelvis, which can increase the risk of overstretching. For this reason, stretching too much can be dangerous, so try not to go deeper into these poses than you could before pregnancy.’
The trick is to listen to your body and go with the flow. Try these back-boosting moves to stretch and strengthen your body today.
Cat/Cow
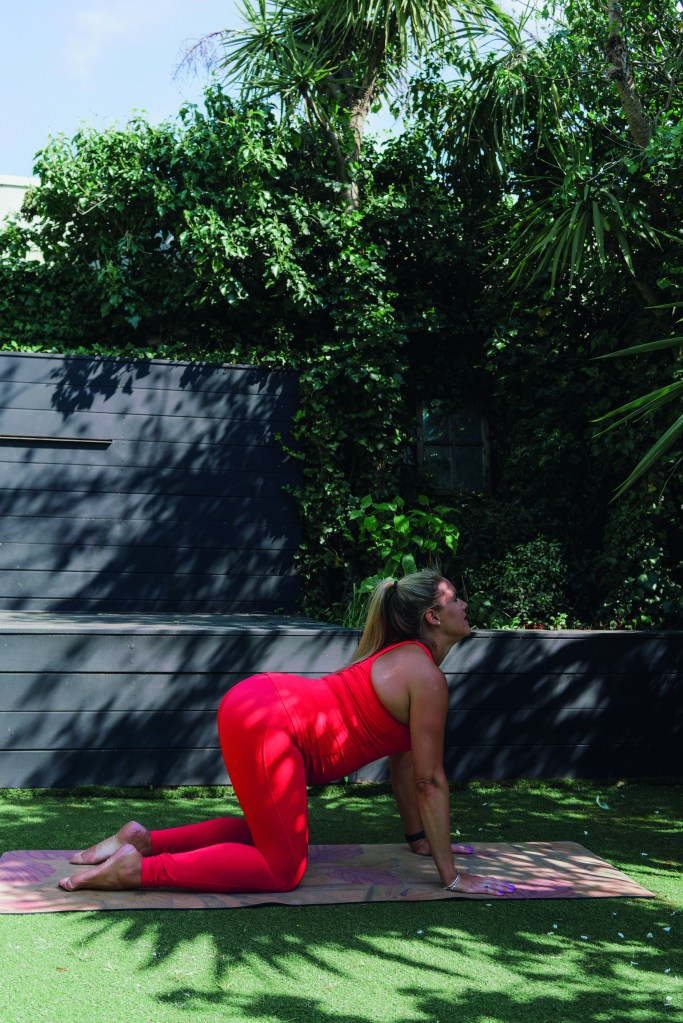
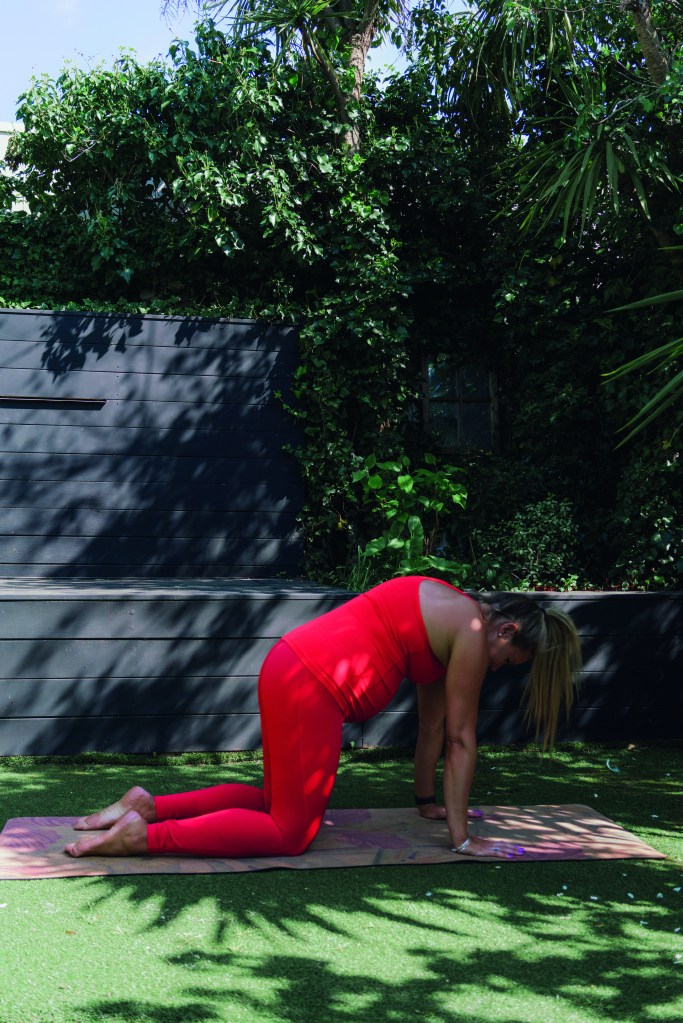
Benefits: Gently strengthens your lower back, decreases hip and lower back pain, and helps with all round ligament pain. It can also increase spine mobility
- Begin on all-fours. Keep the tops of your feet flat on the mat, shoulders directly over your wrists, and hips directly over your knees.
- As you inhale, drop your belly and allow your back to arch. Keep your shoulders rolled back and down while looking forward and slightly upward (A).
- As you exhale, press into your hands and round your upper back, while looking in toward your belly (B).
- Continue moving in this way, following your breath, at least five times.
Child’s pose
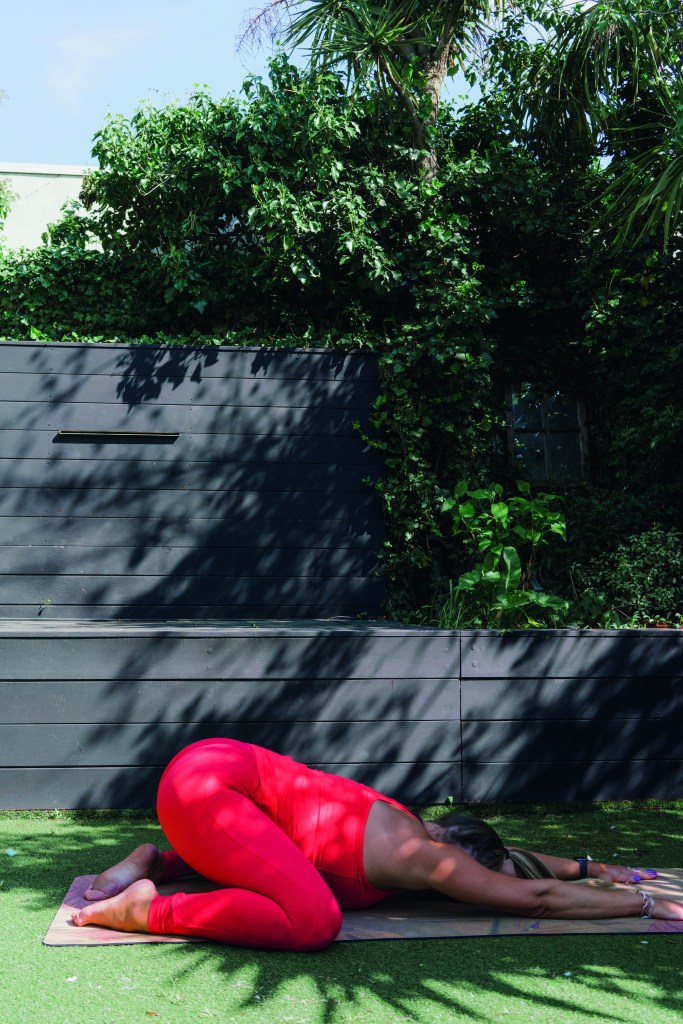
Benefits: Gently stretches aching hips, the pelvis and thighs. It also stretches the spine, especially the lower back
- Begin on all-fours on the mat, with your knees directly under your hips. Keep your big toes touching. This will give your belly room to slide between your knees and avoid putting strain on your hips. You can also widen your feet if having toes touching puts any pressure on your knees or does not provide enough room for your belly.
- Inhale and feel your spine grow longer. As you exhale, draw your bottom towards your heels and lower your head towards the mat, while tucking your chin to your chest (pictured). Take your knees wider if needed, to provide space for your bump.
- Rest here, with your forehead on the ground. You can also fold a blanket or use a yoga block and let your head rest on it if that’s more comfortable. Keep your arms long and hold for at least five deep breaths.
Glute bridge
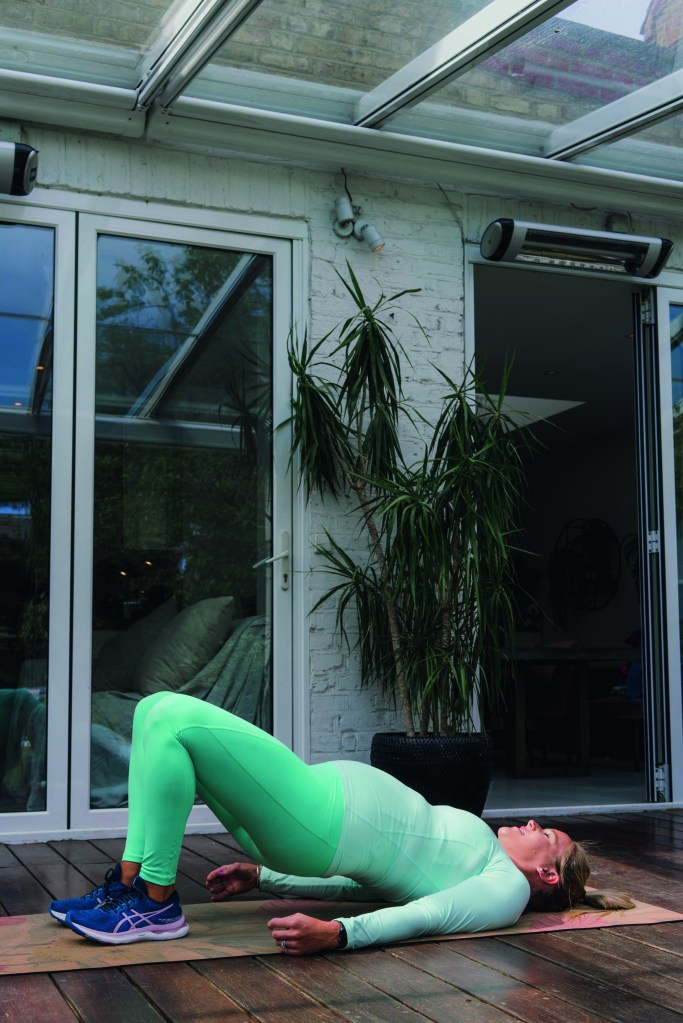
Benefits: Provides a gentle stretch for hip flexors. It can also help strengthen your lower back, abdominals and glutes, while relieving aches in the hips and lower back
- Begin on your back with feet flat on the floor. They should be approximately hip-width apart but can be more spaced out if this is uncomfortable for you. Keep your arms straight alongside your body and, if possible, have your legs bent enough so your fingers can graze the backs of your heels.
- As you inhale, curl your pelvis until your lower back is gently pressing against the floor, then gently lift your hips and back off the ground, pressing evenly into your feet and keeping a neutral spine (pictured).
- Hold for a few counts. As you exhale, gently roll your spine back to the ground, one vertebra at a time. As you relax preparing for the next lift, be sure your spine is neutral. Your lower back should be slightly off the ground, respecting the natural curve of your lumbar spine. Repeat 10 times.
Butterfly stretch
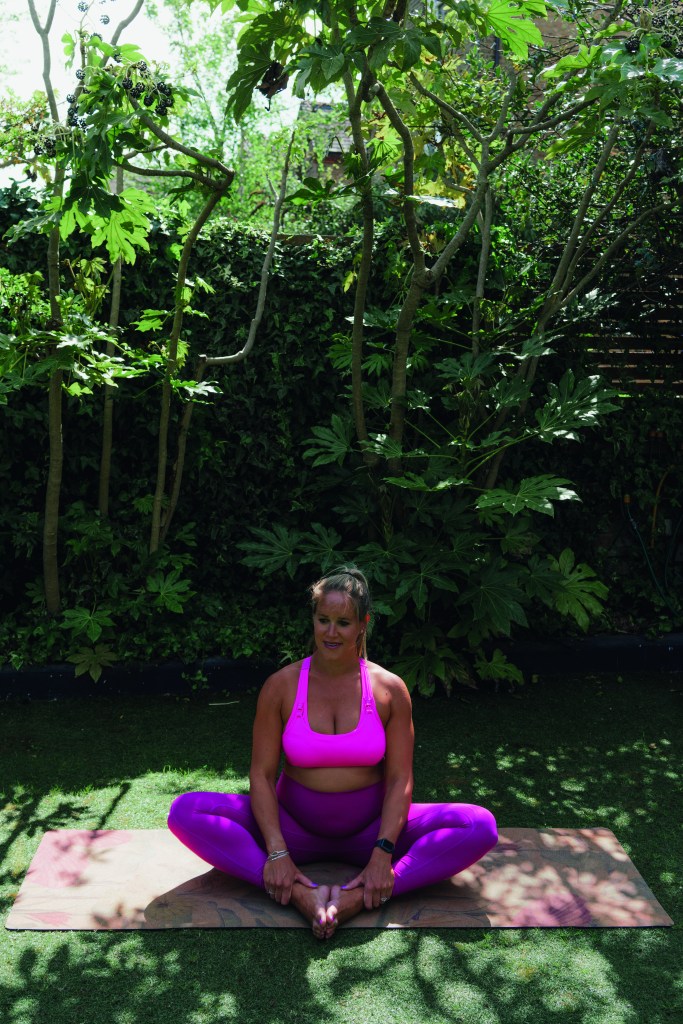
Benefits: This seated pose is a hip opener. It also stabilises your pelvis and stretches your inner thighs, back and neck
- Sit on your mat and bend your knees, bringing the soles of your feet together in front of you. Grab hold of your toes and draw your feet gently toward your pelvis.
- Inhale and sit up tall on your sitting bones, not your tailbone. You don’t want your pelvis tucked under (pictured).
- As you exhale, press your knees to the ground. Keeping your spine straight, gently begin to bend at the hips, taking your torso toward the ground. When you get as far as you can comfortably go, release any tension in your neck by dropping your chin.
- Stay here for three-to-five slow, even breaths. If possible, gently lean further forward with each exhale, but don’t overstretch.
Lunge
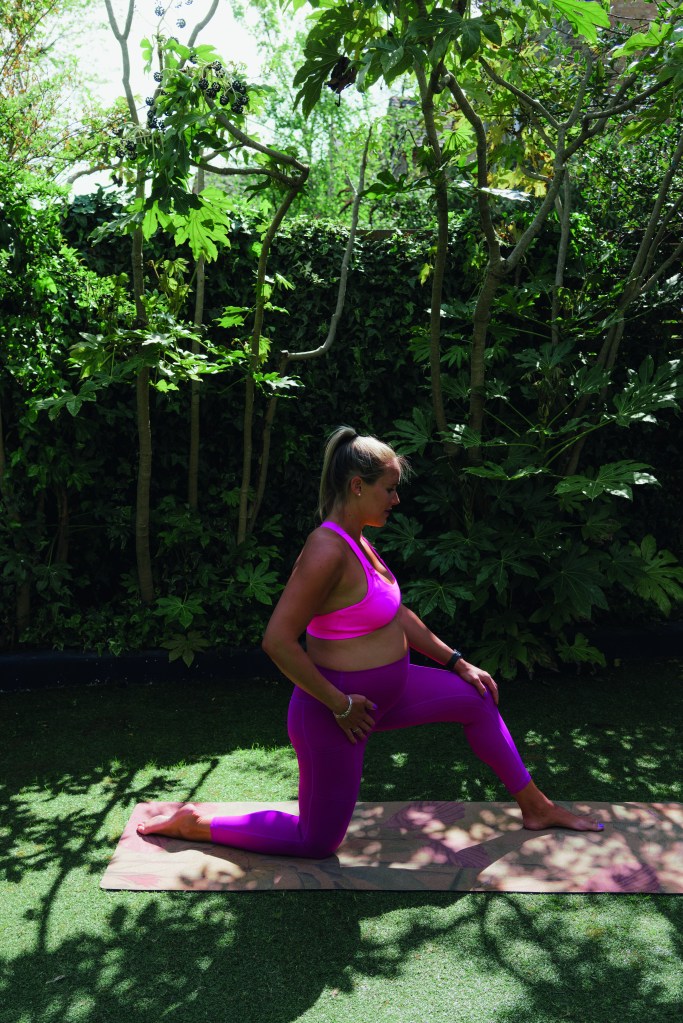
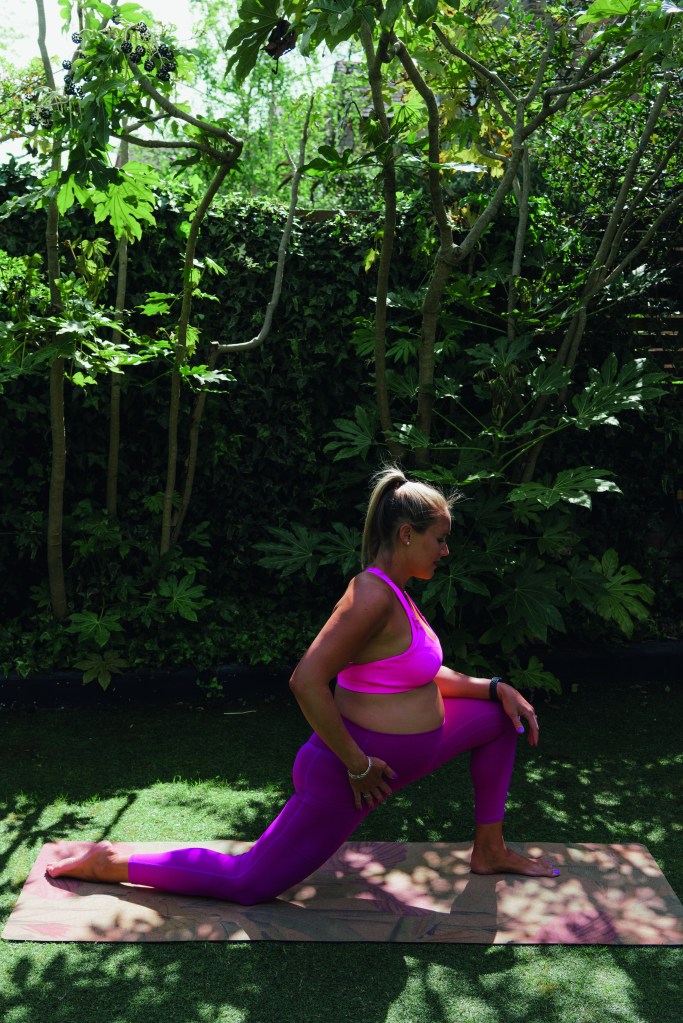
Benefits: Eases tight hip flexors (the muscles that run along the front crease of your hips). These muscles can often get tight during pregnancy due to changes in the position of the pelvis
- Begin kneeling on the floor, with your knees on a yoga mat or pillow for comfort.
- Step one foot forward so that both your front knee and hip are at 90-degree angles (A).
- As you exhale, slowly lean forward, putting weight into your front leg (B). Square off your hips by rotating your back hip forward until you feel a stretch down the front of the hip and thigh.
- Hold onto a wall or chair for balance, if needed. Hold position for 30 seconds. Repeat on the other side.
Forward fold
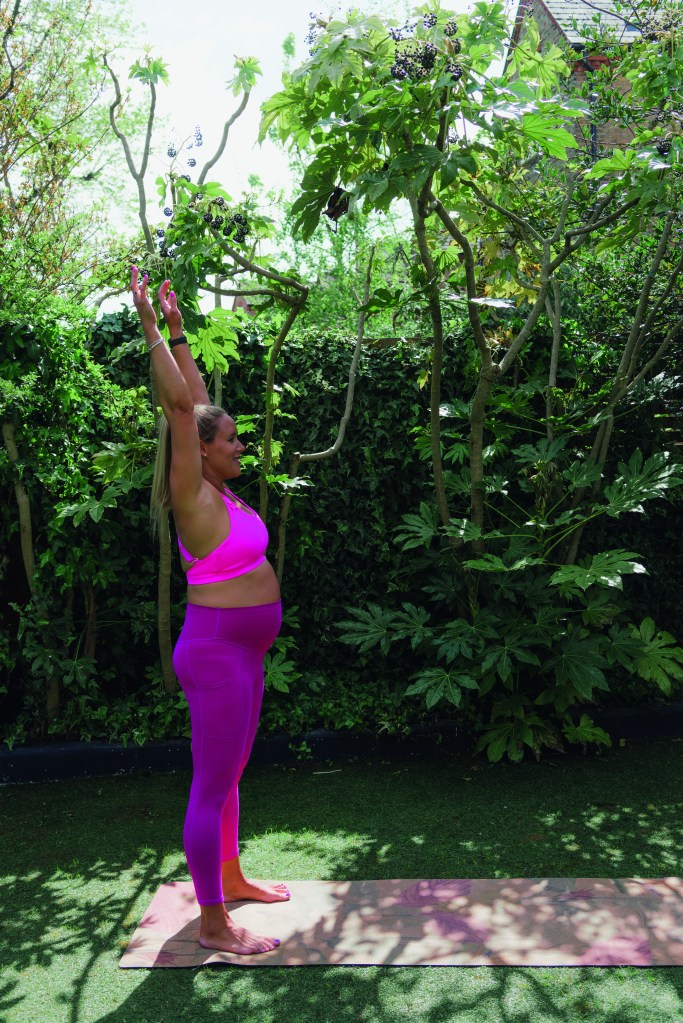
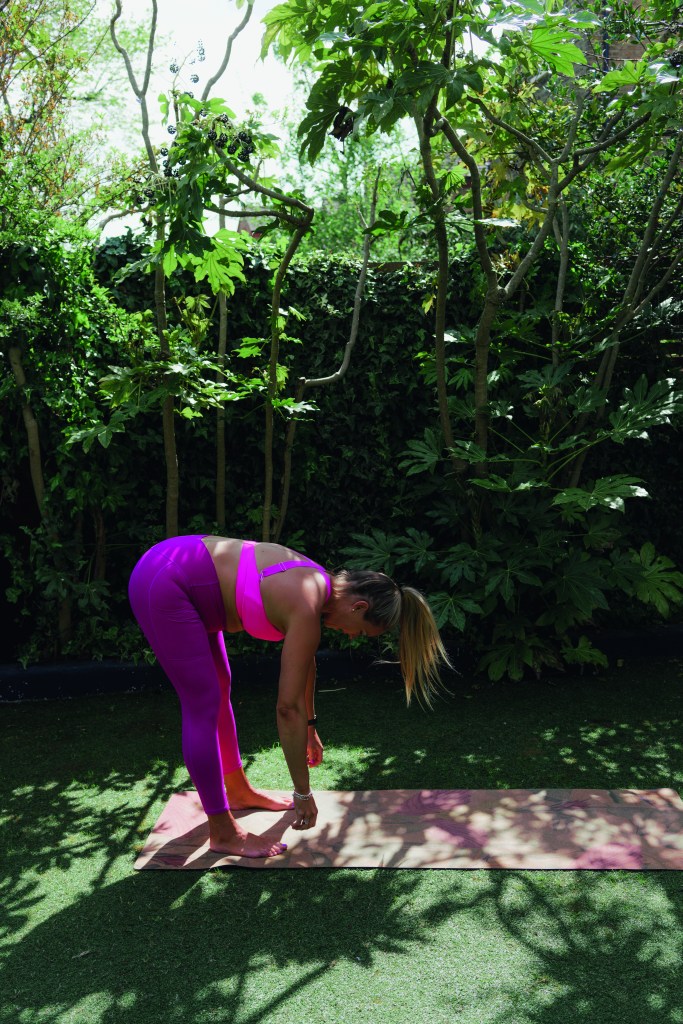
Benefits: Stretches the hamstrings, which often get tight during pregnancy. Tight hamstrings can lead to lower back pain, leg pain and poor movement patterns
- Begin standing on a mat with your feet slightly wider than hip-width apart, toes pointed forward.
- Reach up (A) and then lean forward with a flat back, slowly lowering your hands toward the floor (B).
- Continue until you feel a stretch down the back of your legs. You can rest your hands on your legs for support anywhere that feels comfortable, but avoiding on the knee joint itself.
Release into the position for 30 seconds. - To increase the stretch, walk your hands over to one side and then the other until you feel a good stretch. Repeat three times.
Sarah Campus is a women’s personal trainer, nutrition coach, wellness expert, mum of three and the founder of LDN MUMS FITNESS. Find out more at ldnmumsfitness.com and follow her on Instagram @ldnmumsfitness