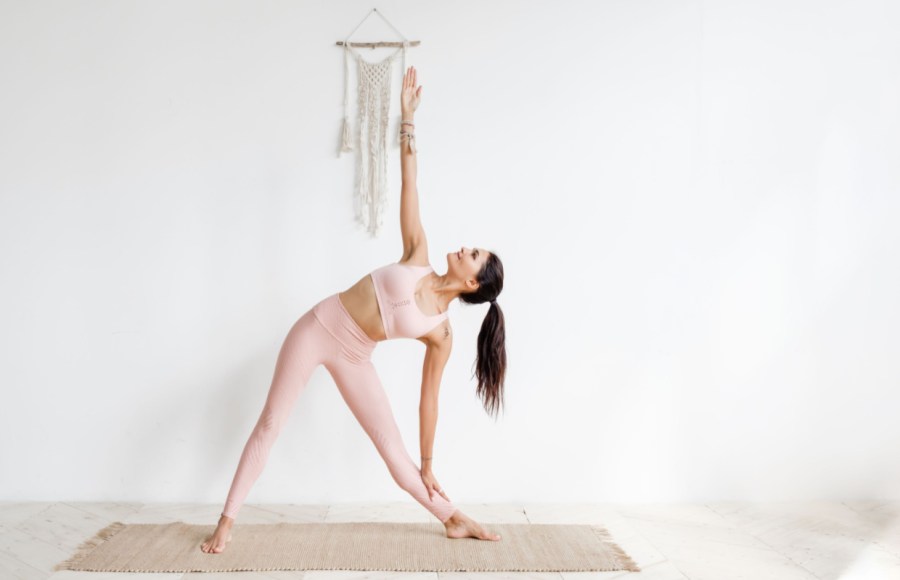
Target your core muscles while finding a sense of inner peace and improving your flexibility with this 10 minute yoga abs workout…
In yoga, your solar plexus or spiritual centre is located in your tummy, and it’s important to keep this area strong and supple, yet flexible. Doing millions of sit-ups is not the way to do it, as this only works the superficial layer of fat in your abdomen and not the deeper fat.
This 10 minute yoga abs workout is designed to work your entire tummy deeply and in a more controlled way than you might with sit-ups alone. Over time, your abs will thank you!
Get started on your yoga journey with the latest yoga kit
Try the Sundried Non-Slip Jute Yoga Mat
BUY IT NOW:
£18.90 / amazon.co.uk
How to do this 10 minute yoga abs workout:
Before starting this workout, first complete our full body yoga warm-up. Then, complete four rounds of a basic sun salutation A sequence for beginners. Then, move on to the following core-targeting yoga poses. Perform two rounds of the circuit below.
10 minute yoga abs workout
- (Warm up)
- (Sun salutations)
- Boat Pose – Move in and out five times.
- Bicycle Twists – Complete 10 twists each side.
- Elbow plank – Hold plank for five breaths.
- Dolphin – Hold for five full breaths. You could then repeat Plank and Dolphin sequence three times.
- Triangle – Hold for six to 10 full breaths each side.
- Reverse triangle – Hold for six to 10 full breaths each side.
- Shoulder stand – Hold for up to 25 full breaths.
- Plough – Hold pose for 10–20 breaths.
- Savasana pose – Lay comfortably on your back with any cushions or coverings you need. Hands by your side, palms up, then simply relax and focus on your breathing.
Below, we’ve included detailed instructions and helpful photo demonstrations for each tummy-targeting pose in this 10 minute yoga abs workout…
Boat pose
Navasana
Benefits: Deeply tones your tummy muscles and spine, helps your digestion.
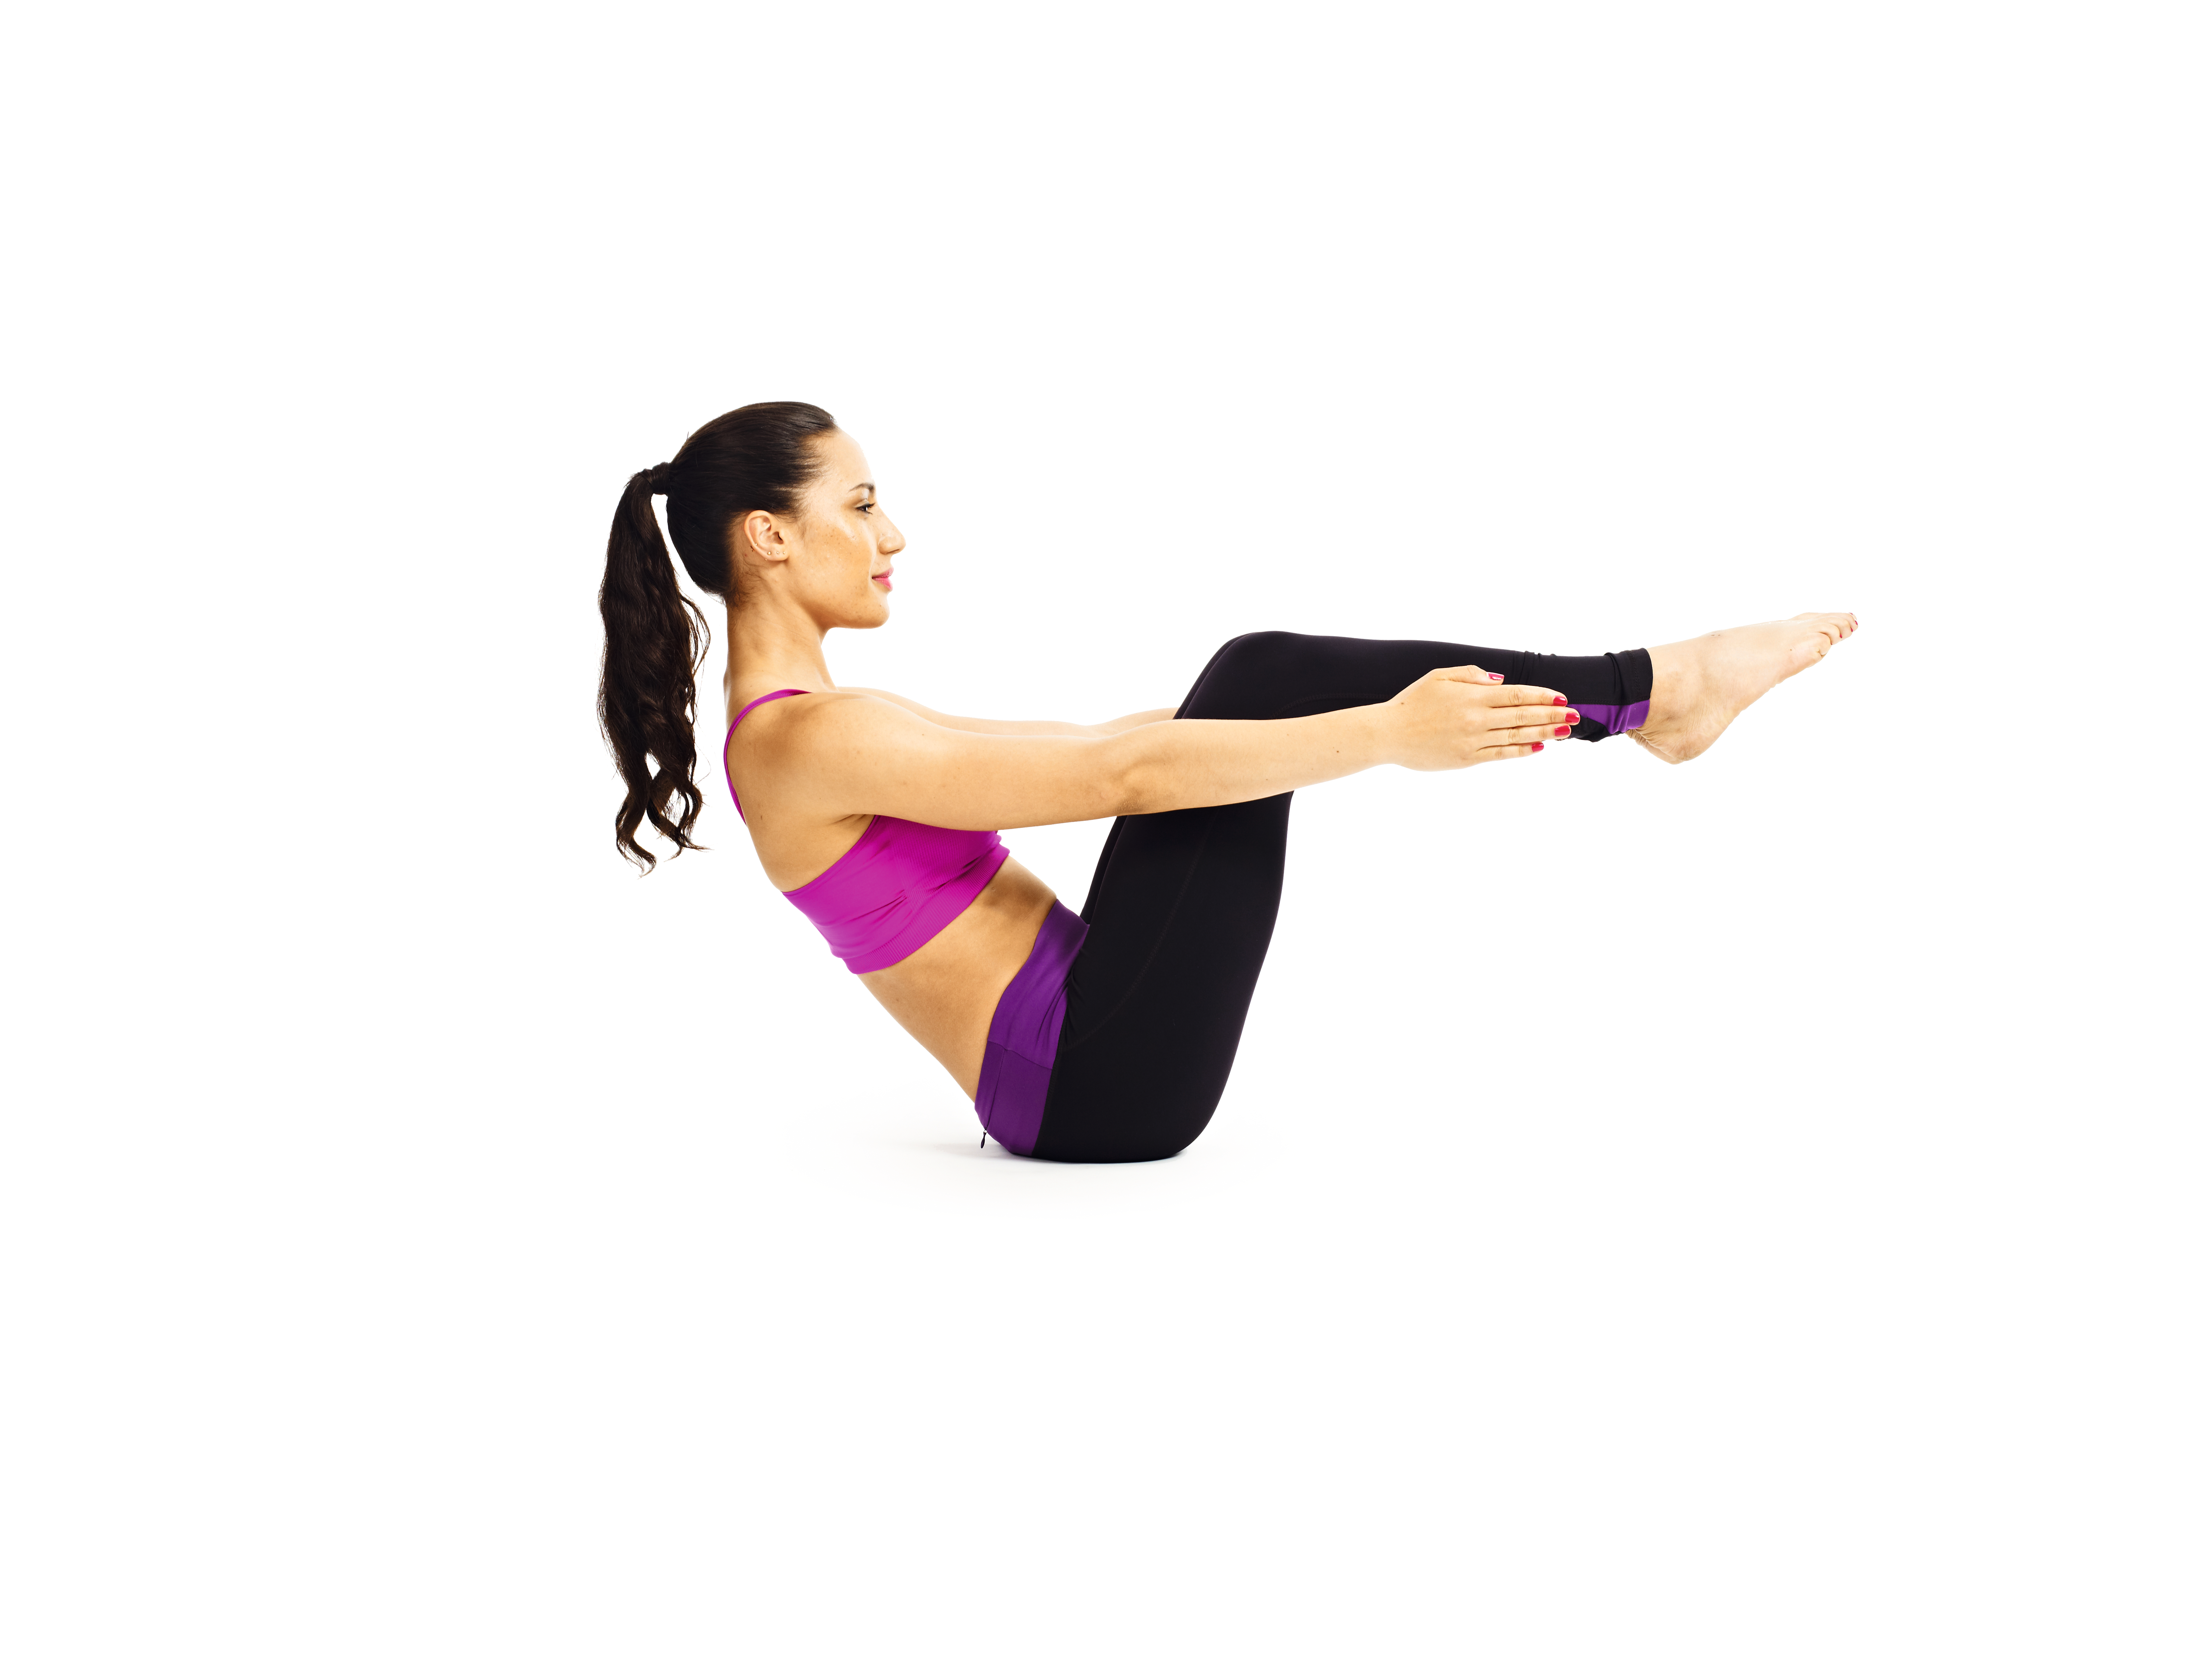
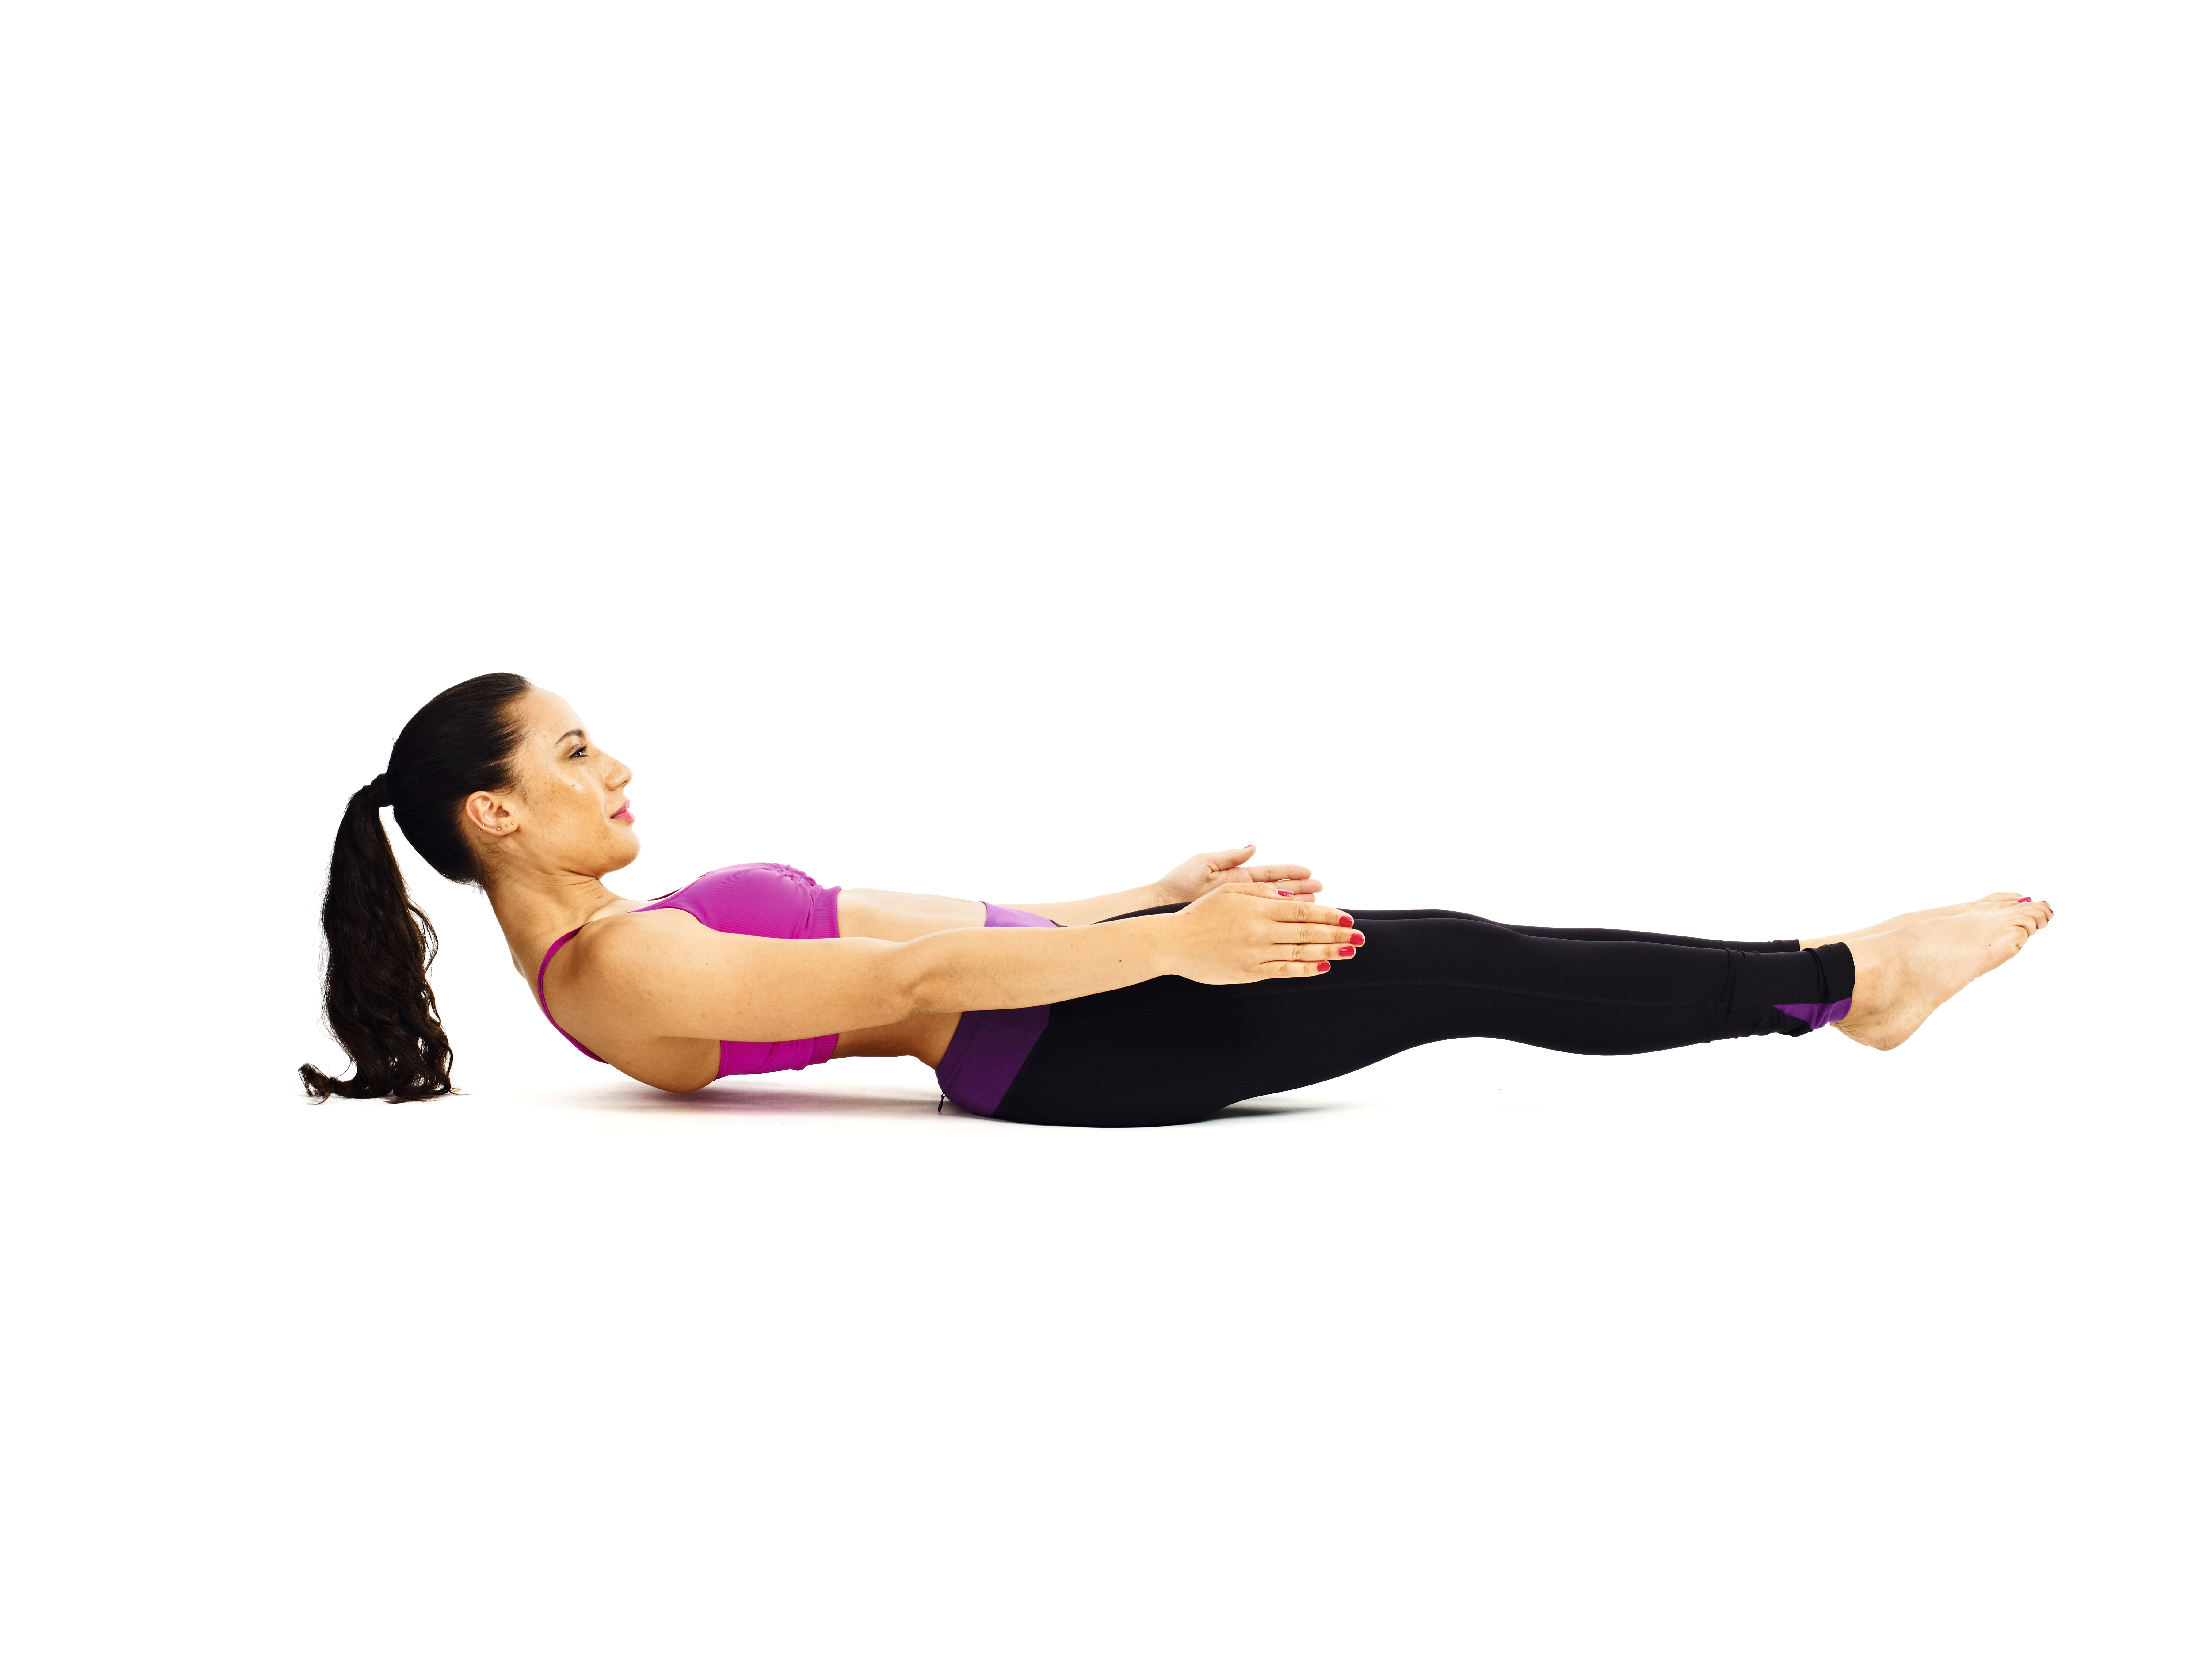
- Sit on the floor with your legs straight out in front of you.
- On the next inhale, lift your feet off the floor a few inches. Hold the back of your thighs. Engage your abs and move your torso diagonally back so you balance on your tailbone. This is stage one of the posture.
- Beginners: Practise by taking five breaths here, then rest.
- To progress, lift your feet and keep your knees bent so your shins are parallel to the floor, with your legs at a 90° angle. Continue to balance on your tailbone. This is stage two. (A)
- On your next exhale, lower your torso back until you’re about 10cm from the floor, and straighten your legs out. (B)
- Bring your knees and torso back up to stage two. Repeat this in-out movement 10 times.
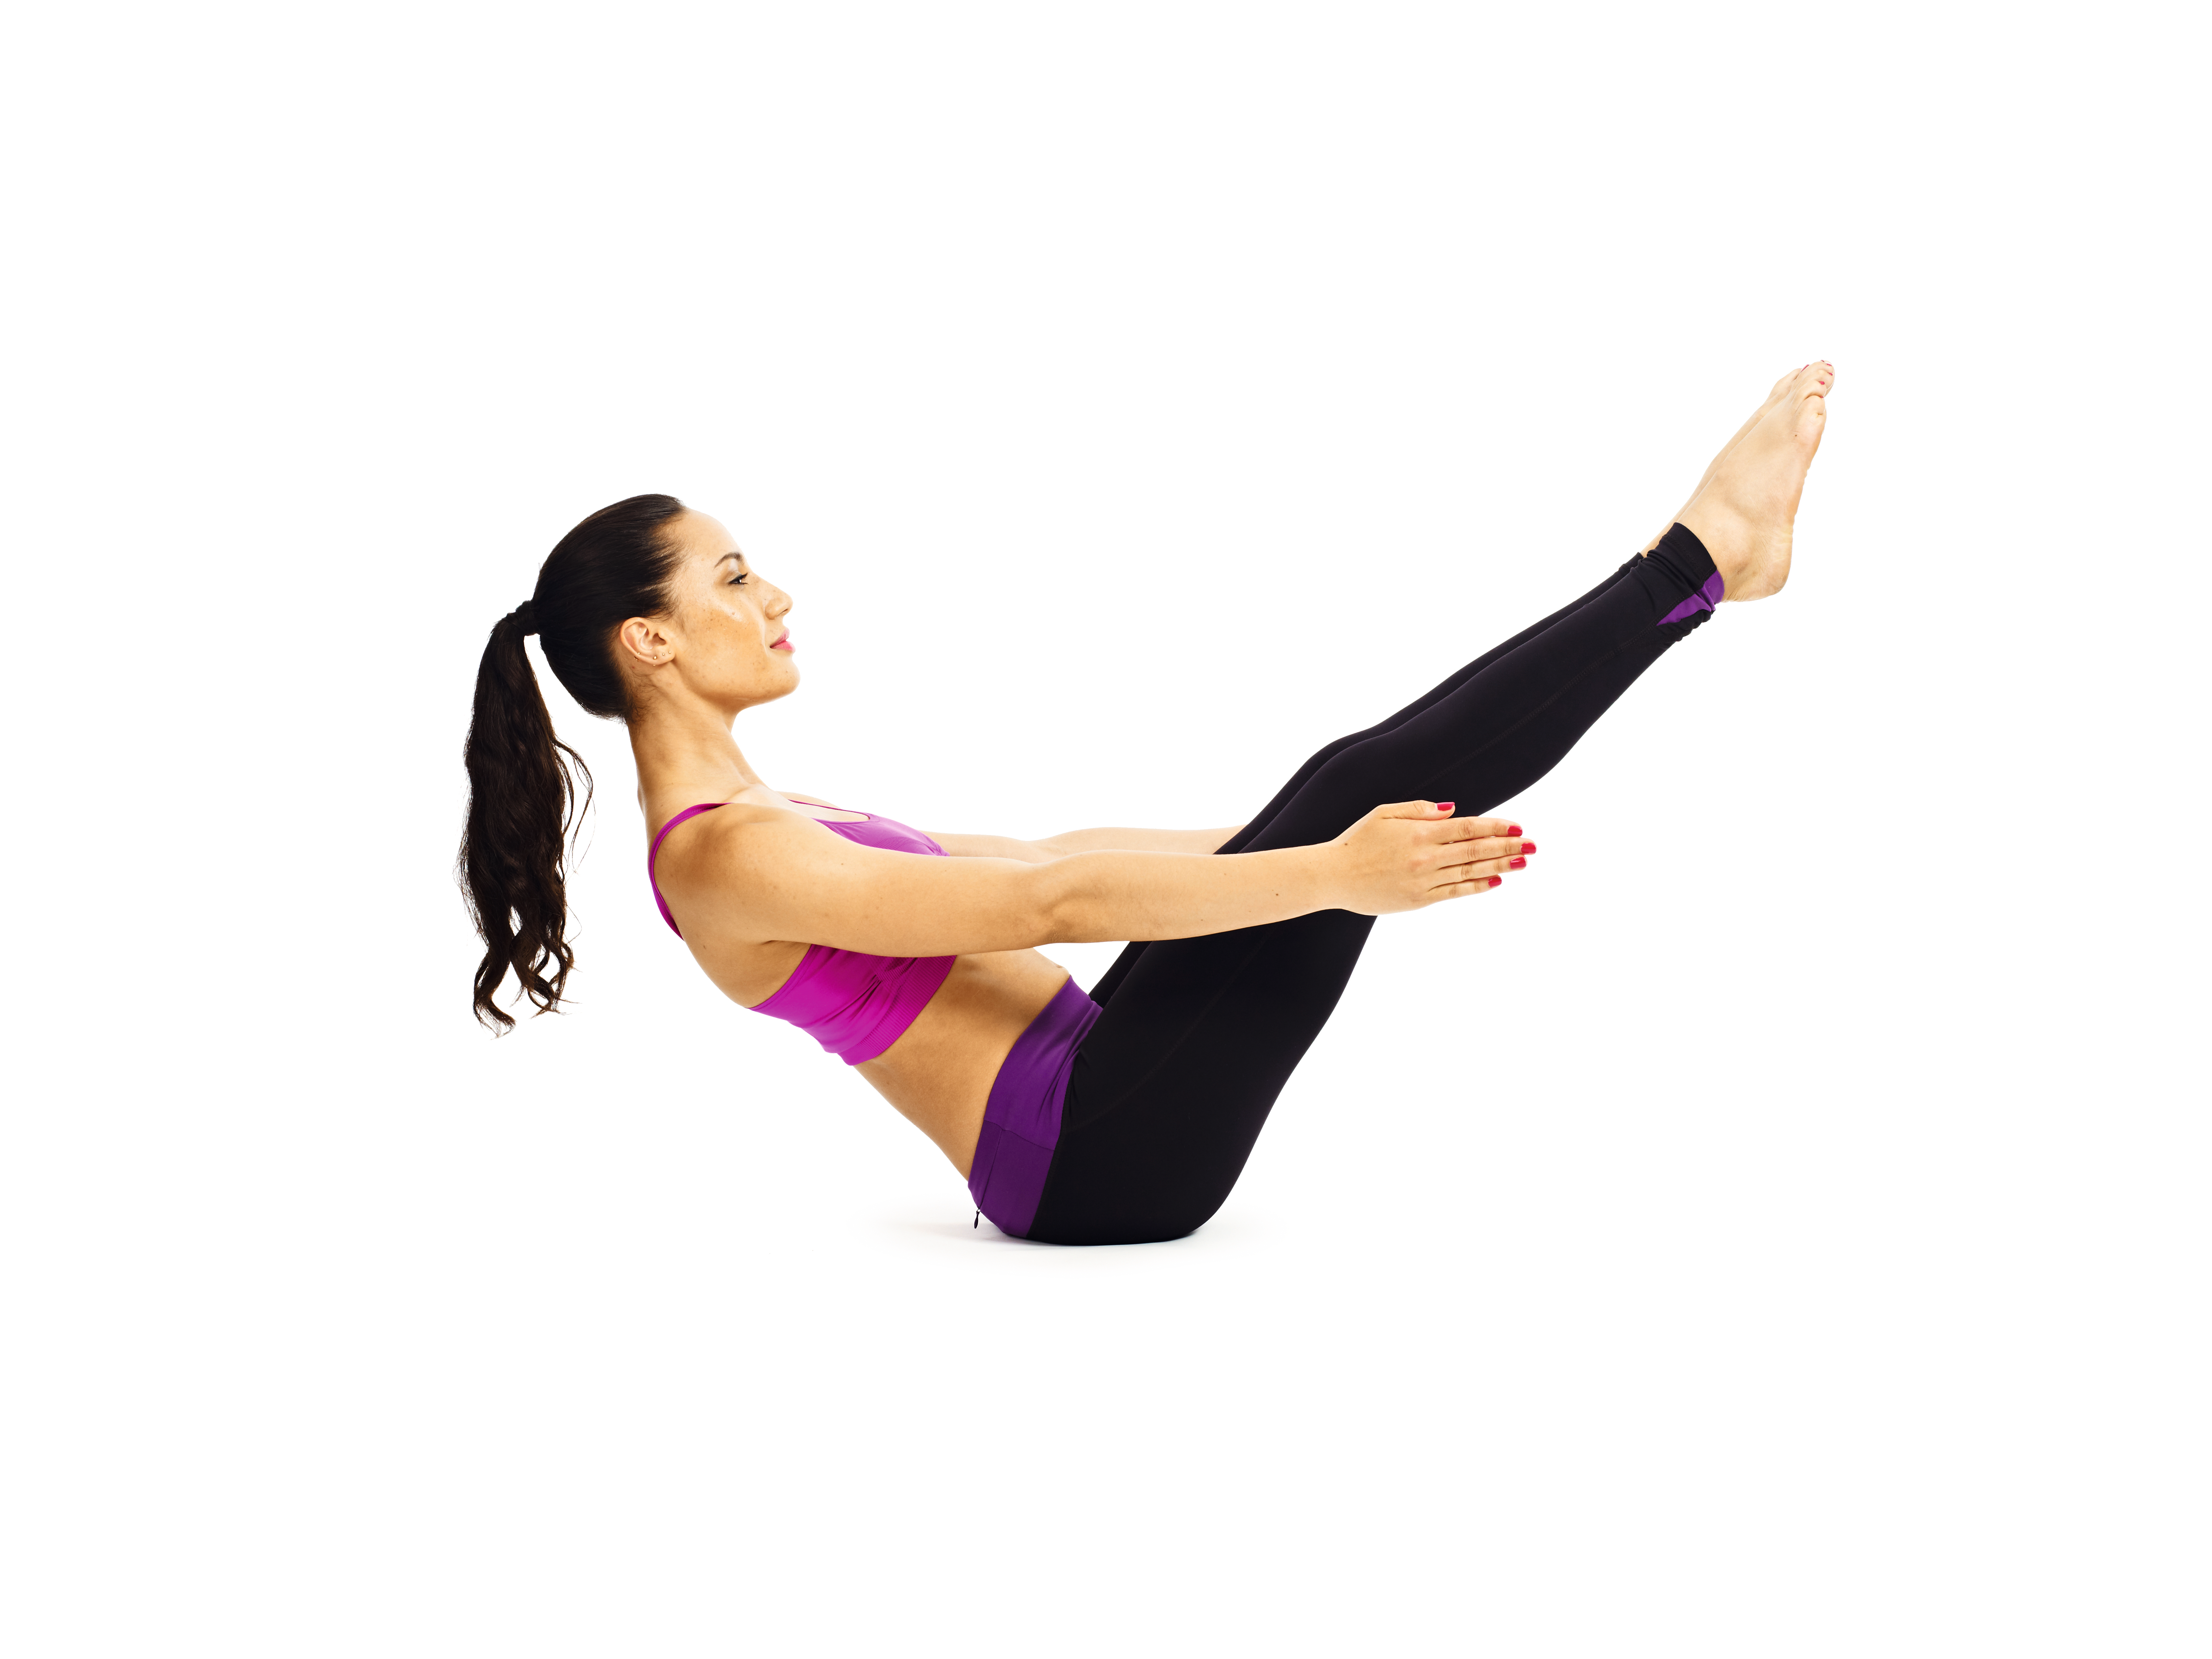
Intermediate version:
- When you feel comfortable with stage one, take your arms from your thighs and straighten them out parallel to the floor. Now straighten your legs out in front of you so your torso and legs are at a 45° angle from the floor, toes gently pointing up, and abdominal muscles fully engaged. (C)
- If you feel strong and supple, take your arms away from your thighs and stretch them out parallel to the floor, palms facing each other.
On an exhalation, lower your torso back until you’re about 10cm from the floor and straighten your legs out. (B) - Repeat this in-out movement 10 times.
Alternating bicycle twists
Benefits: Tones your lower and upper abdominal muscles as well as your waistline.
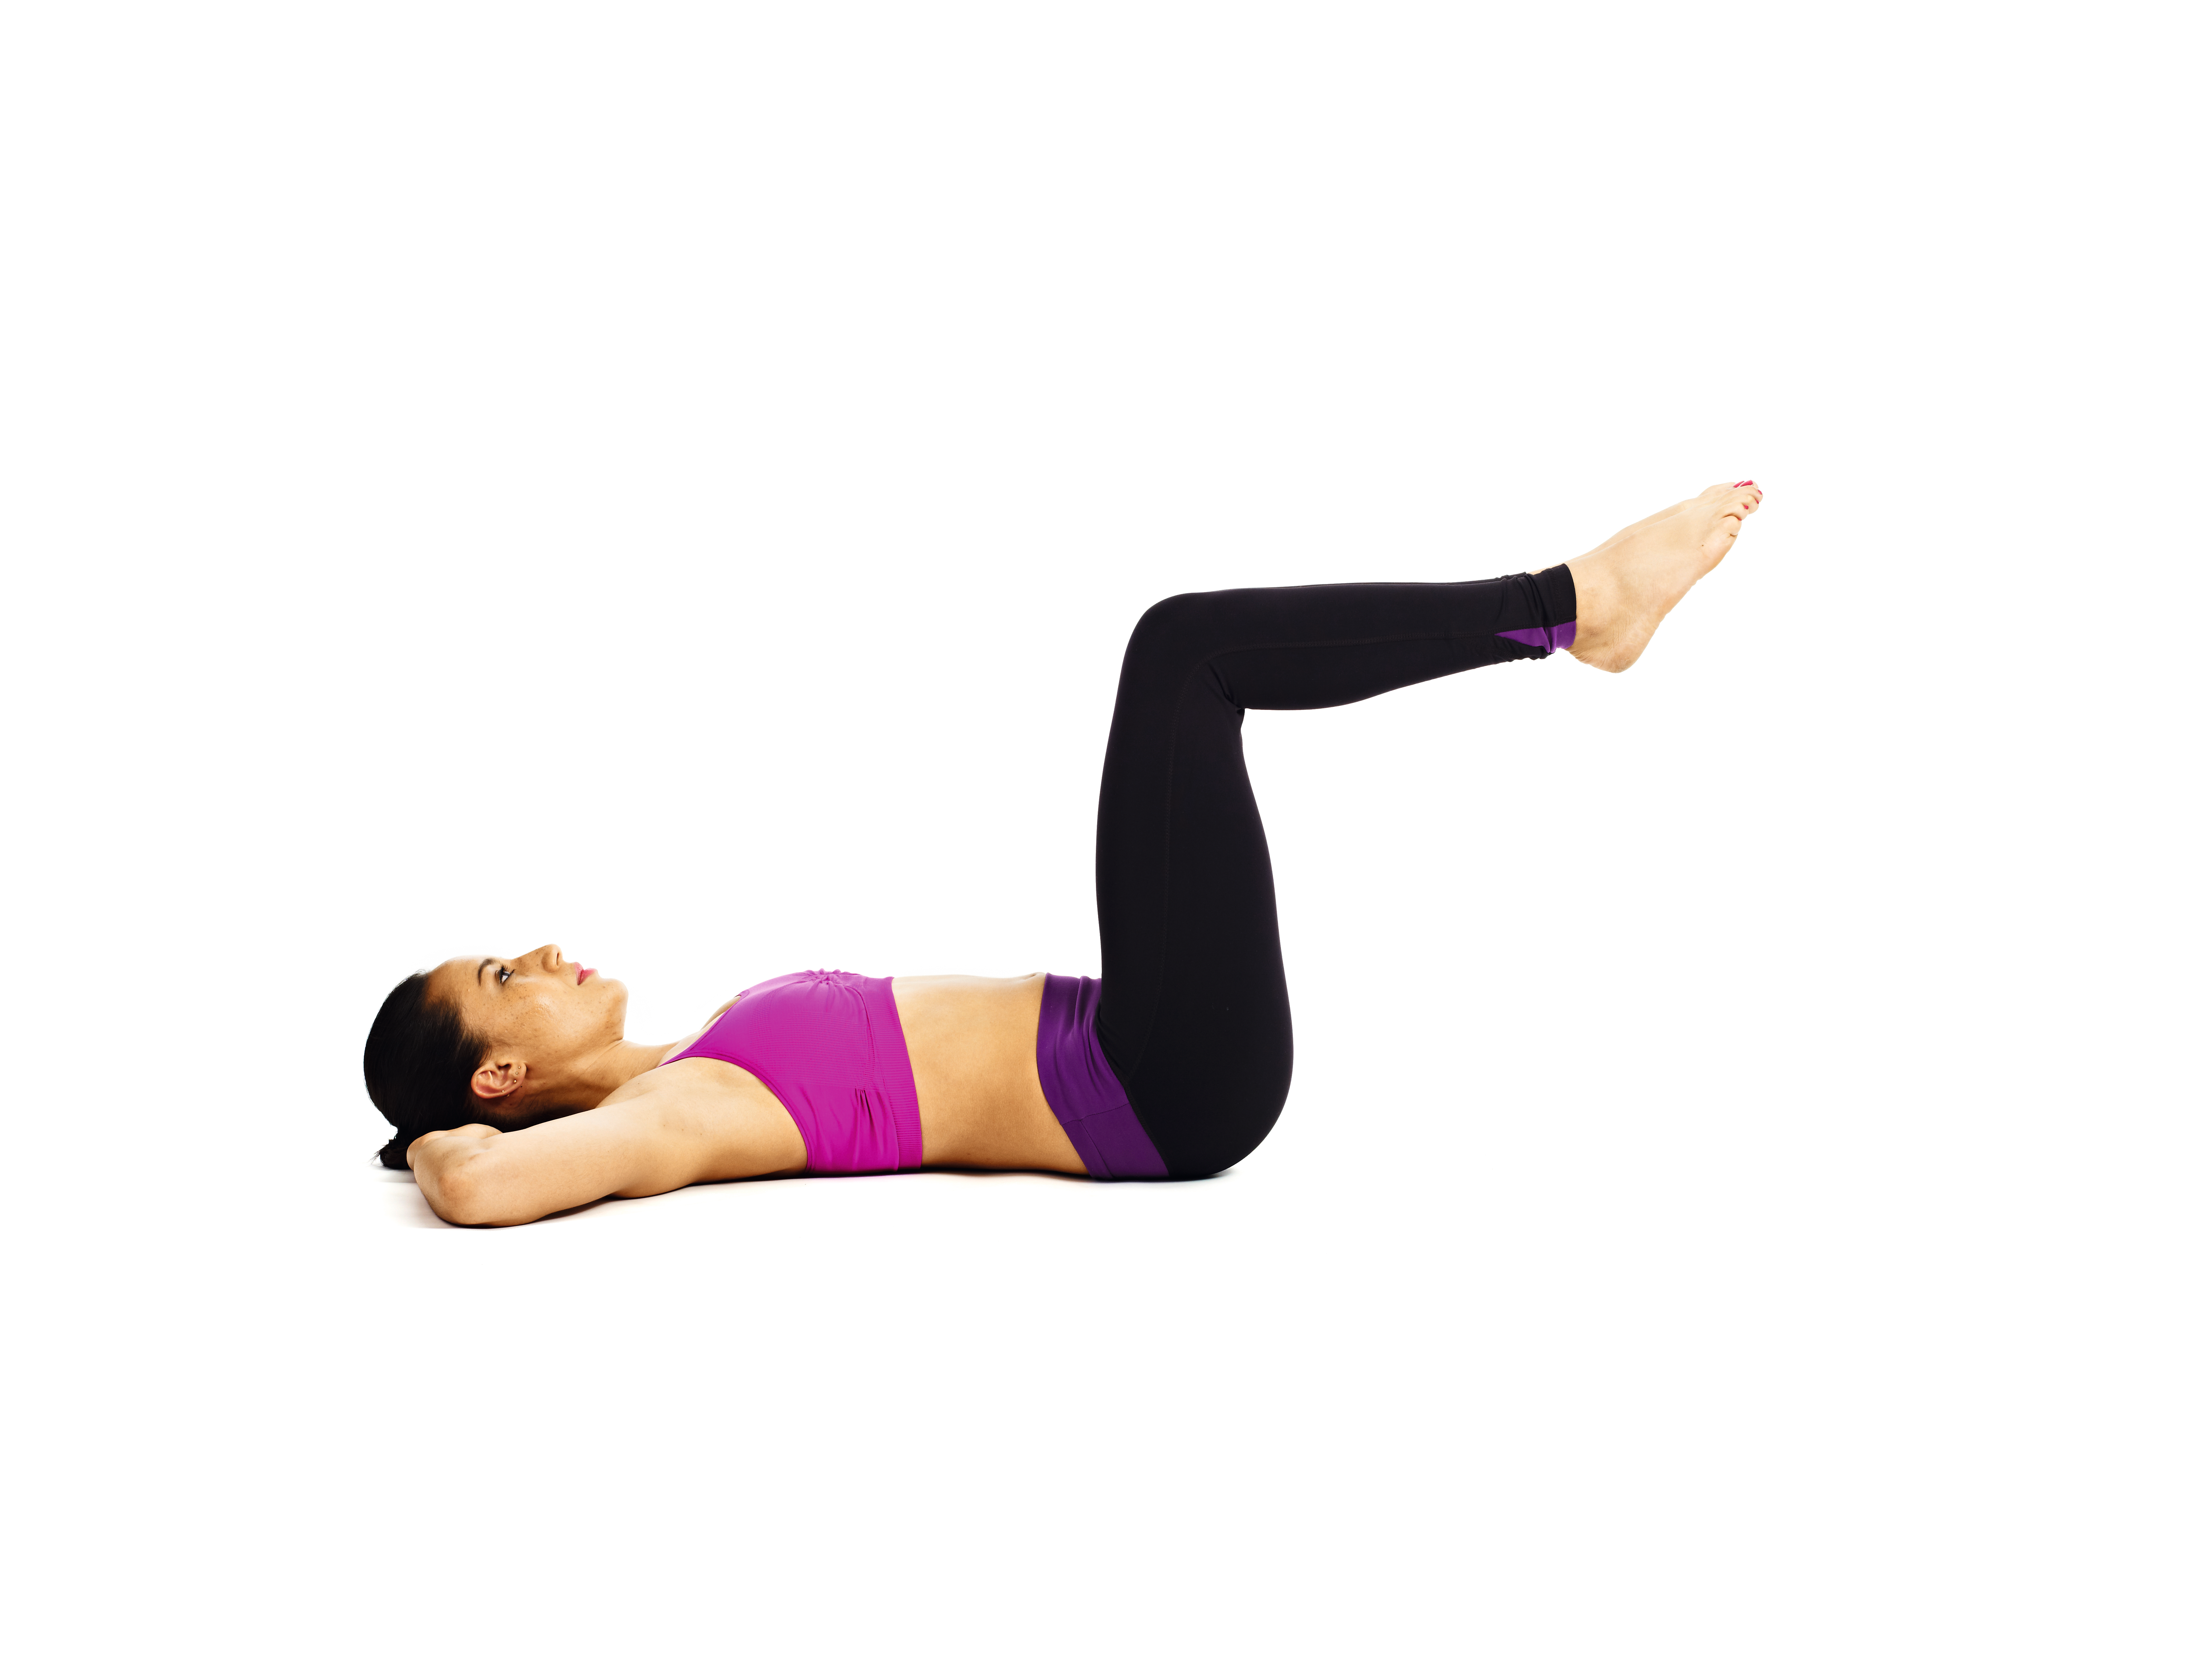
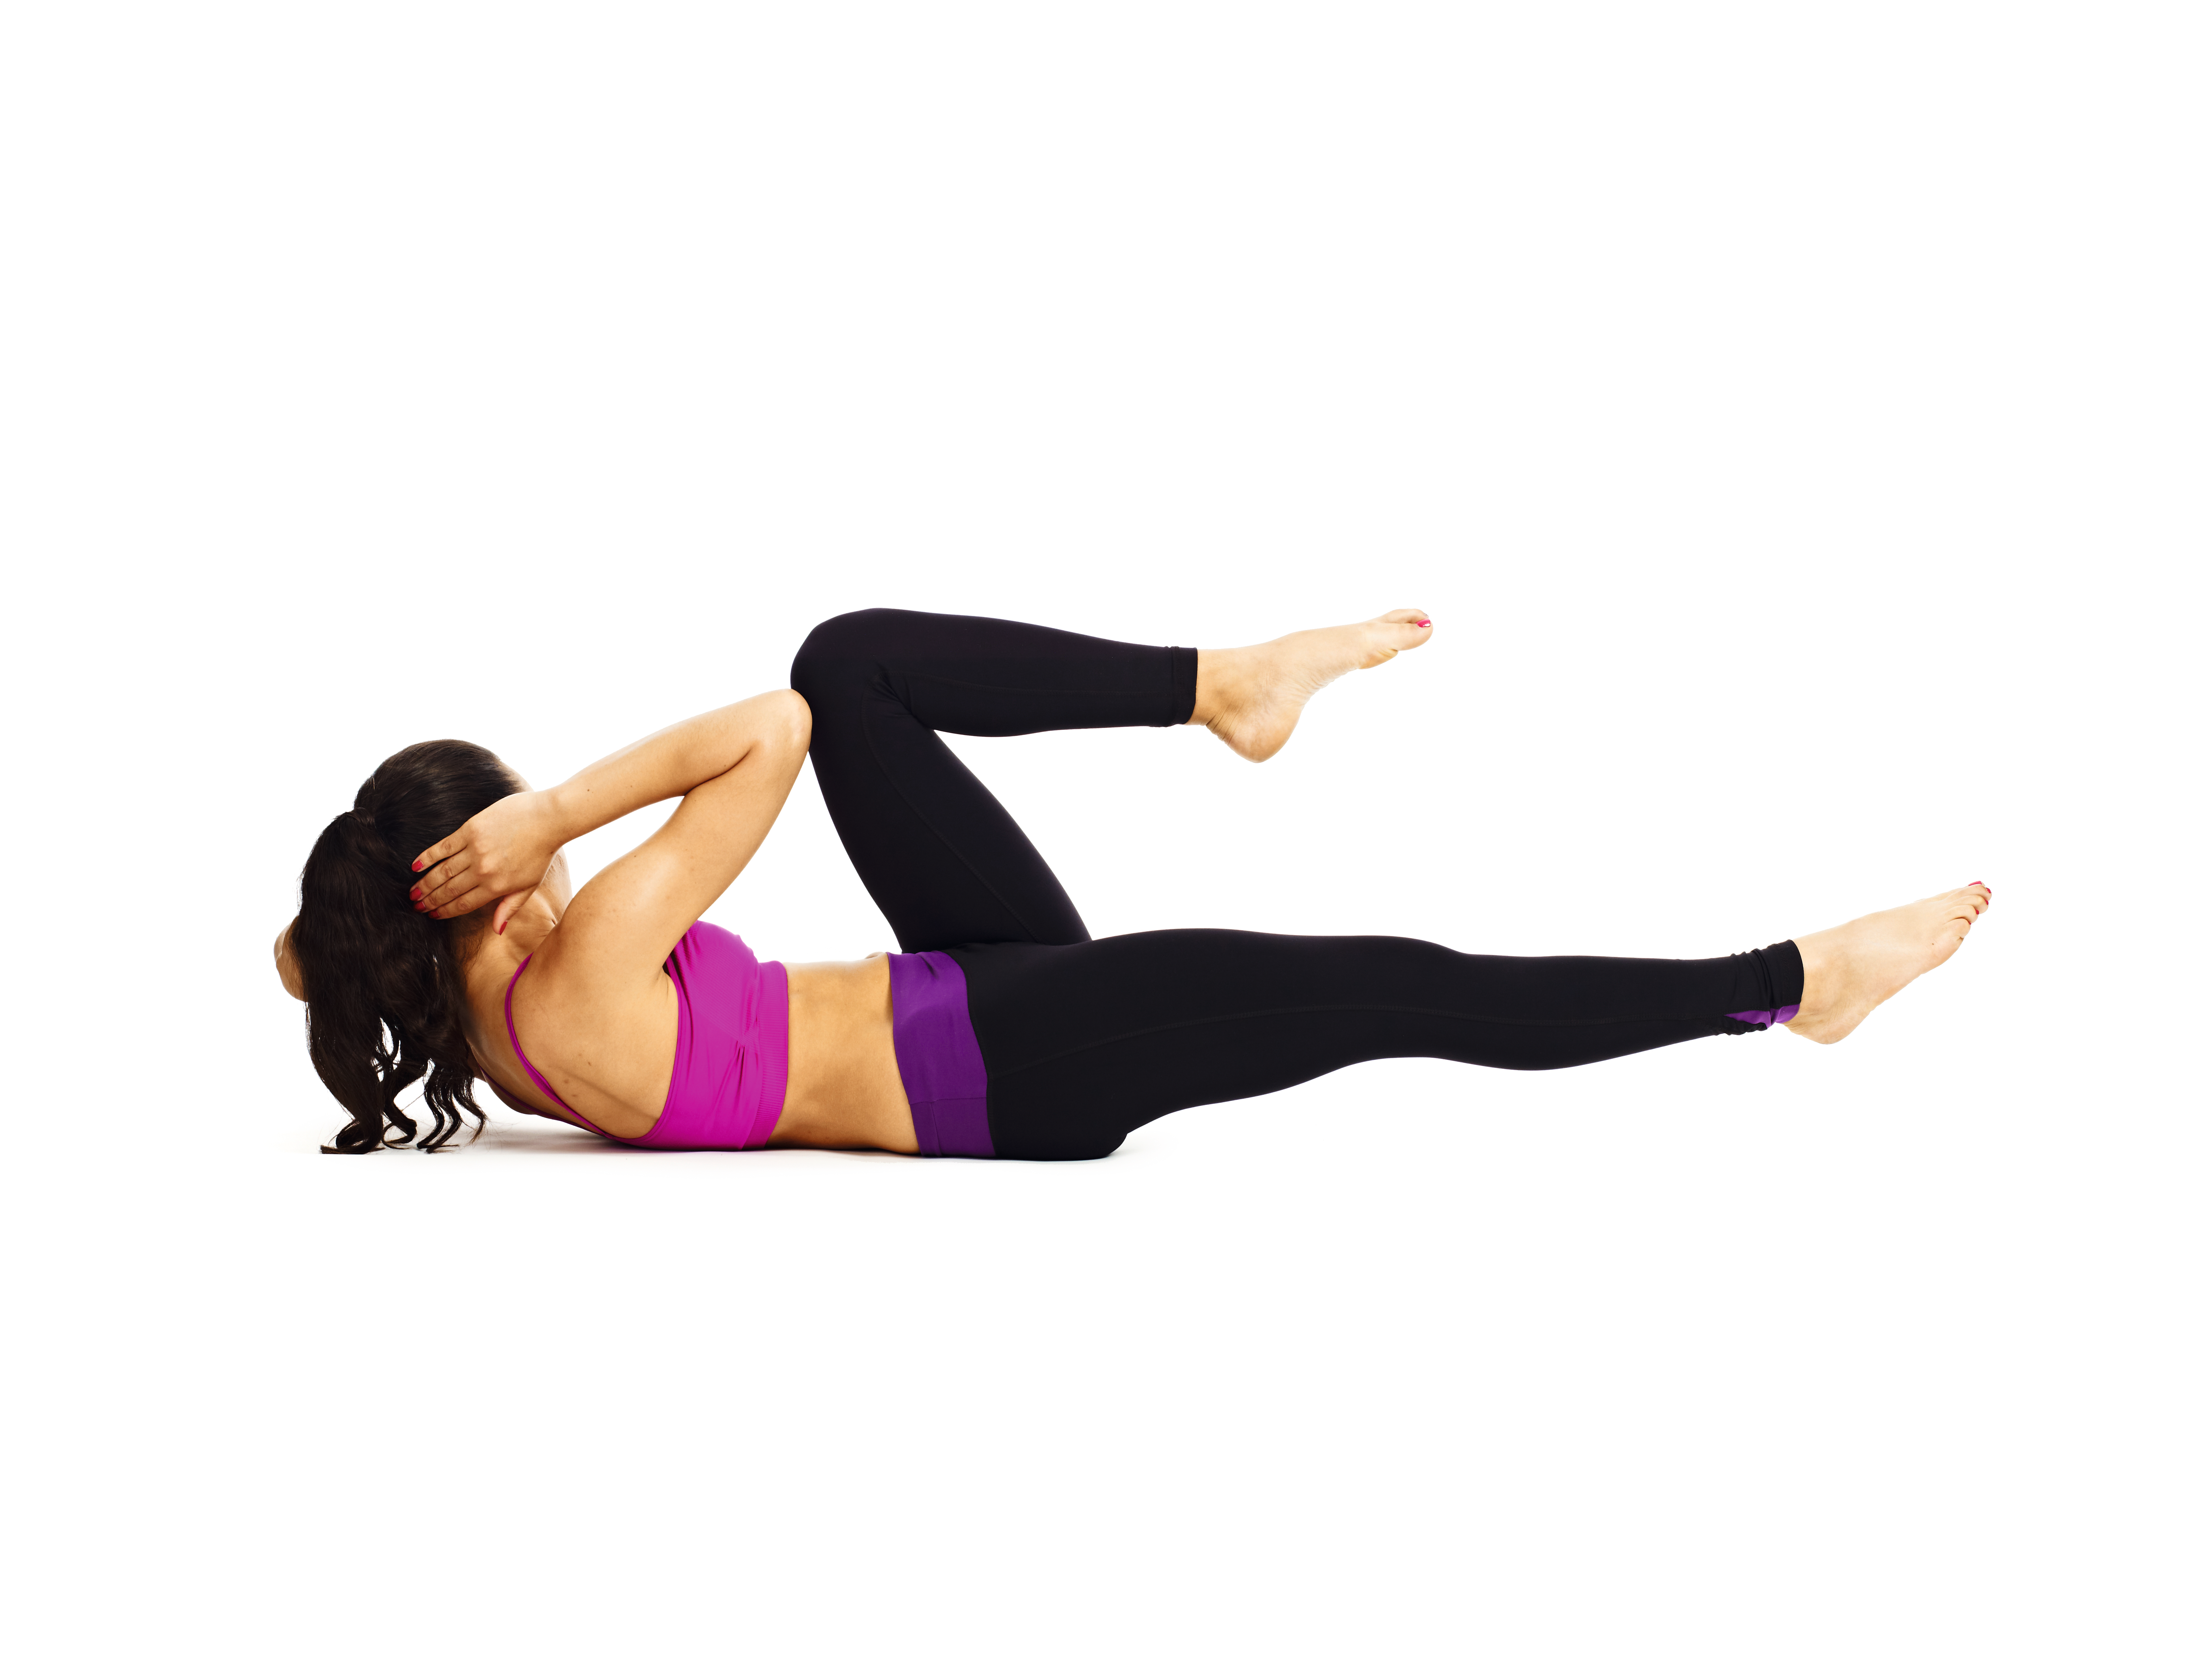
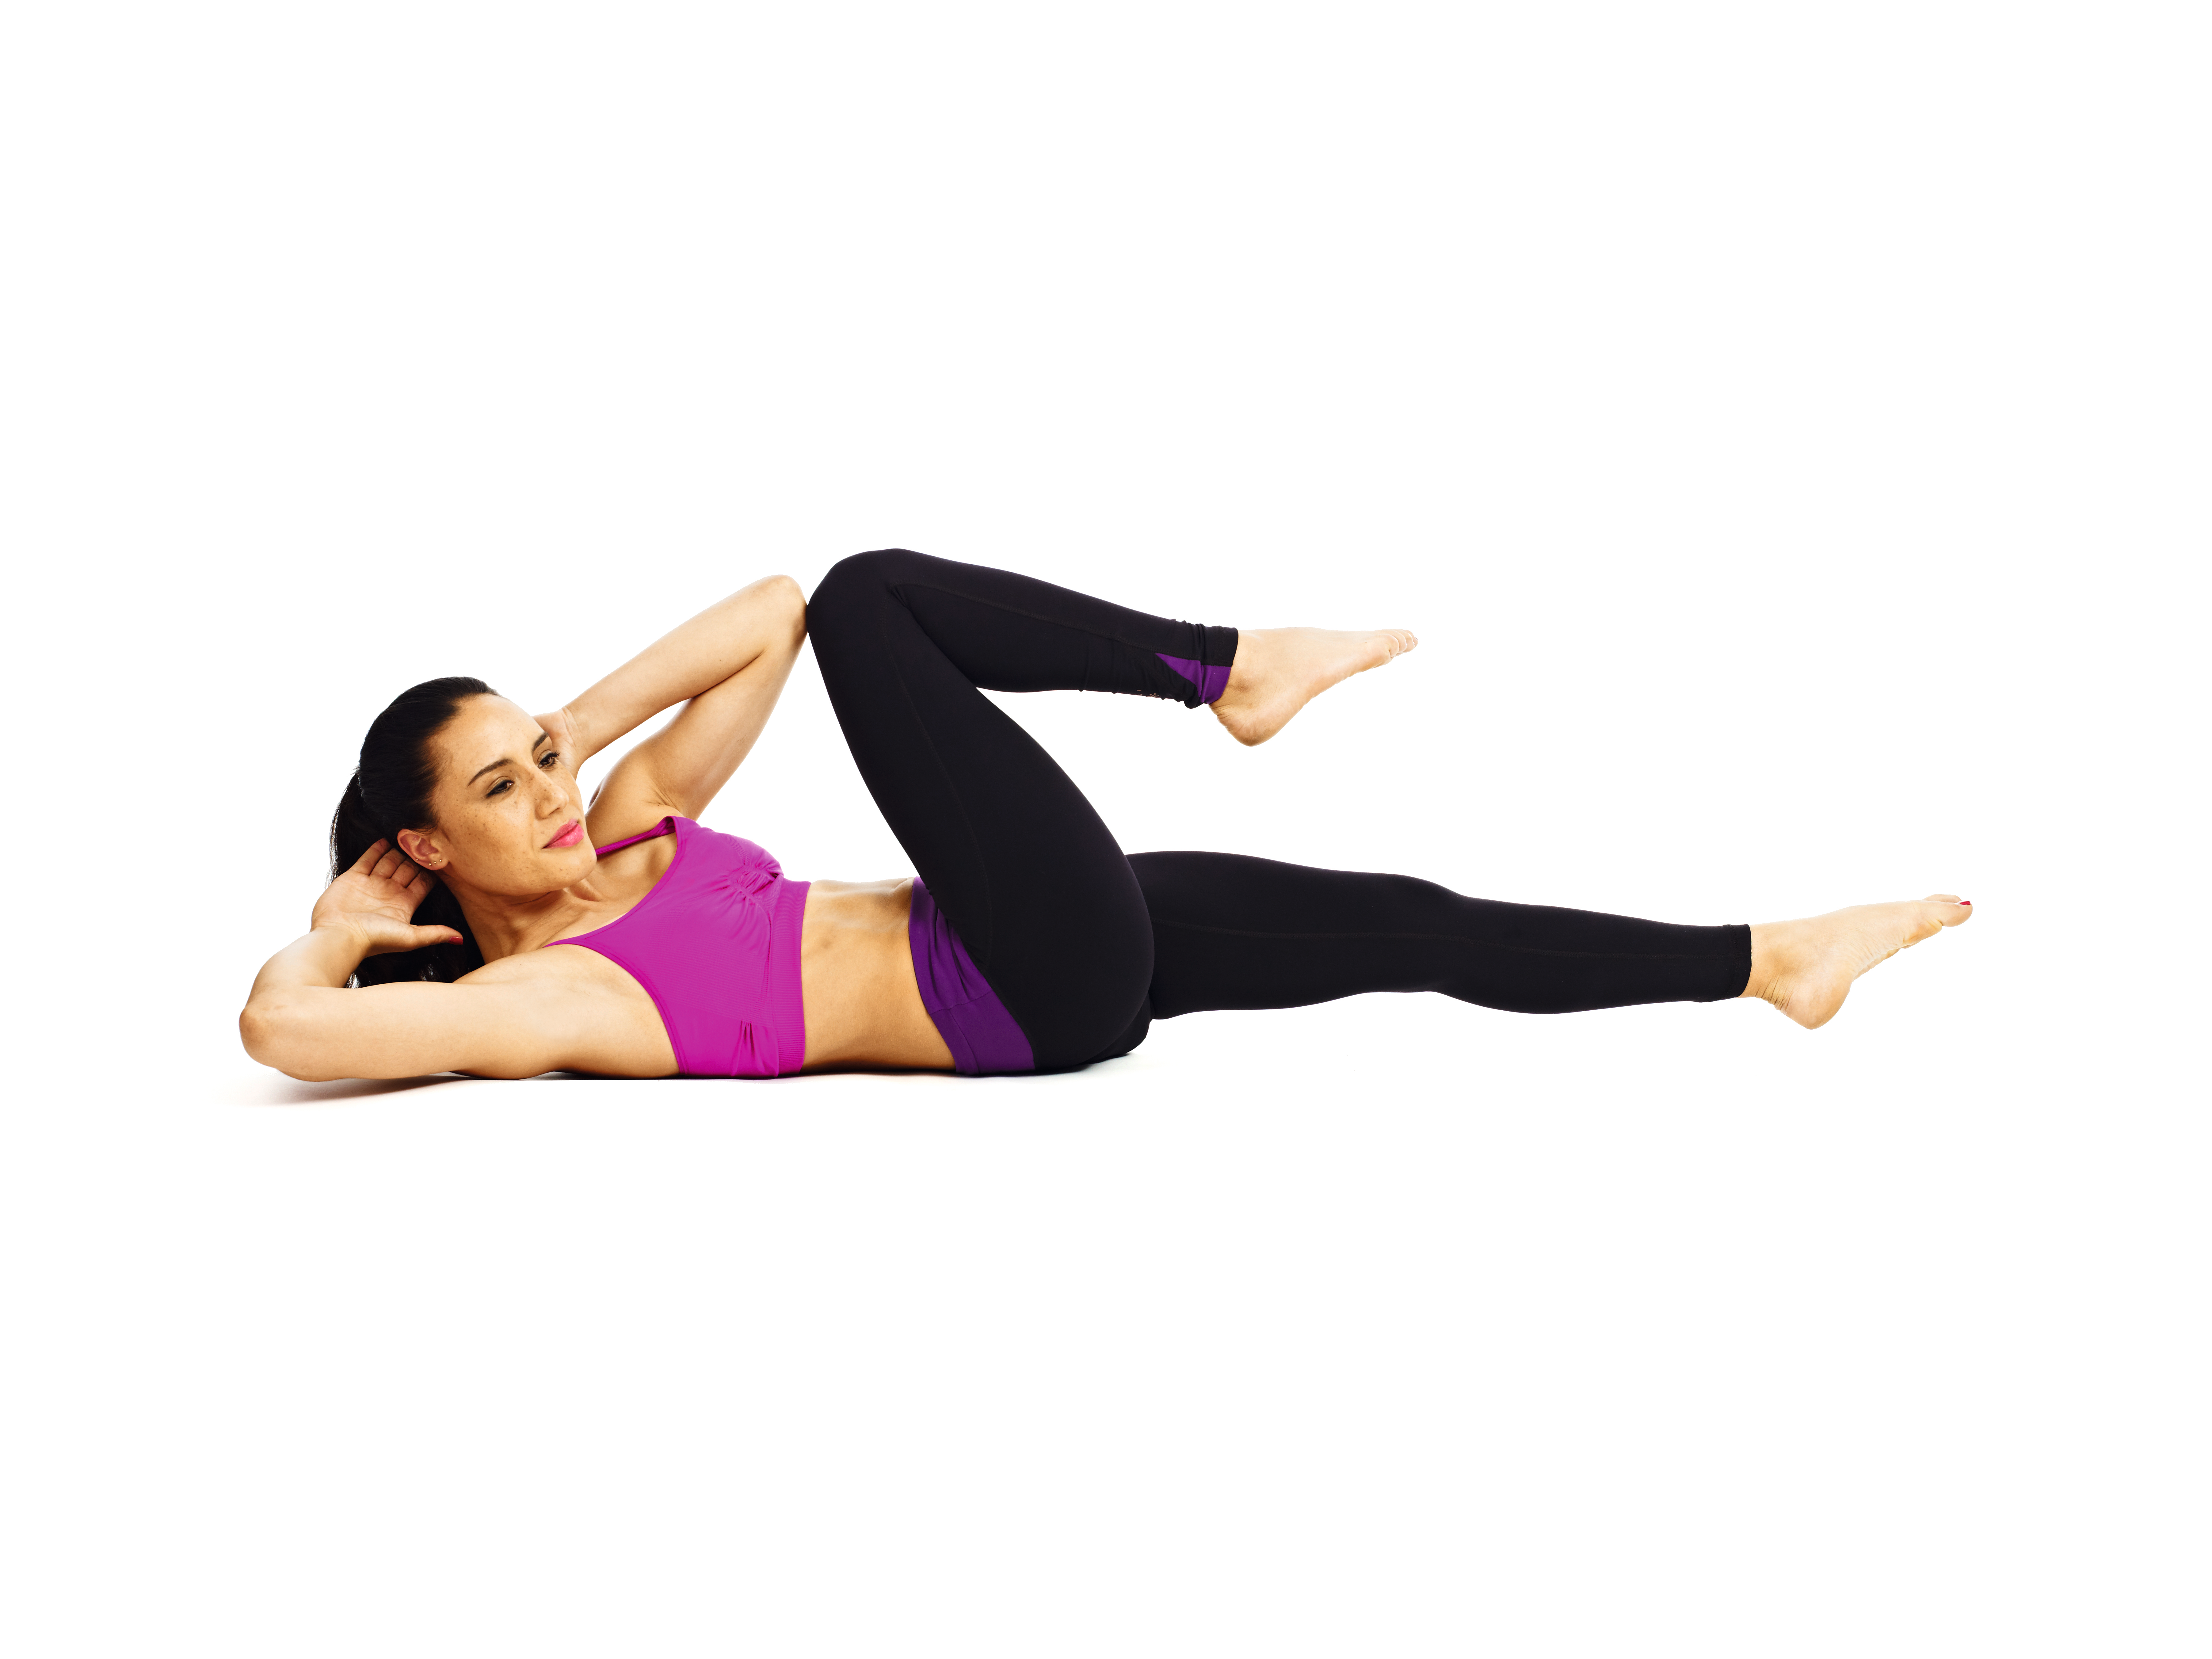
- Lie on the floor, your knees bent at right angles and fingertips touching the sides of your head. (A)
- Inhale and draw your right elbow over to your left knee, and bring the left knee in to meet it.
- At the same time, your right leg straightens out in front of you. The closer your foot comes to the floor (without touching the floor) the harder the move. (B)
- Exhale and, twisting your torso, do the same move on the other side: left elbow coming to right knee. Press your lower back into the floor, drawing your navel towards you. (C)
- Repeat each move on an inhalation and exhalation, keeping the pace slow and controlled.
- Do 20 altogether (10 on each side). Rest and repeat.
Plank
Kumbhakhasana
Benefits: Great for warming up your body, and tones your abdominals, buttocks, upper body and arms.
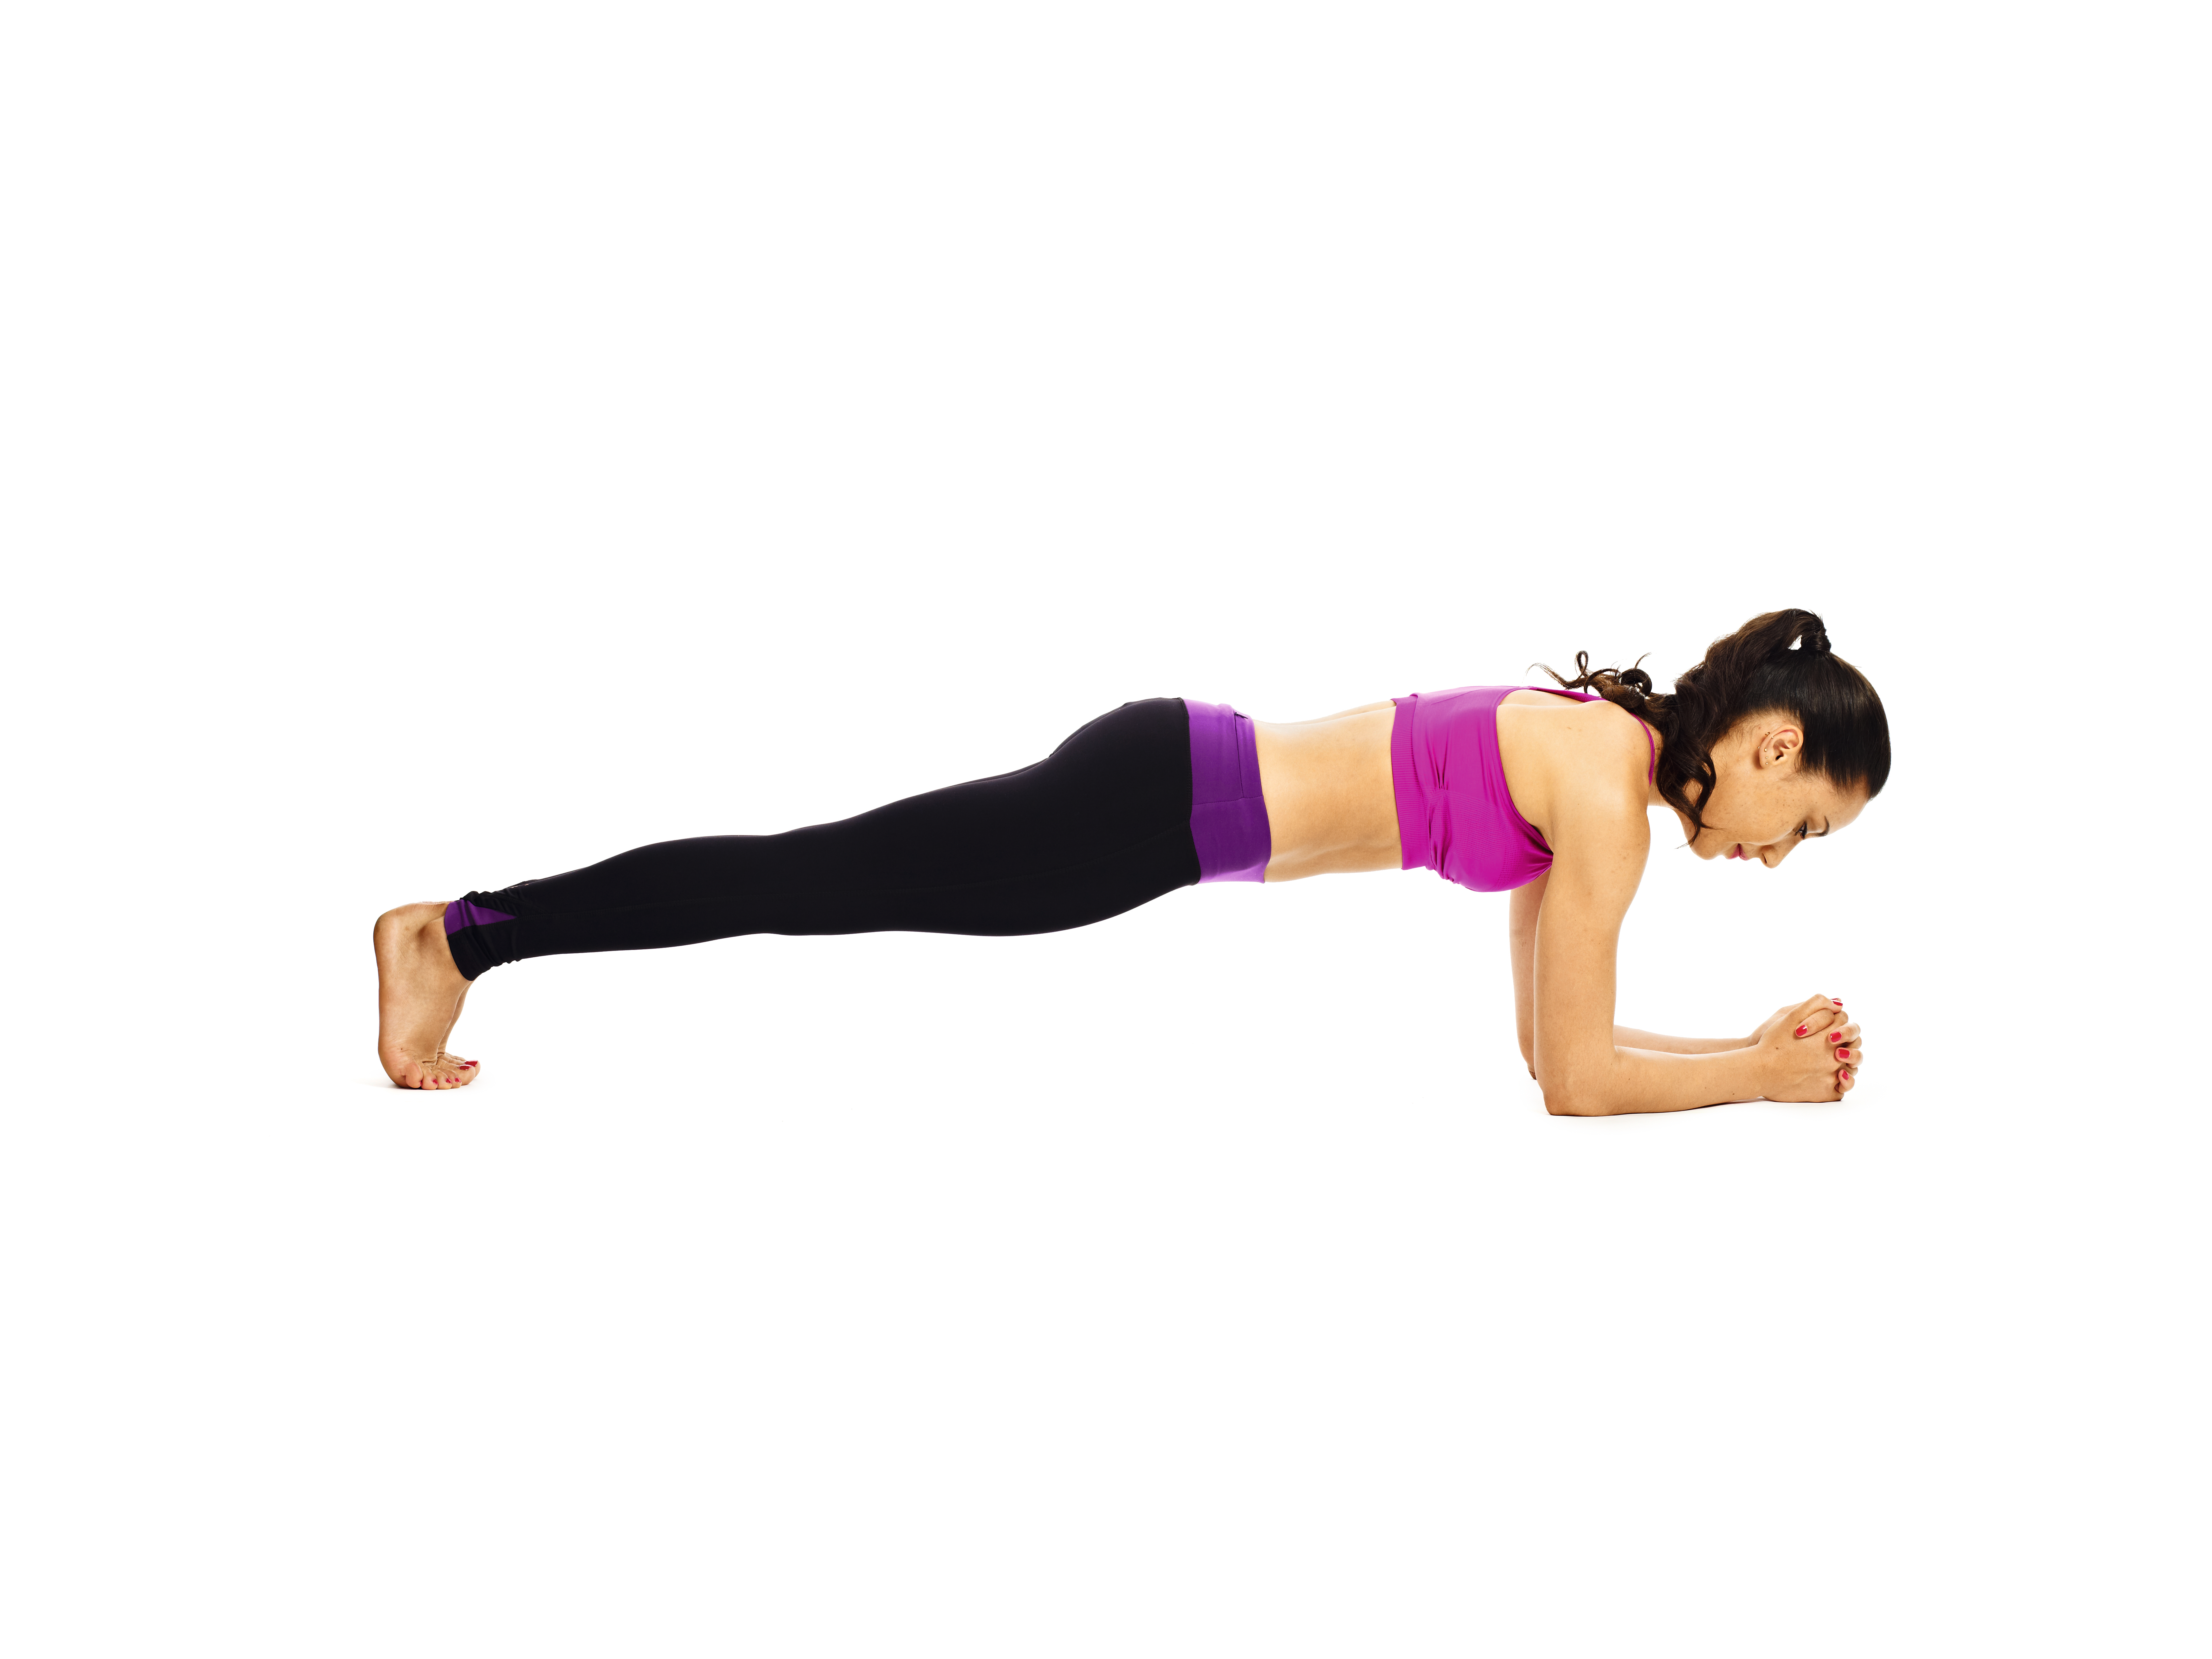
- Start on all fours with your hands shoulder-width apart directly under your shoulders.
- Keep your elbows shoulder -width apart and bring your forearms to the floor, hands clasped hands in front of you.
- Inhale, tuck your toes under and straighten your legs so you’re in one diagonal line from your head, gently sloping to your feet. (Beginners: keep your knees bent and on the floor).
- Exhale and tuck your chin in slightly, keeping the back of your neck long, making a line from your head to your spine.
- Engage your core abdominal muscles, drawing them back towards your spine. Keep your breathing even and long – it’s tempting to hold it!
- Round your upper back to broaden your back and spread your shoulder blades apart.
- Keep your upper body weight spread evenly on your forearms.
- Do five toe taps with the right foot out to the side. Repeat on the left foot.
Tip: Point your heels to the back of the room and extend forwards through the crown of your head to strengthen the pose.
Dolphin
Benefits: Works your belly, inner thighs and upper arms.
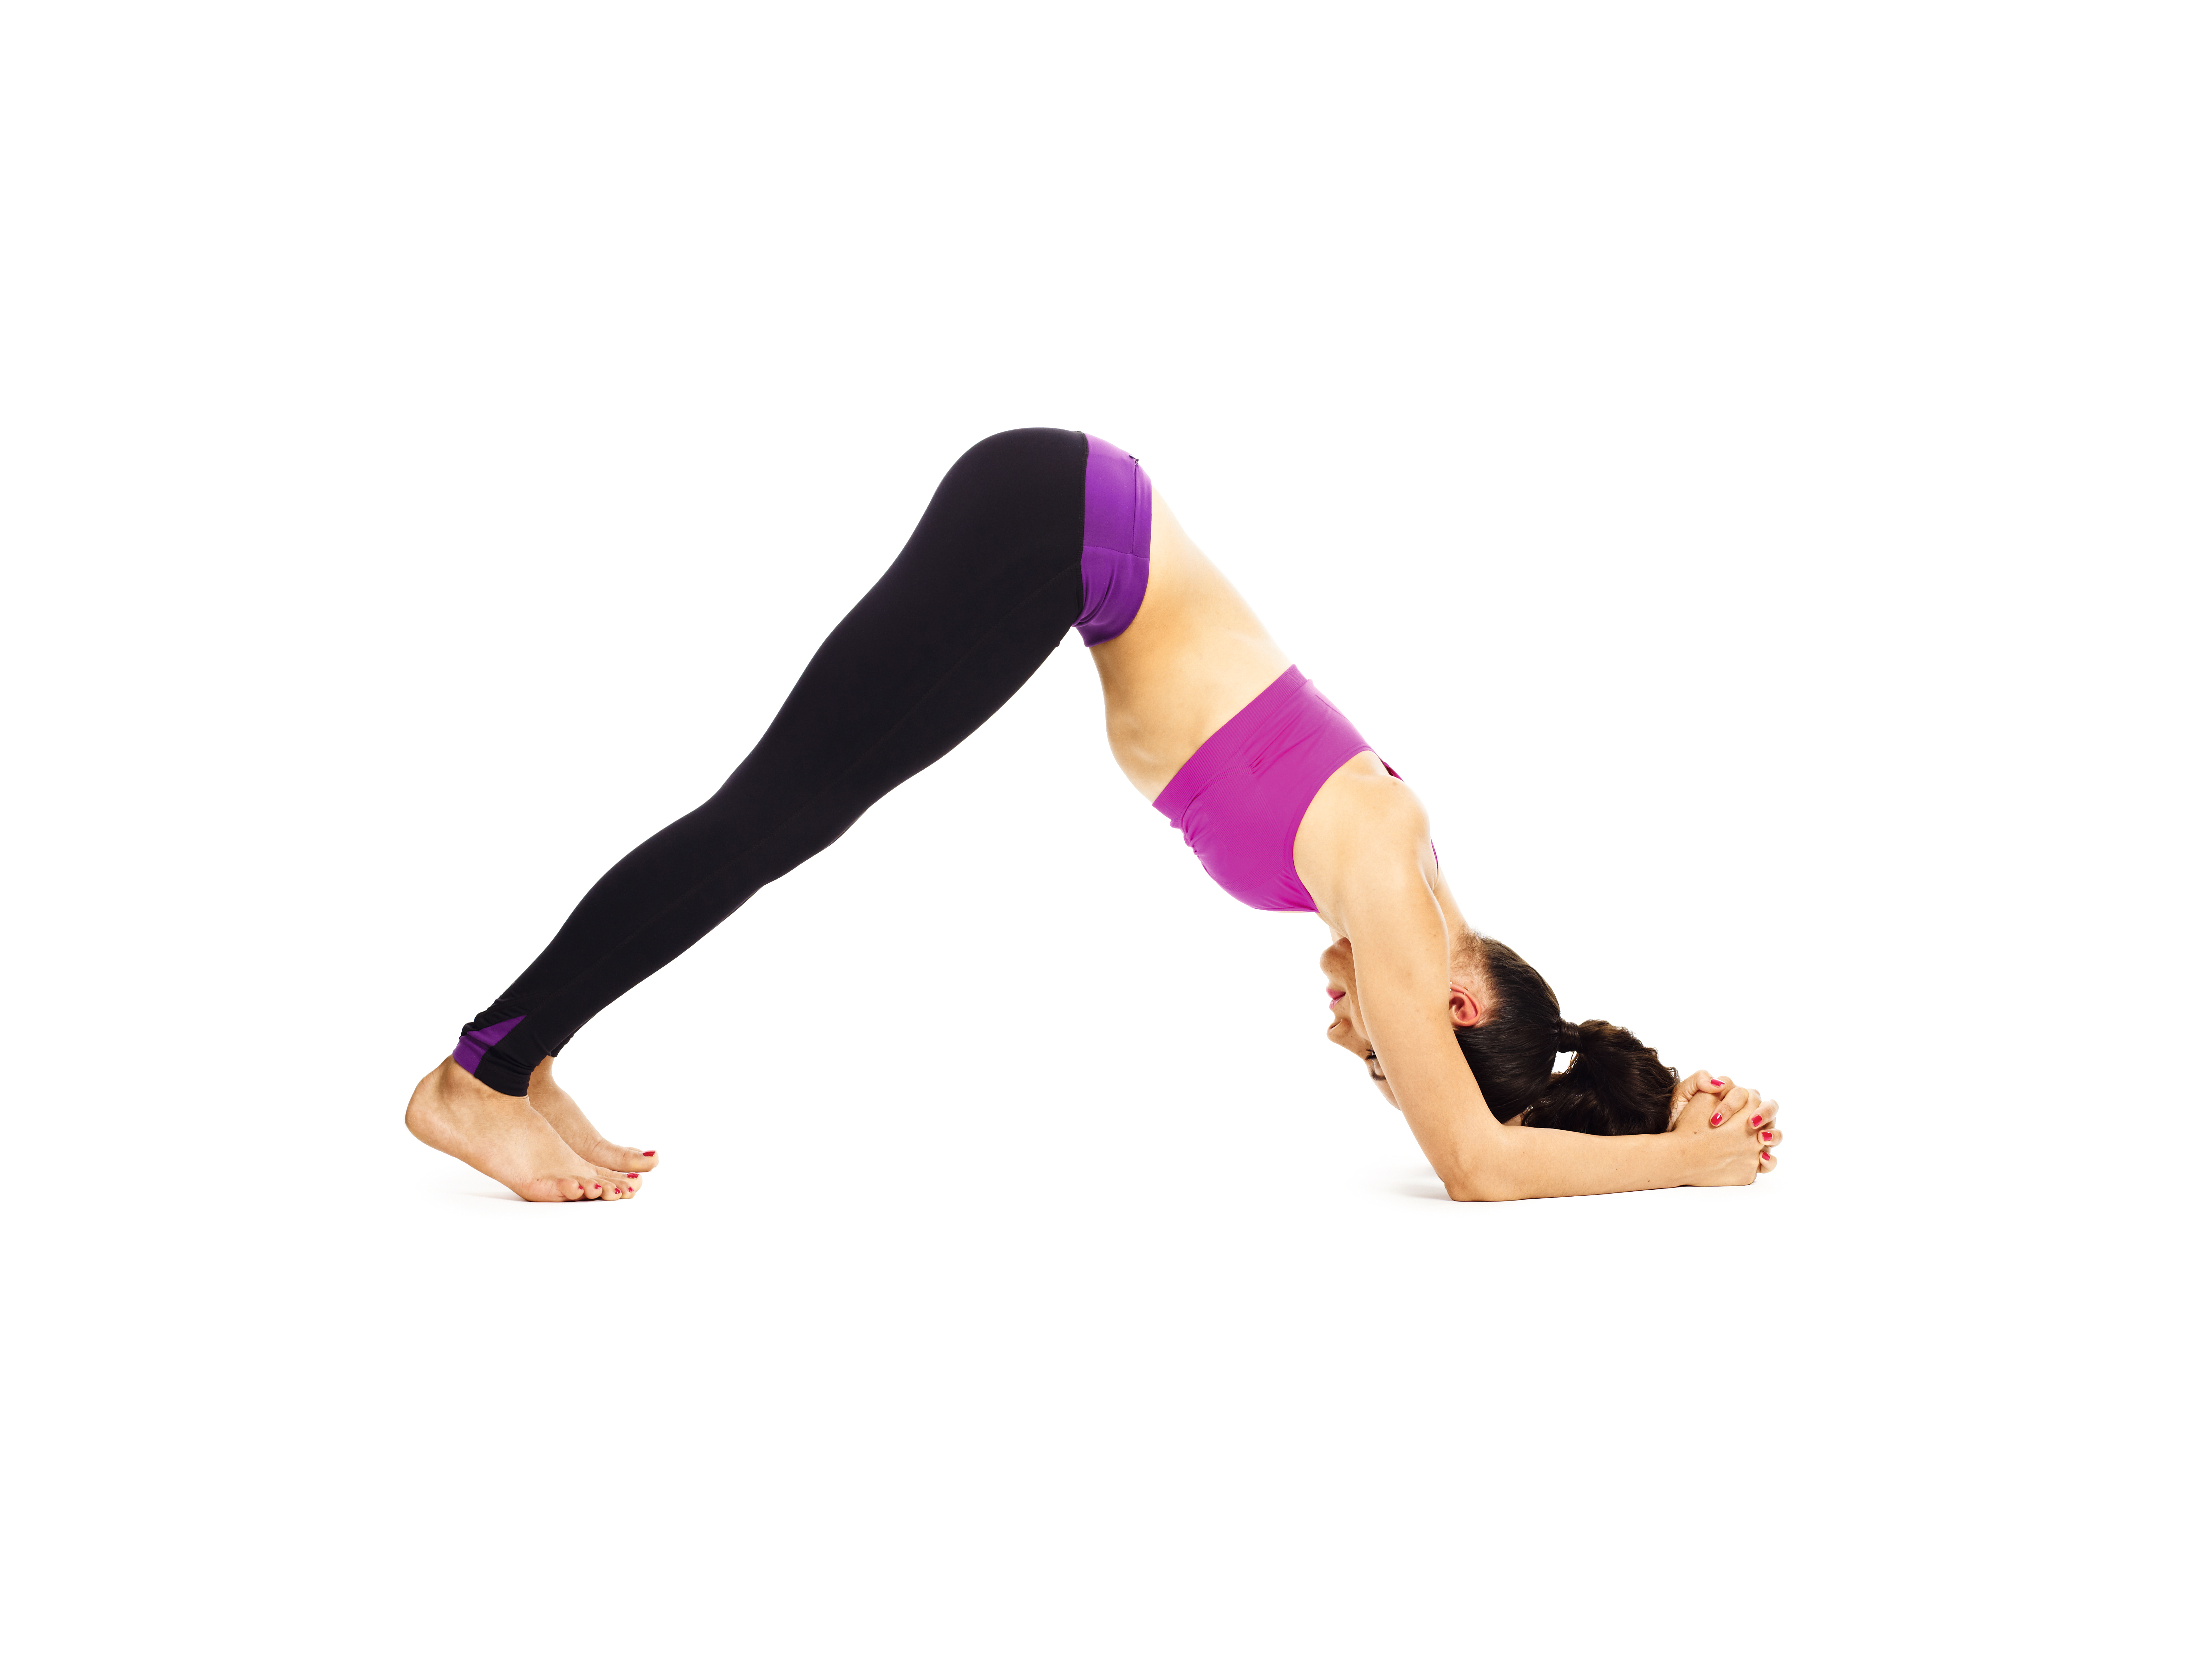
- Start by kneeling, with your feet hip-width apart.
- Inhale, bring your torso forwards and clasp your hands with your forearms on the floor to make a V-shape from your elbows.
- Exhale, tuck your toes under, press your forearms and hands into the floor, and lift your bum into the air.
- Keep your head relaxed and your hips lifted to the ceiling.
- Draw the muscles of your upper thighs back and up, Imagine pressing your ankles towards the back of the room to help draw them back – don’t force them down.
- Engage your core, look towards your belly button.
- Take five deep breaths.
- To really get into the flow, move through Plank and Dolphin three more times.
Tip: Be wary of letting your shoulders compress. Imagine drawing them apart and back, keeping your neck relaxed.
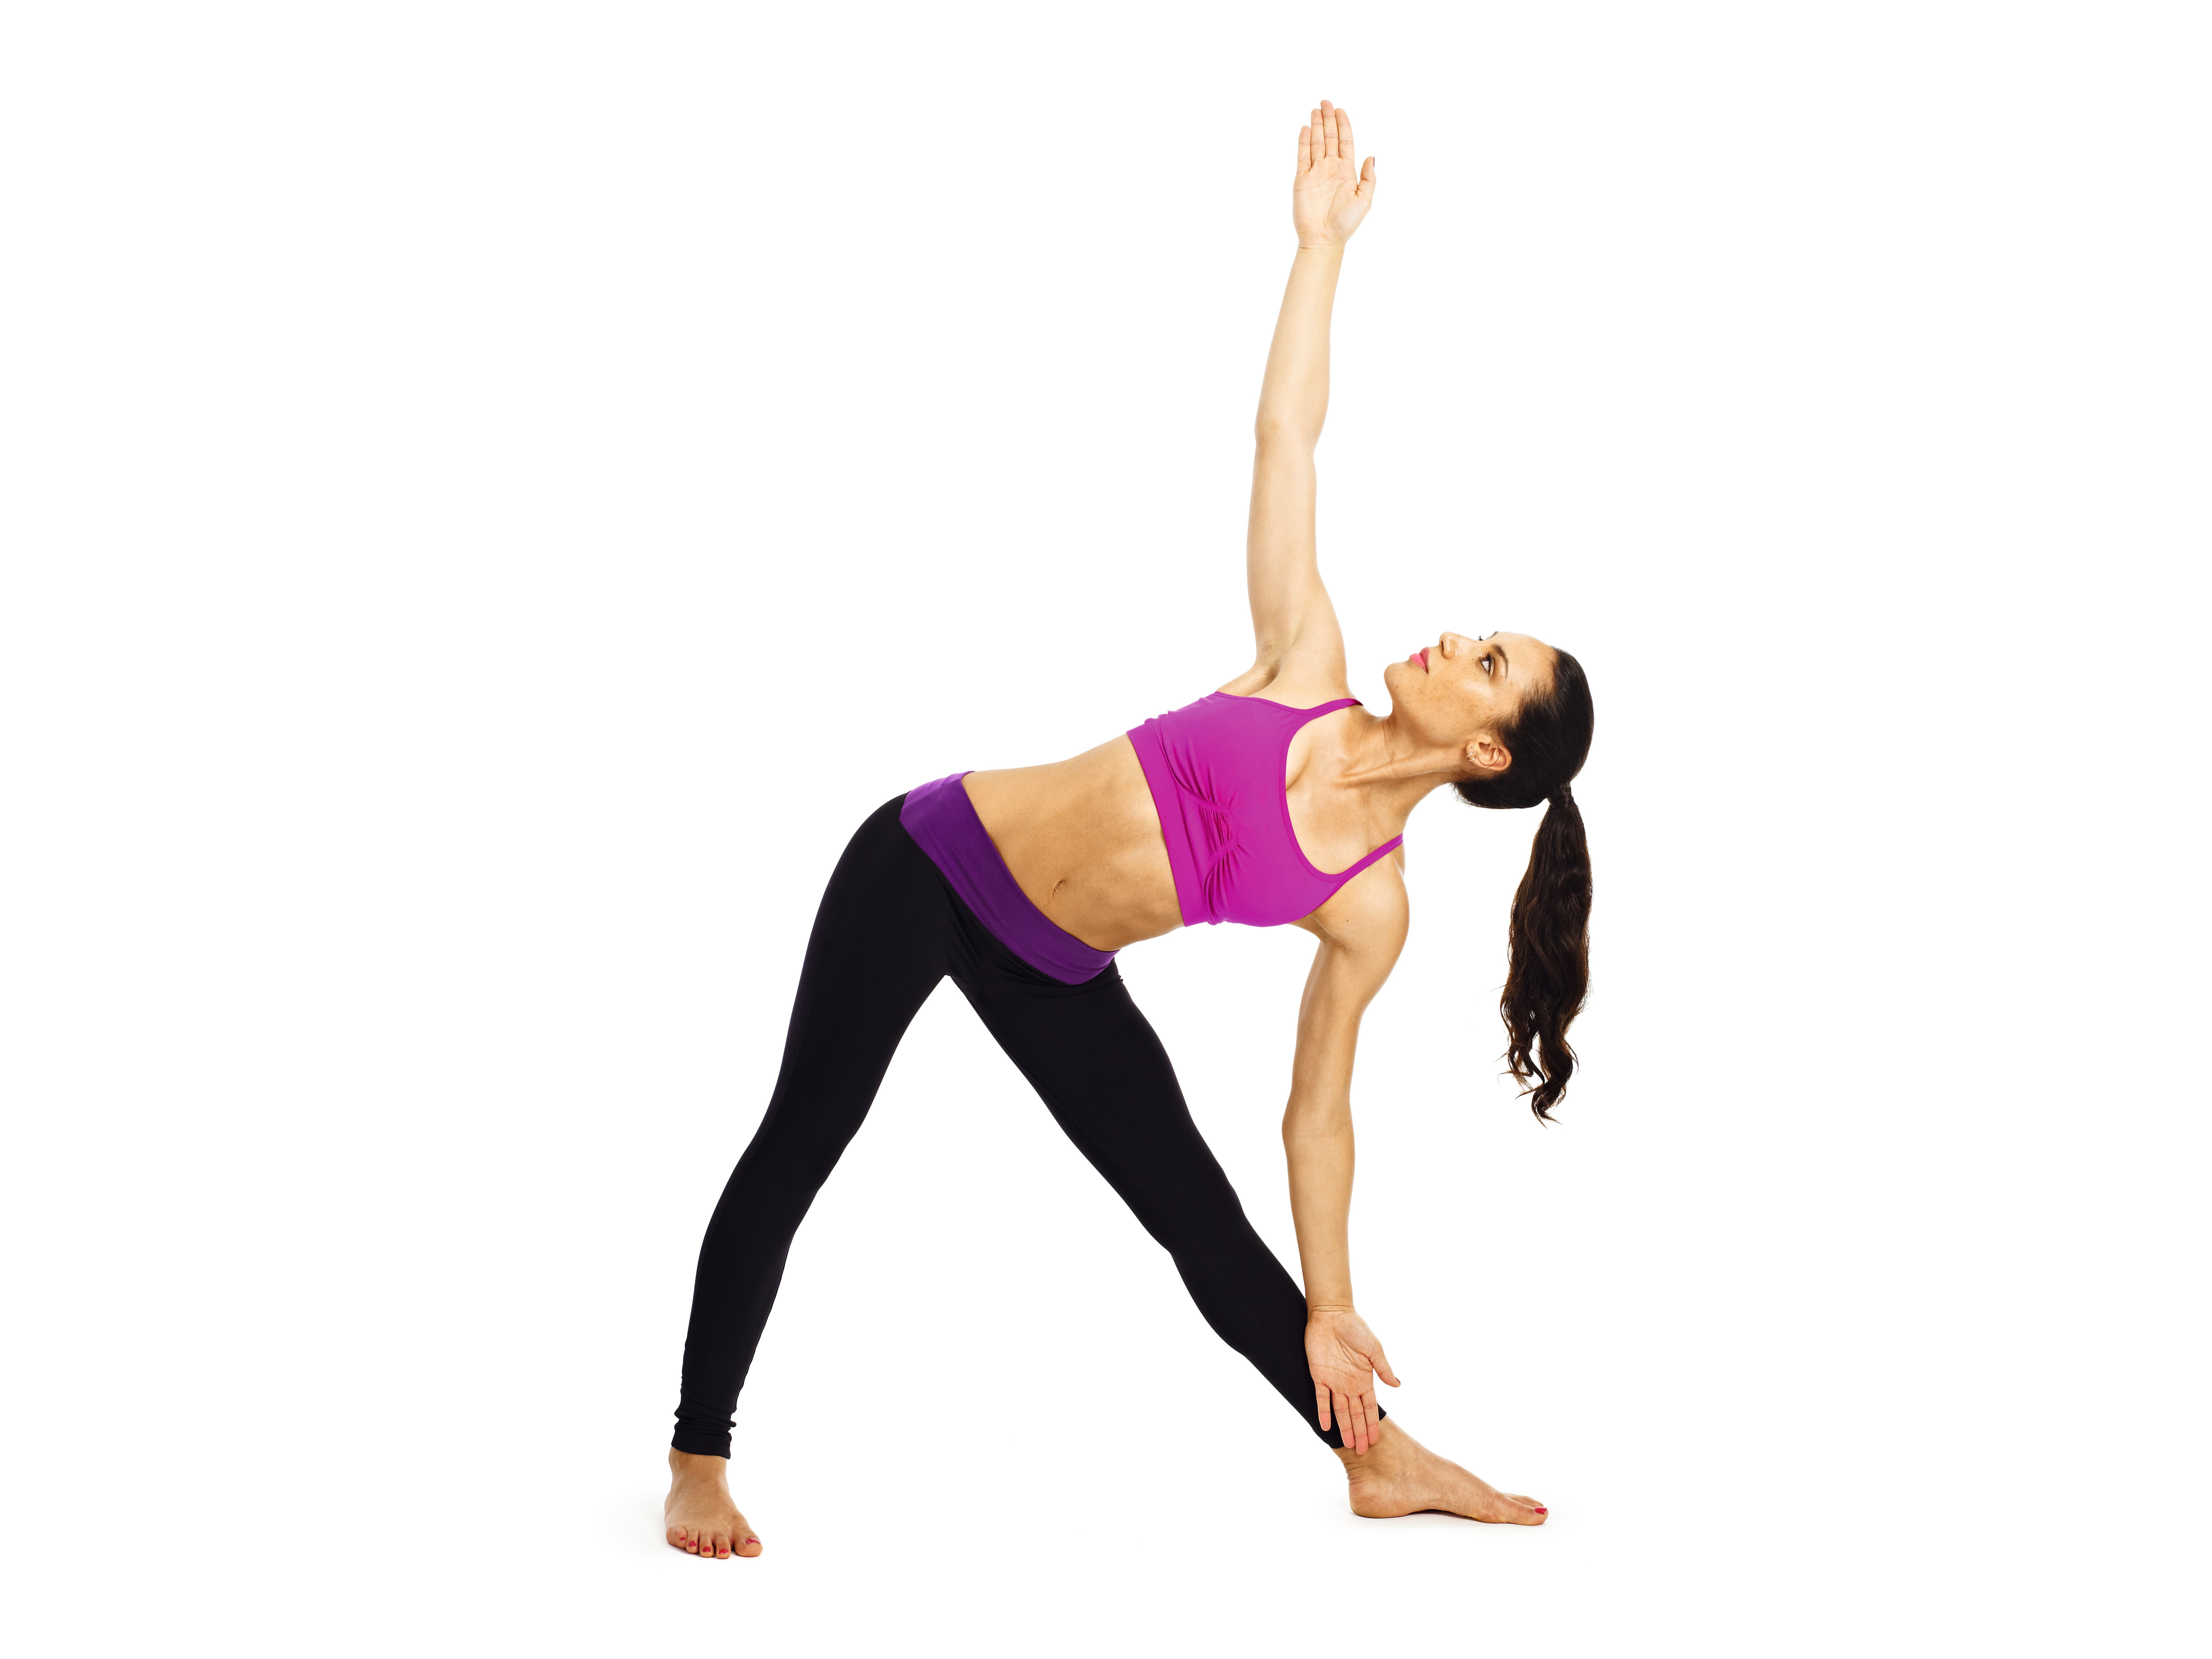
Triangle
Trikonasana
Benefits: Melts fat from your waist; lengthens and tones your legs.
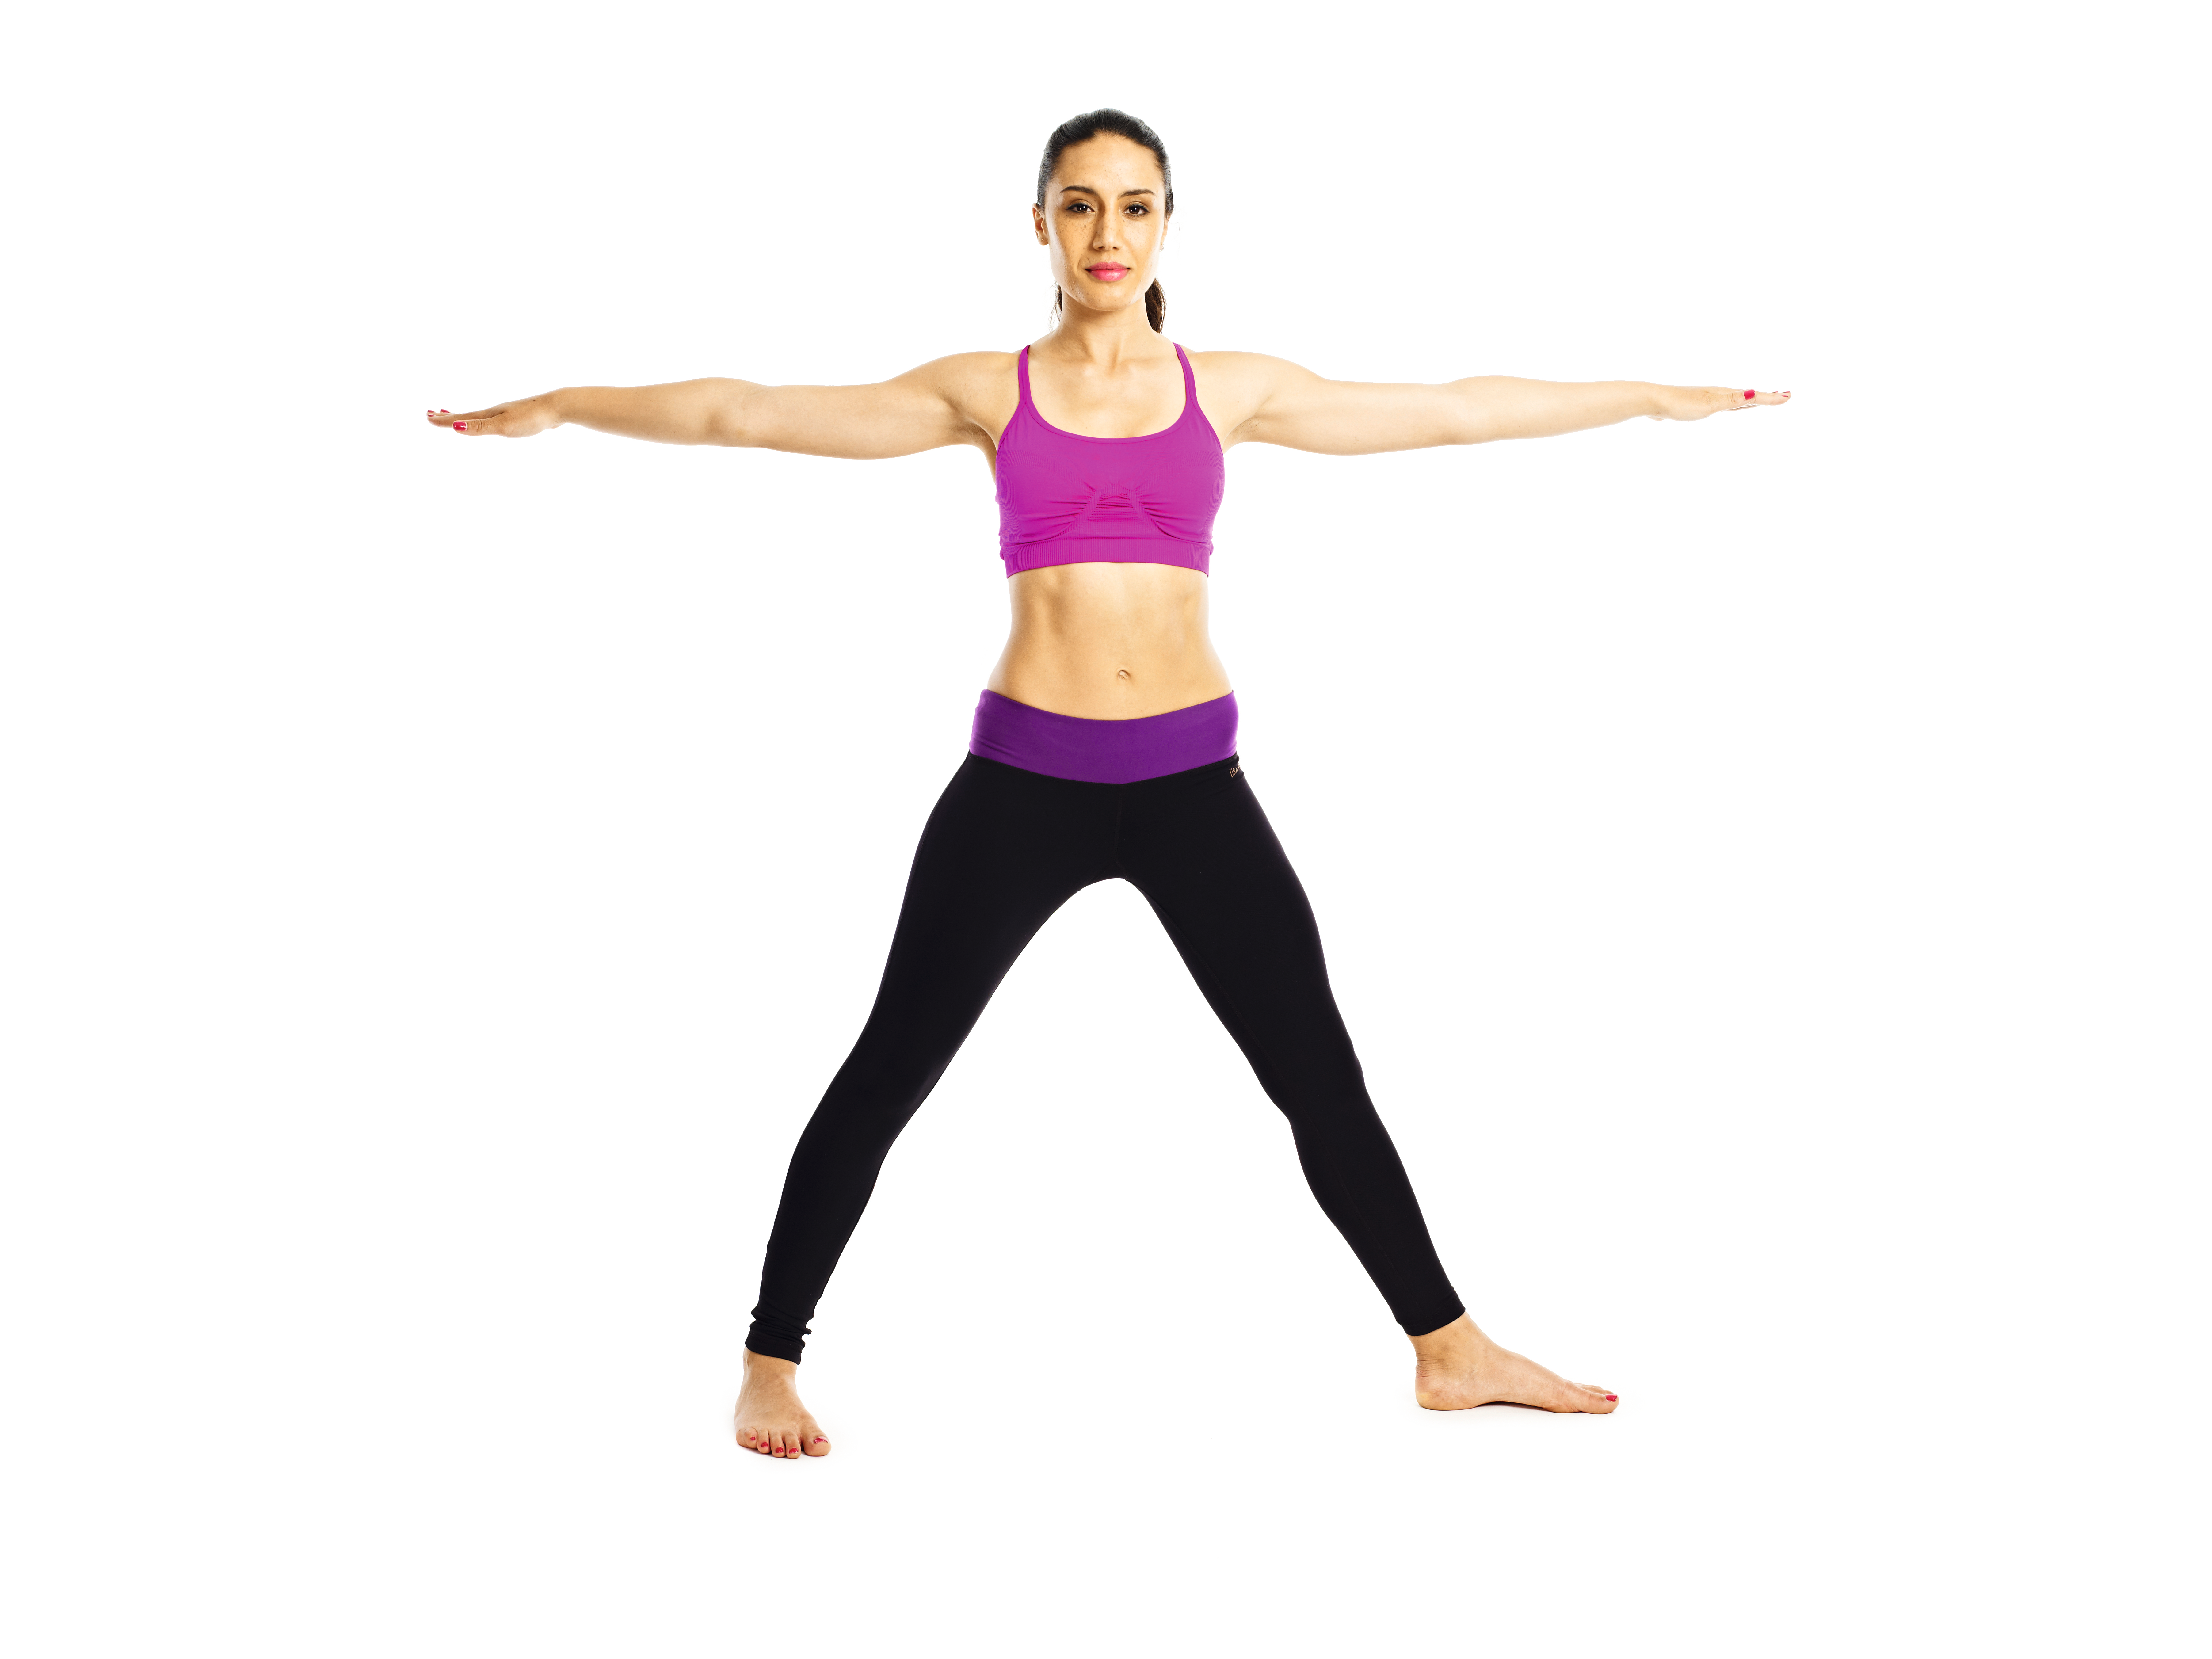

- Step your feet a leg’s-length distance apart. Turn your right foot out 90° and your left foot in 15°. (A)
- Stretch your arms out, palms facing down. On an inhalation, keeping your torso and hips facing forwards, stretch your torso out over your right leg as far as you can. (B)
- When you can’t go further, exhale and lower your right arm down, resting the back of the palm on the inside of your shin or ankle.
- Lift your left arm up towards the ceiling then look up. If this strains your neck, look down or straight ahead. (C)
- Root your feet to the floor, lifting the inner arches to strengthen your legs.
- Draw your right hip forwards and your left hip back. Lengthen your tailbone towards your left foot to deepen the stretch more.
- Take six to 10 breaths, feeling the stretch in your waist, groin and thighs.
- Inhale and press down on your feet to come up. Repeat on the other side.
- Repeat the posture once more on each side.
Tip: If your torso is coming forwards, practise against a wall. Never lock your knees in any posture; always keep a very light bend in them for safety.
Reverse Triangle
Parivritti trikonasana
Benefits: Builds tone, strength and length in your hamstrings, thighs and calves. Tones your belly.
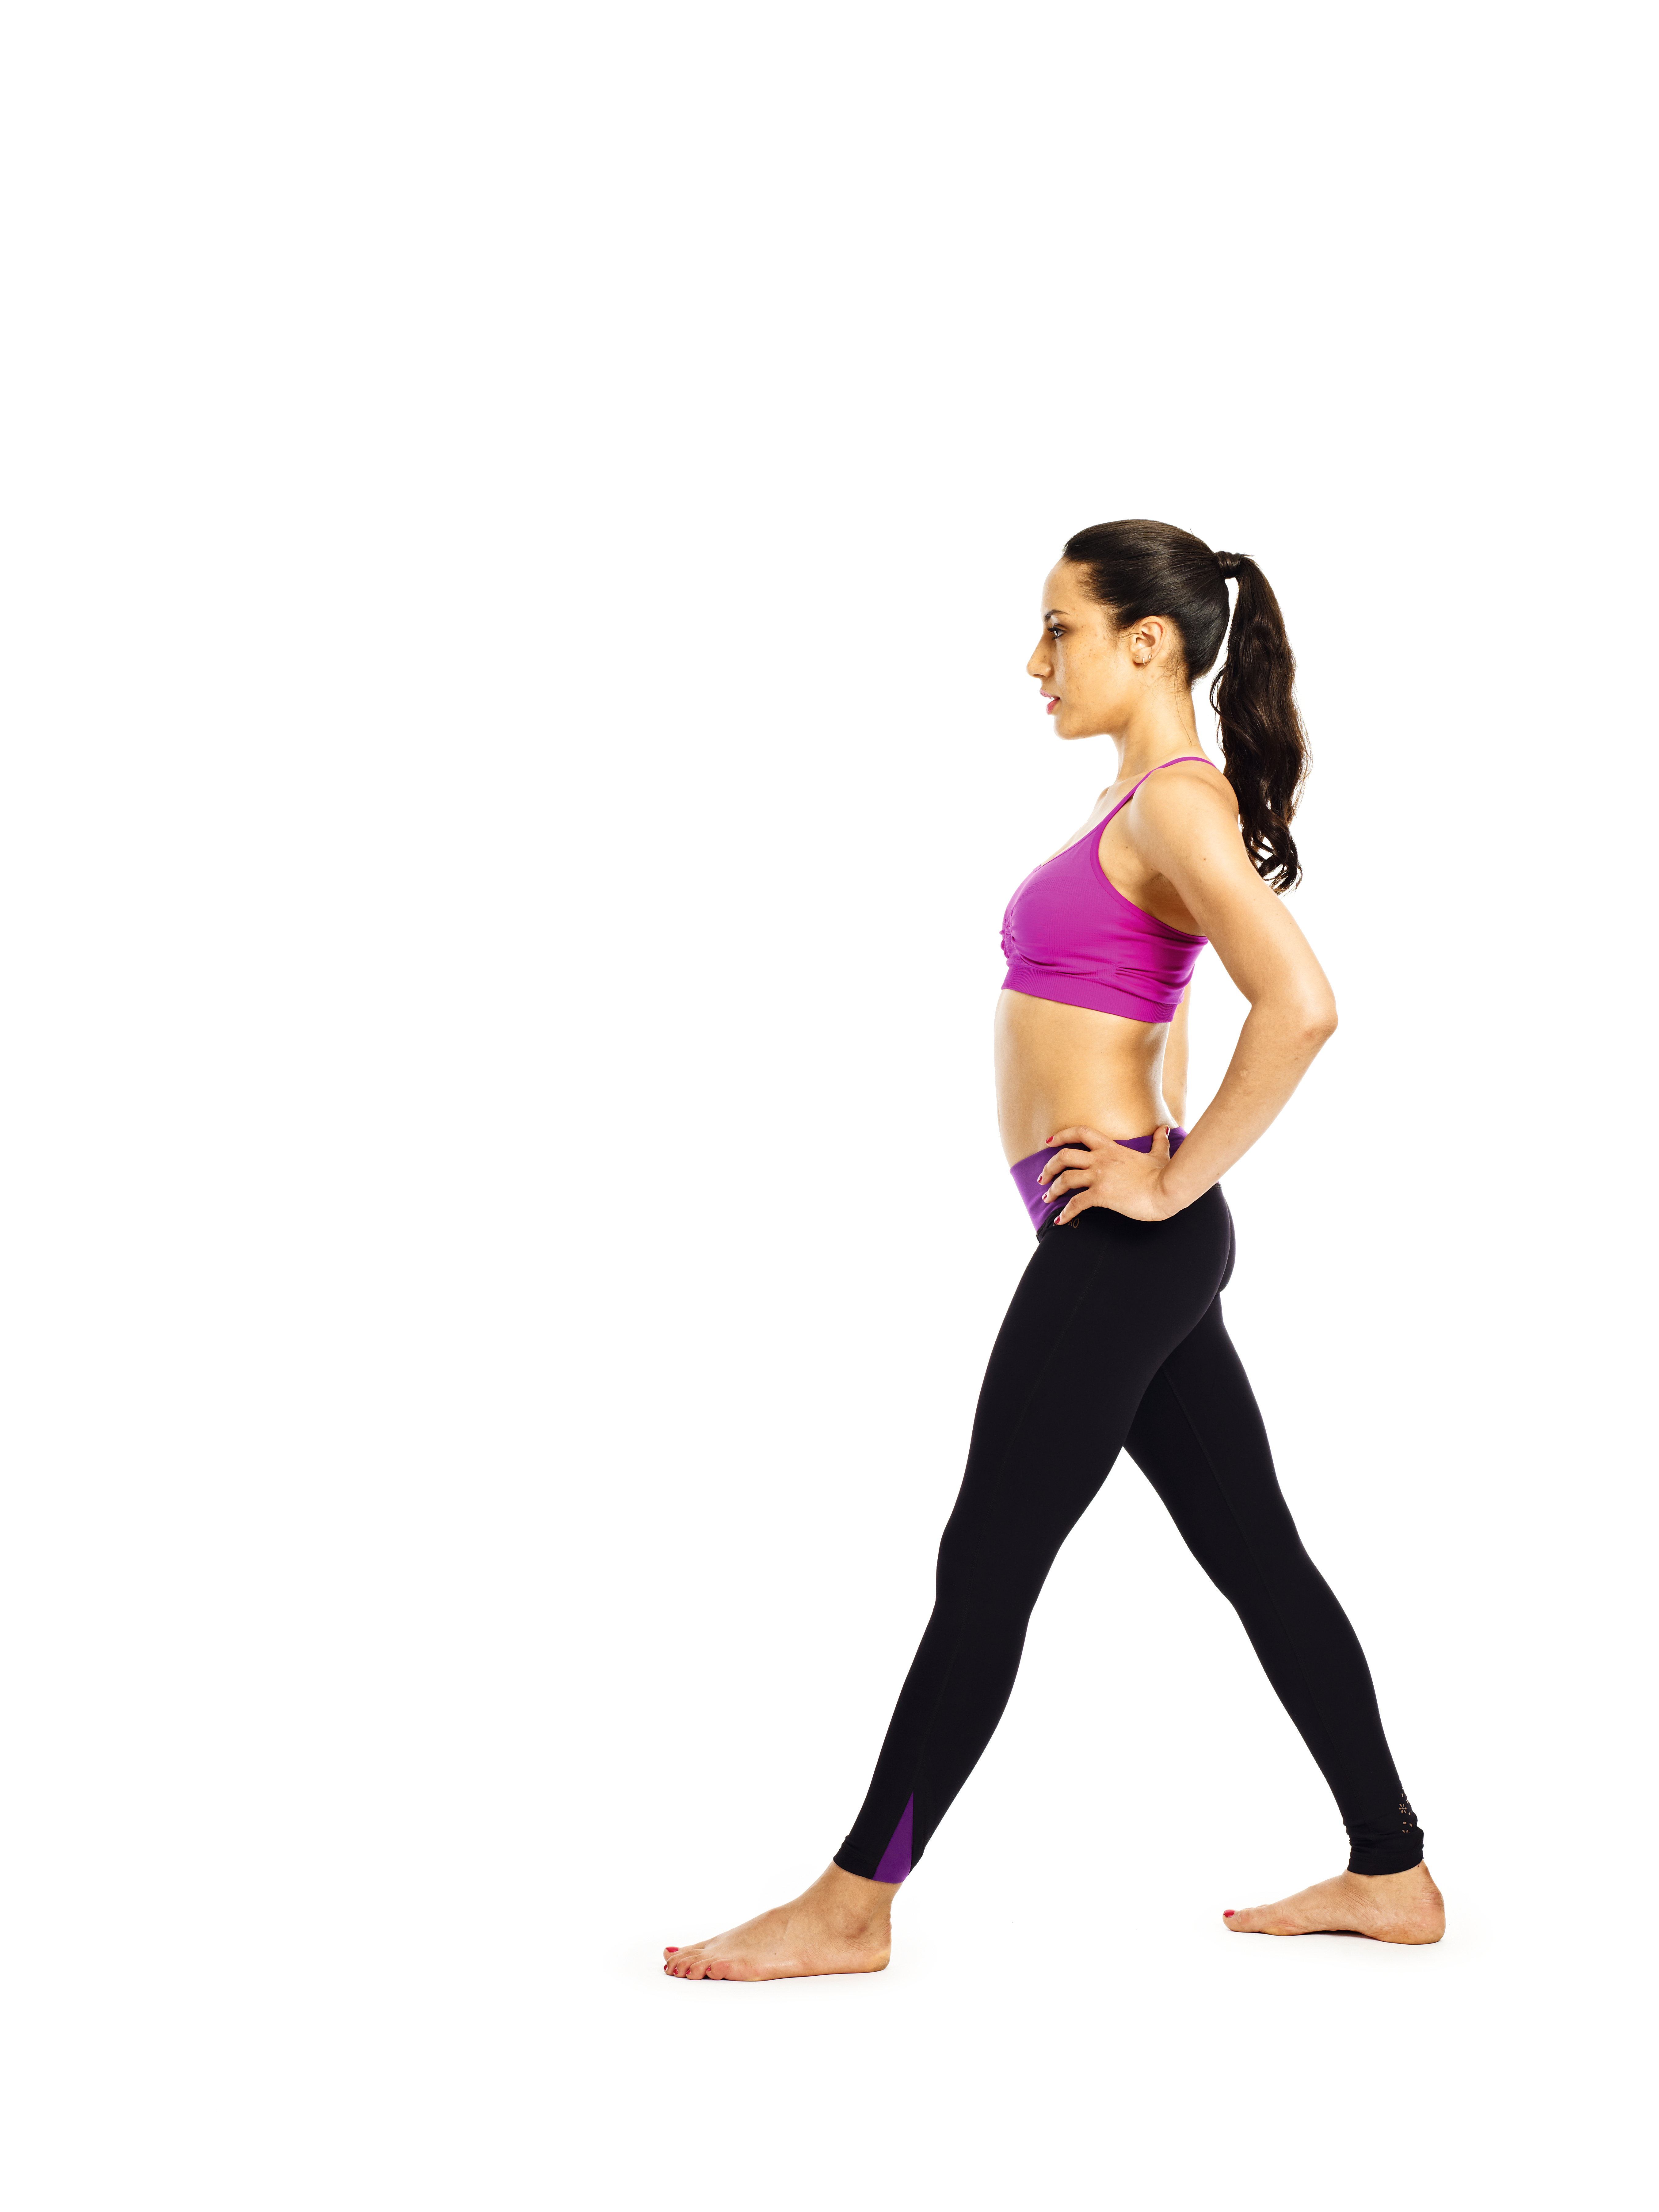
- Step your feet a little less than a leg’s-length apart. Turn your left foot out 90° and your right foot in 45°.
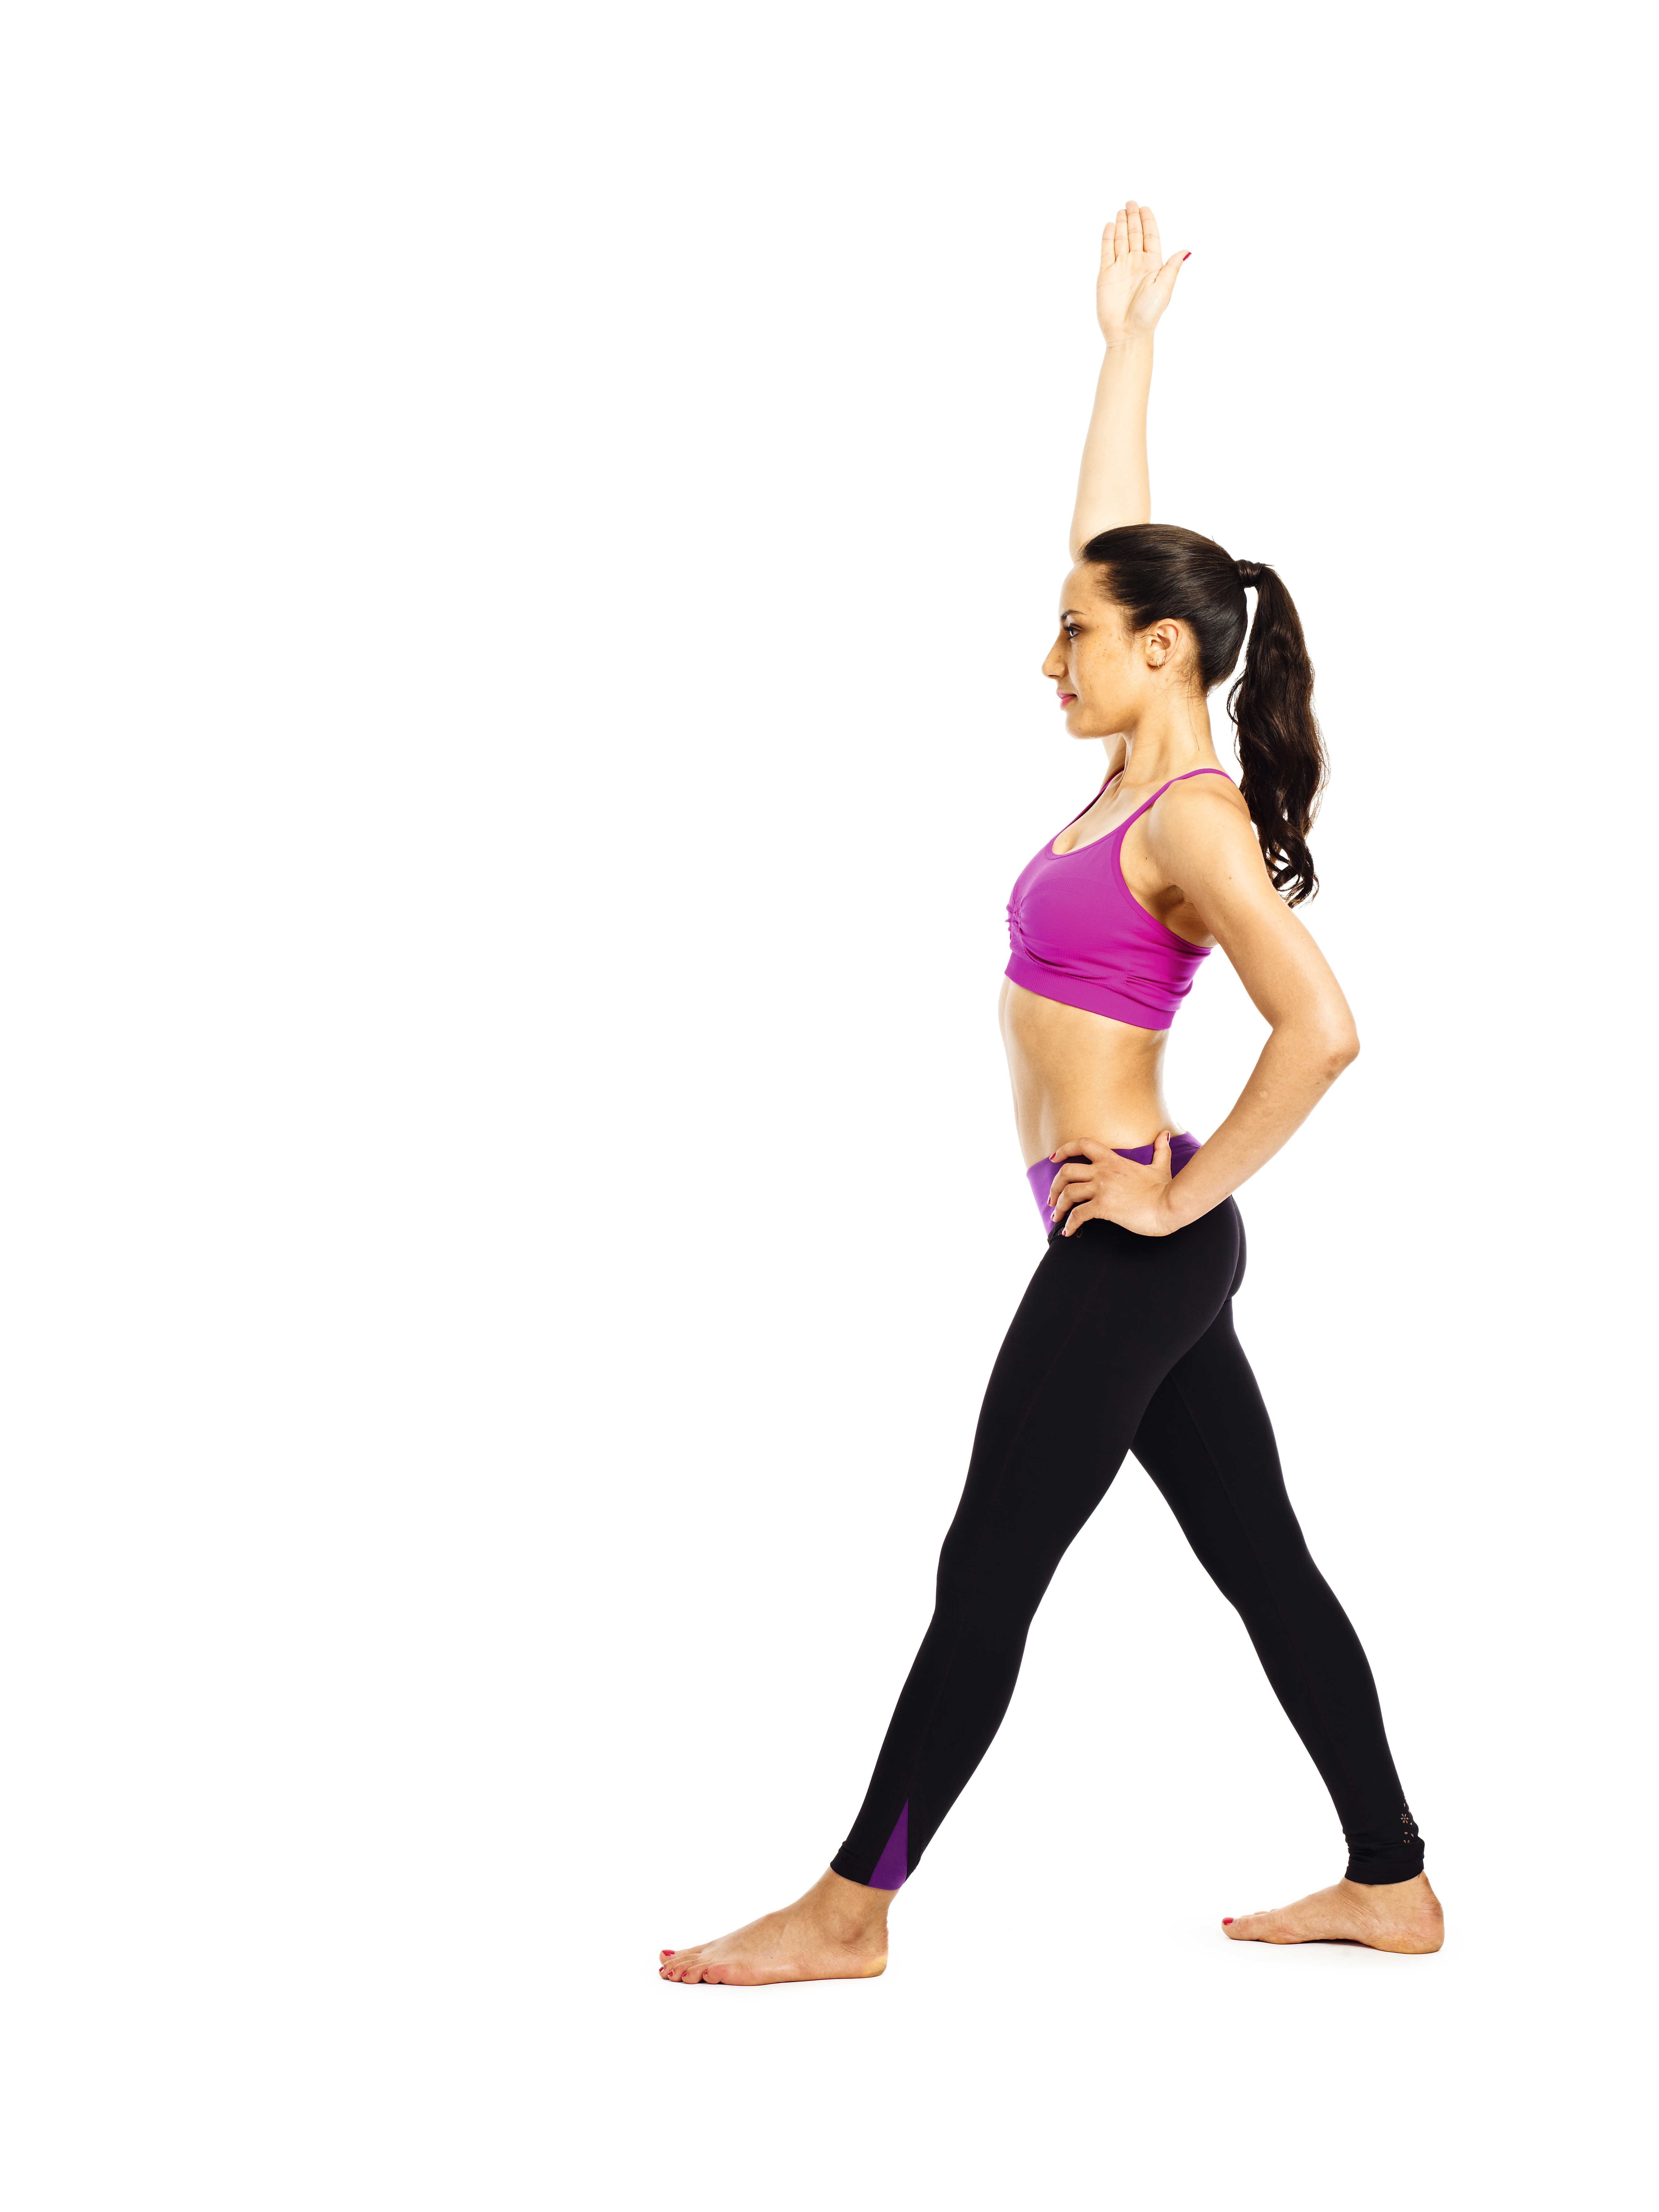
- Square your hips to face the left and turn your torso to face the left too. (A)
- Inhale and lift your right arm up over your head. (B)
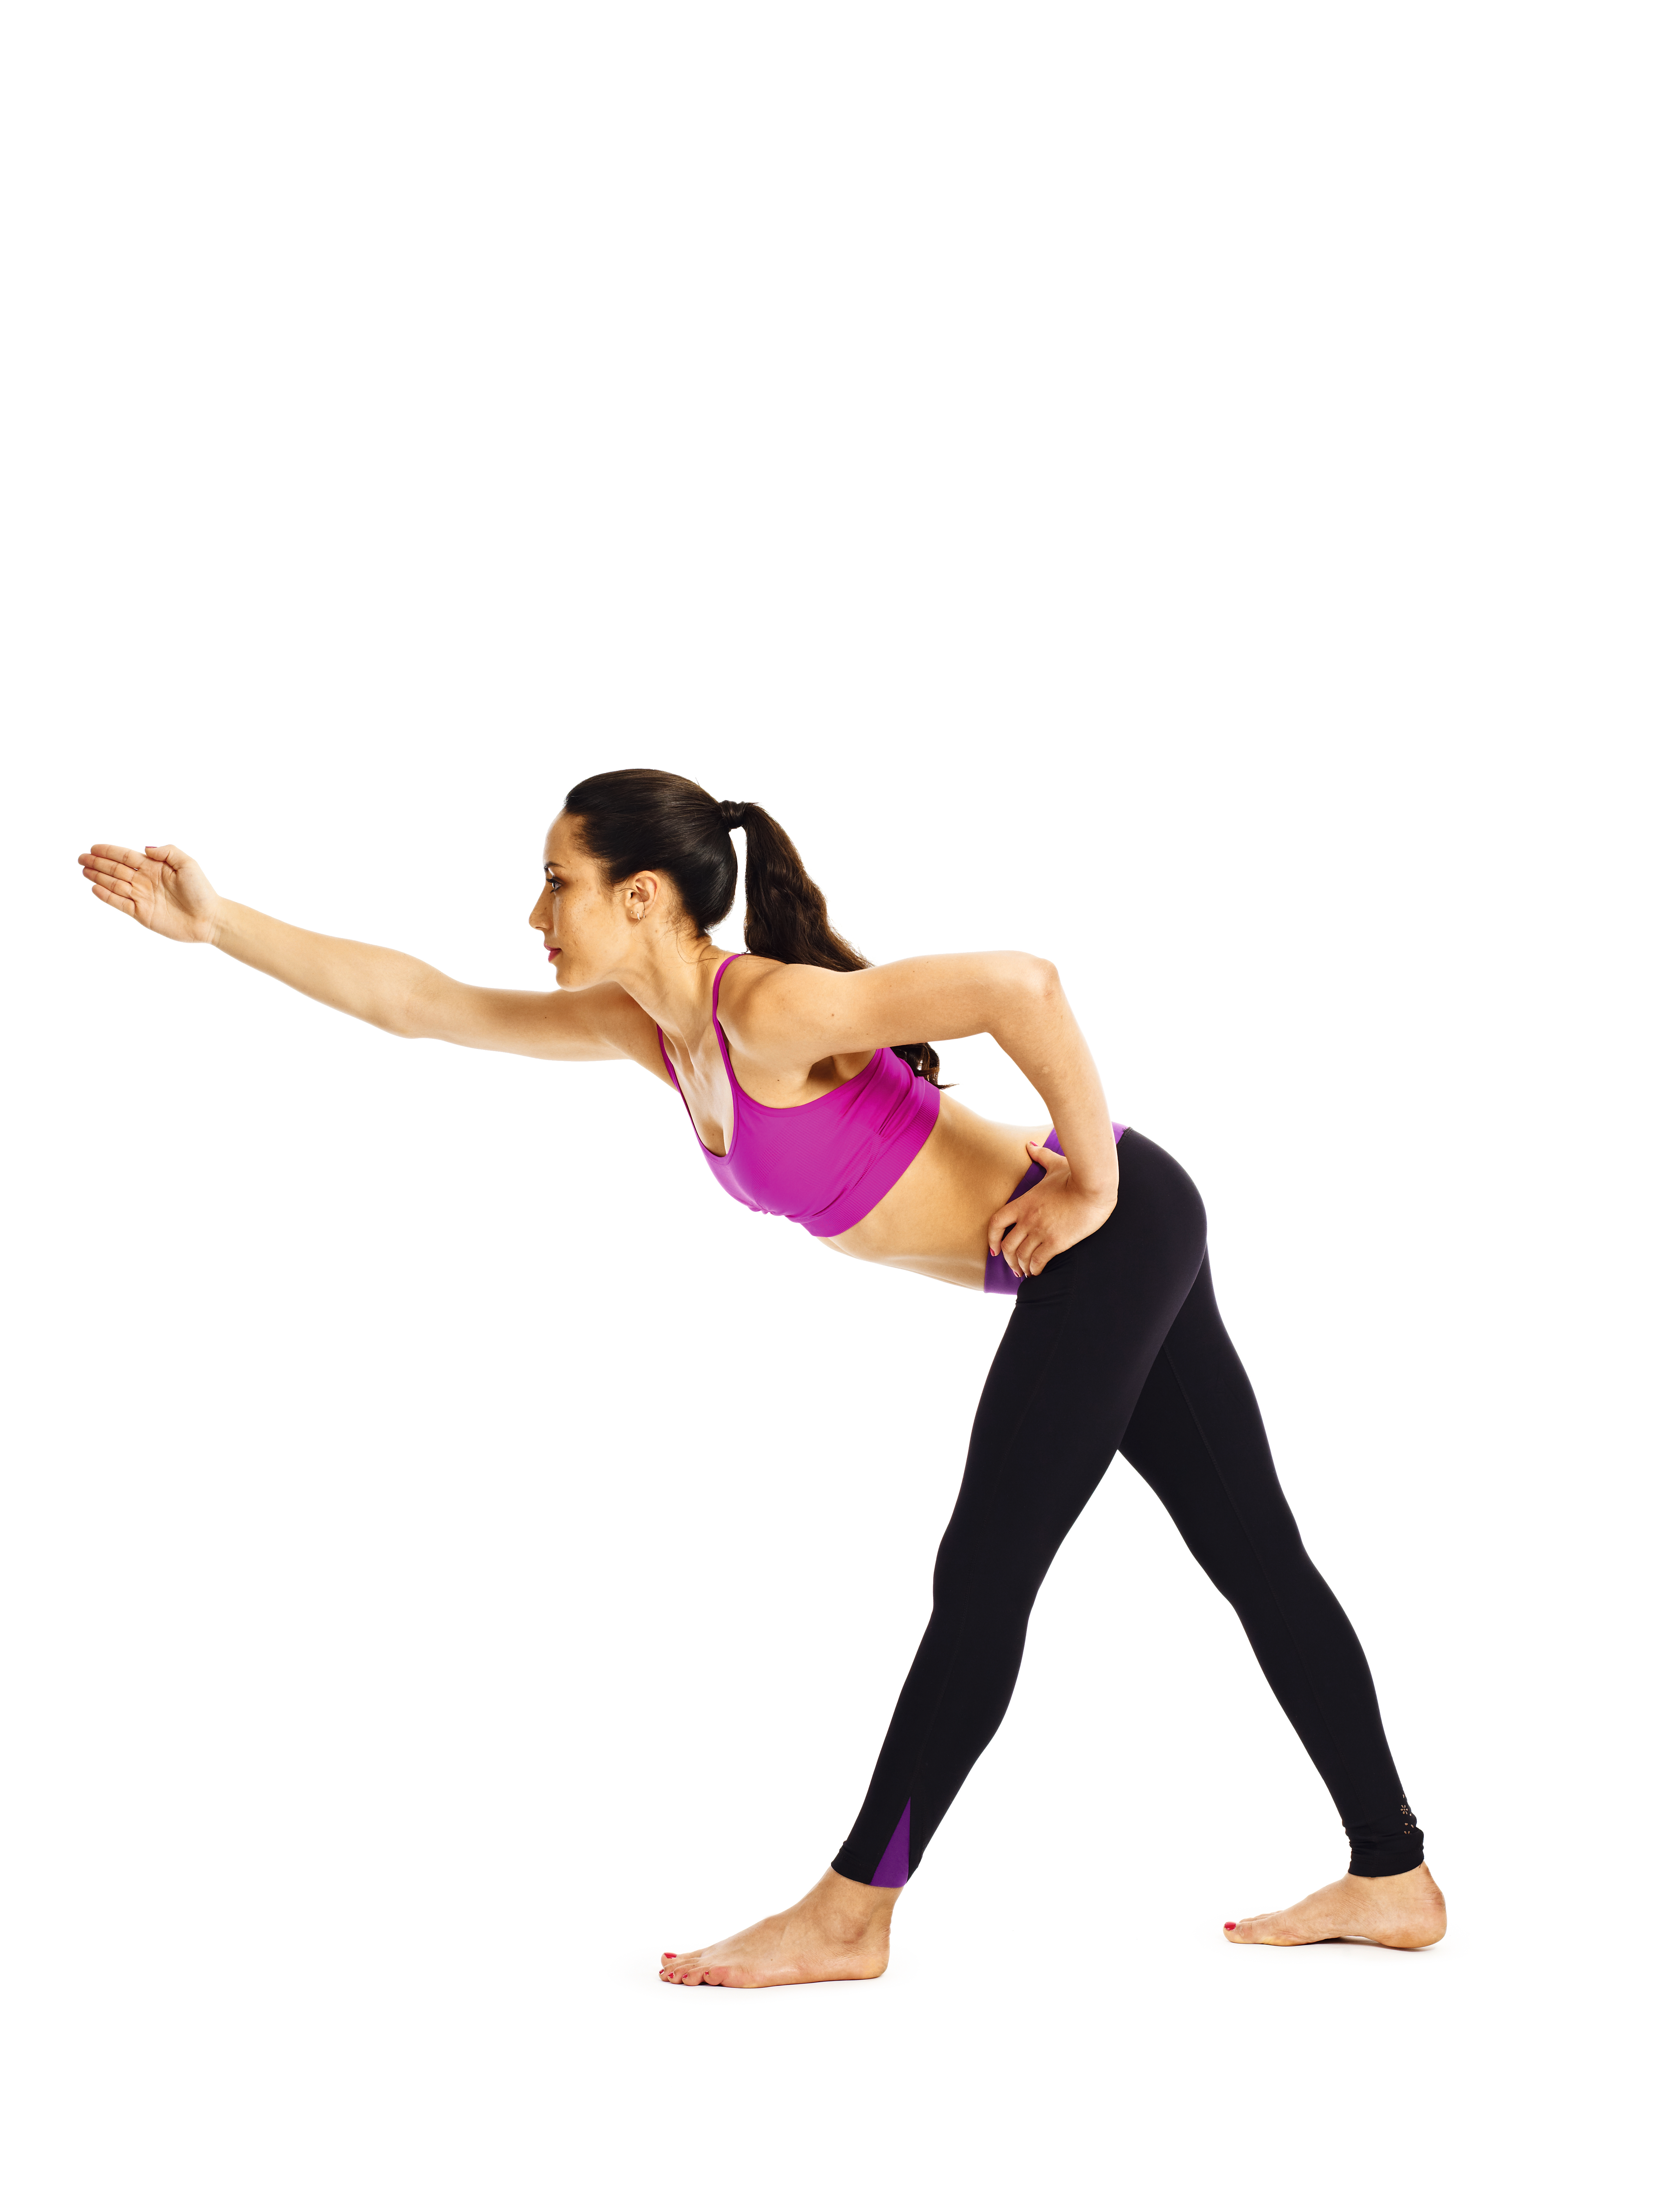
- Keeping your hips steady and your feet rooted to the floor, exhale and bend forwards from your hips to extend your torso out over your left leg. (C)
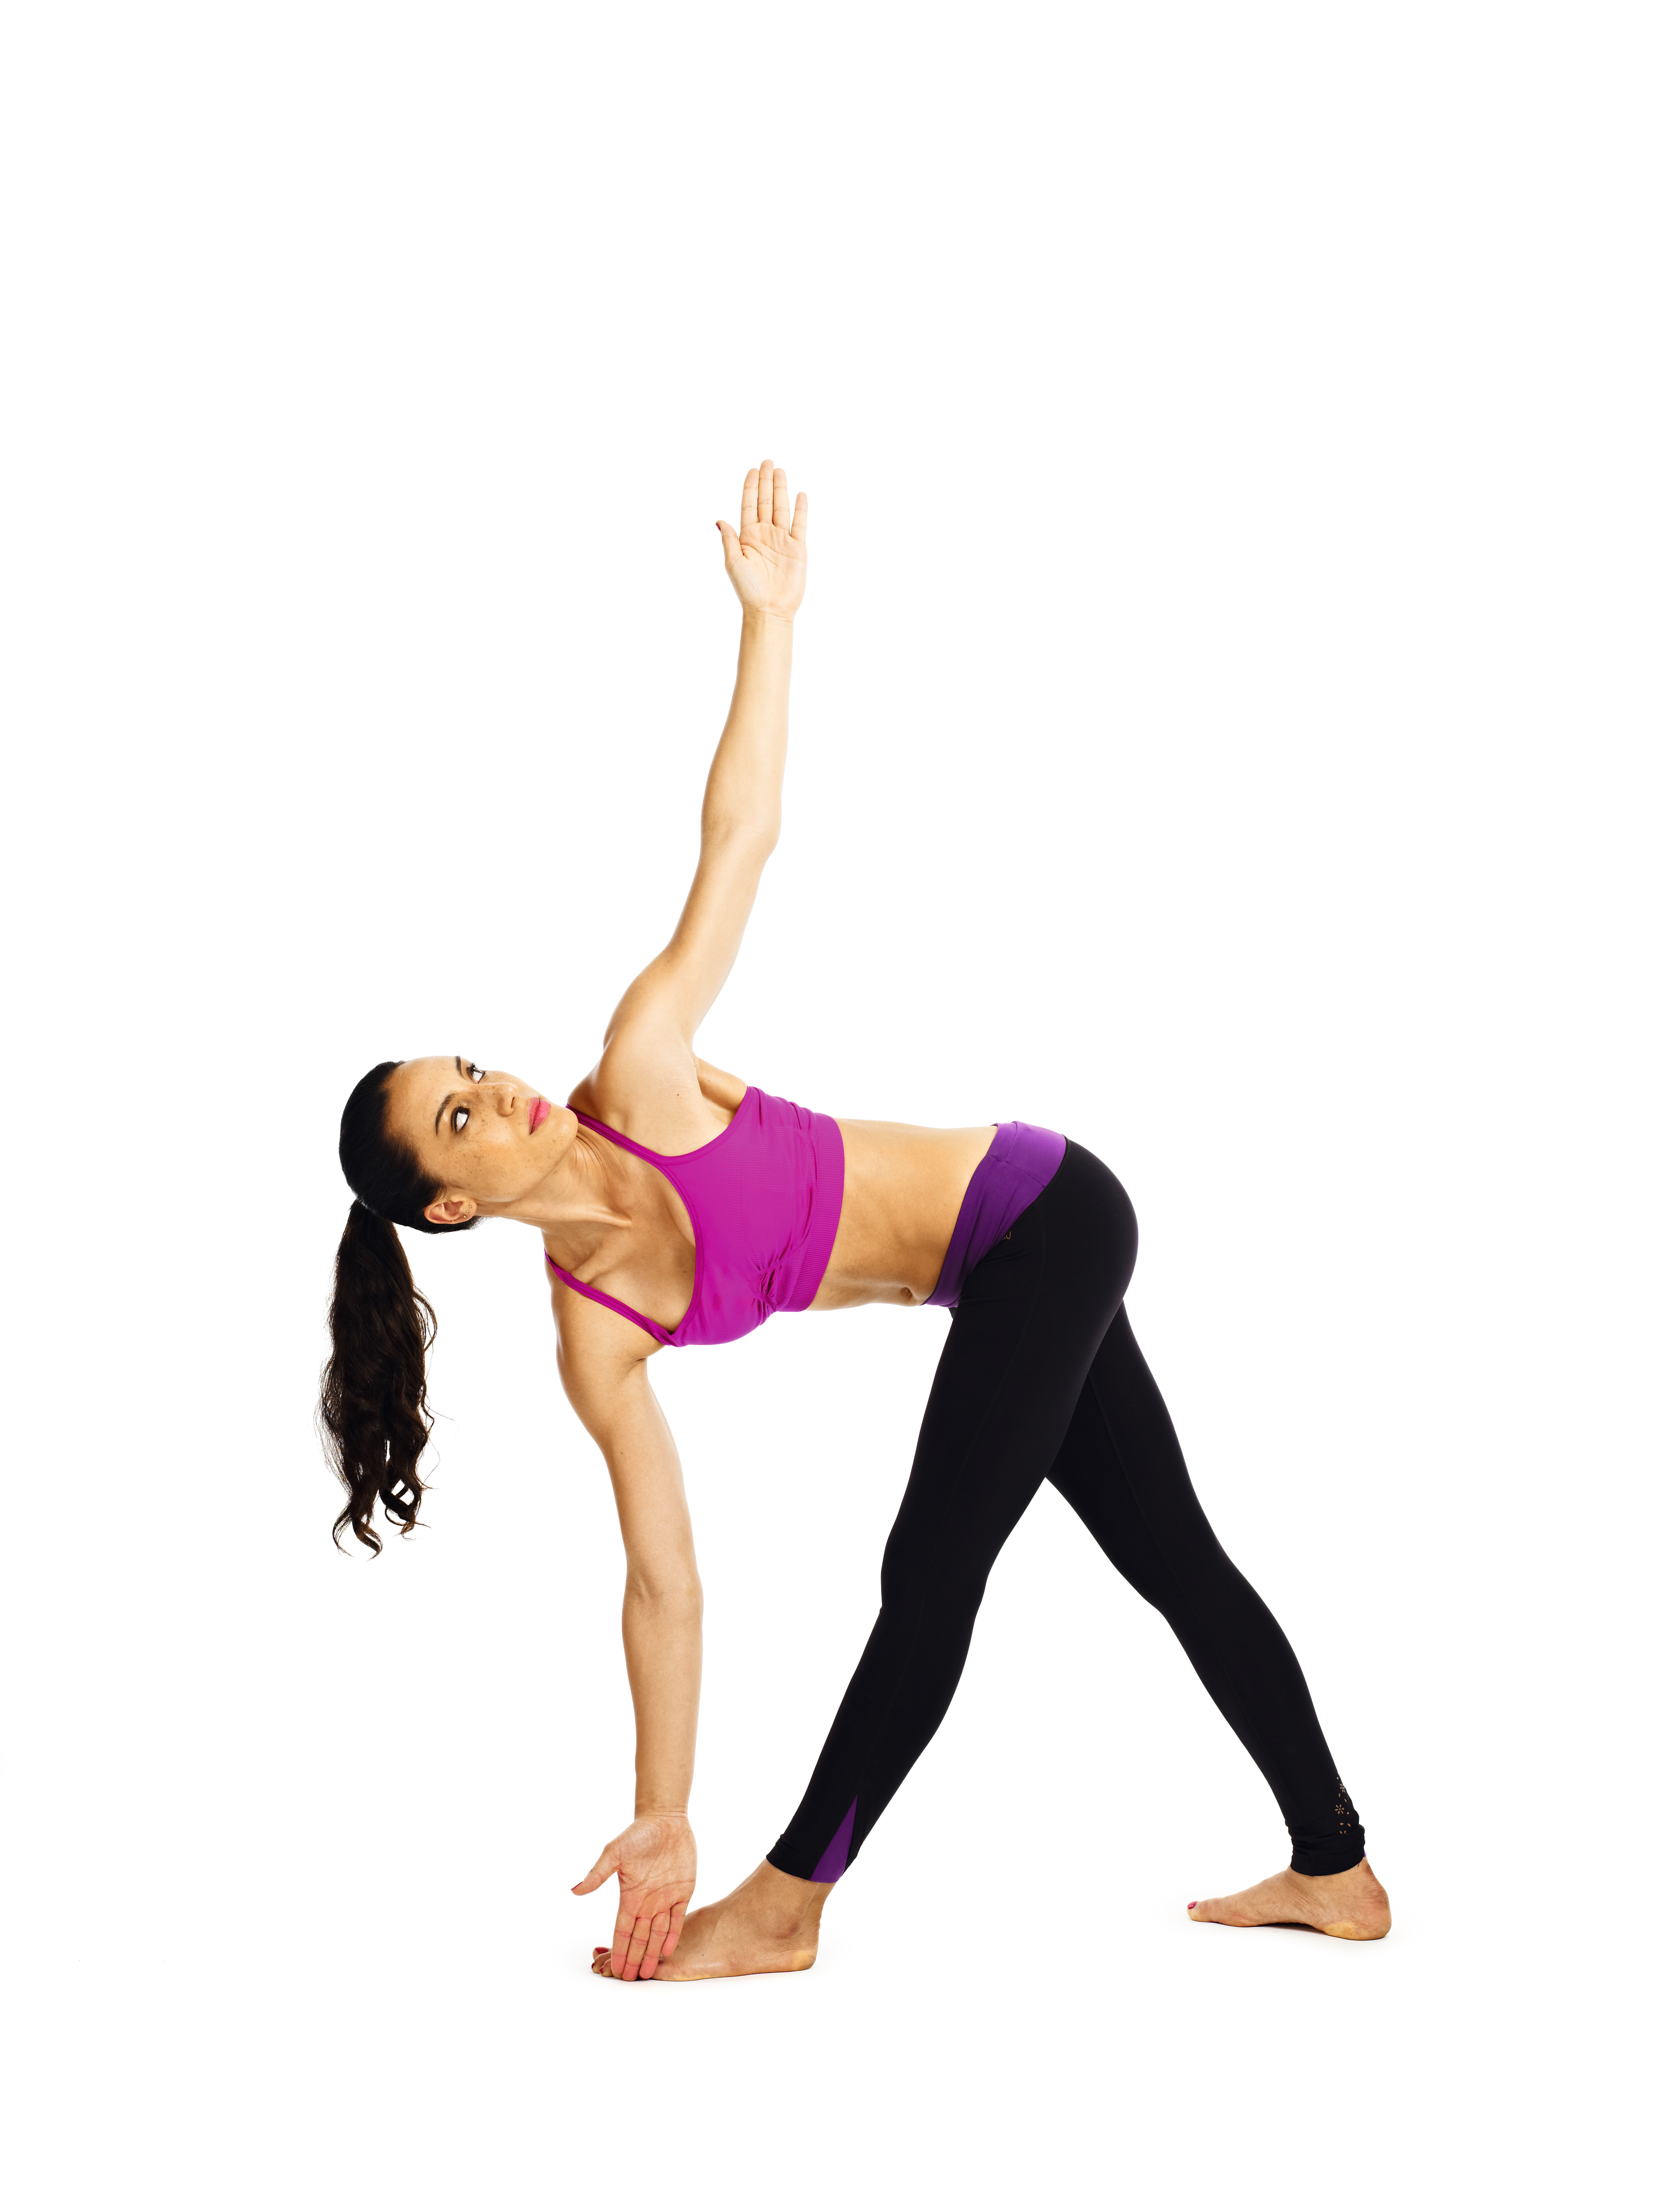
- Place your right hand on your shin, ankle or on the floor or a block beside your left foot – wherever is most comfortable.
- Place your left hand on your lower back, or for intermediate and advanced students, lift your left hand up and twist your torso from the mid-body to look up at your hand. (D)
- Lengthen your ribs away from your hips, lifting your abs.
- Keep your hips level, drawing your left hip slightly back and the right slightly forwards to increase the stretch. Take six to 10 breaths.
- Press down on your back foot to come up.
- Repeat again on each side.
Shoulder stand
Salamba Sarvangasana
Benefits: Stimulates the thyroid to balance your metabolism; stretches the shoulders and back; tones your core and lower back muscles.
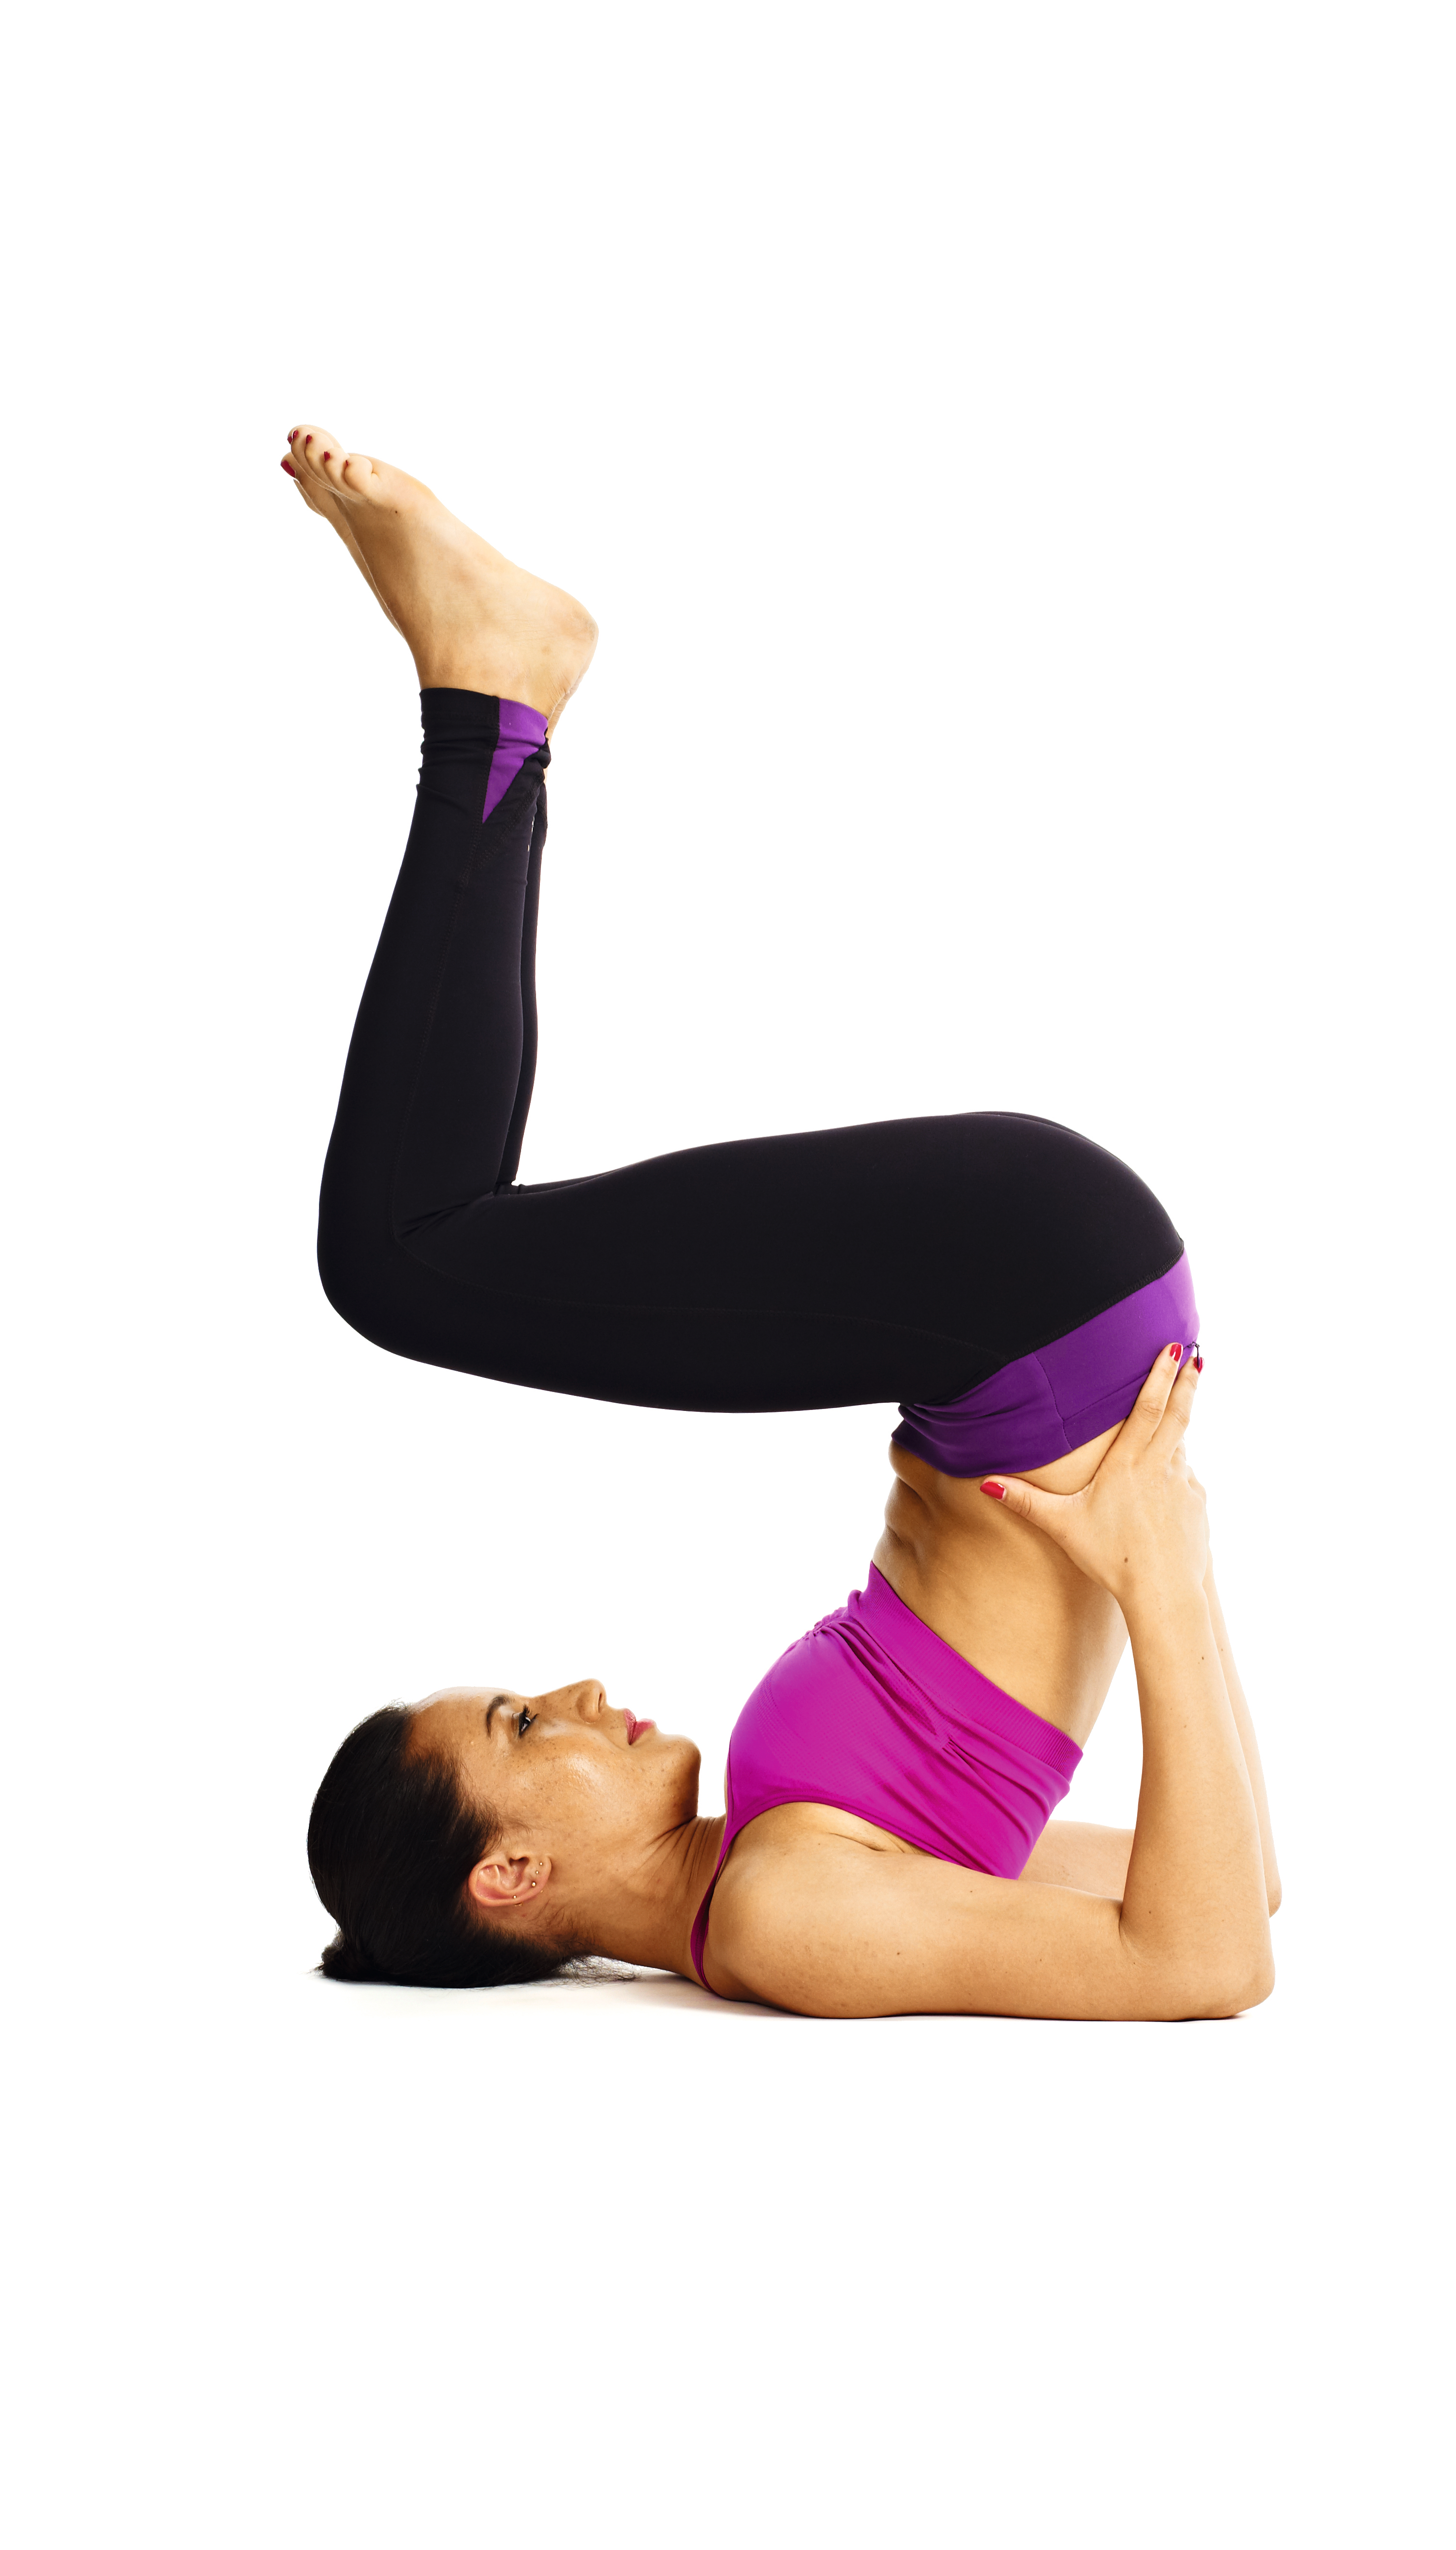
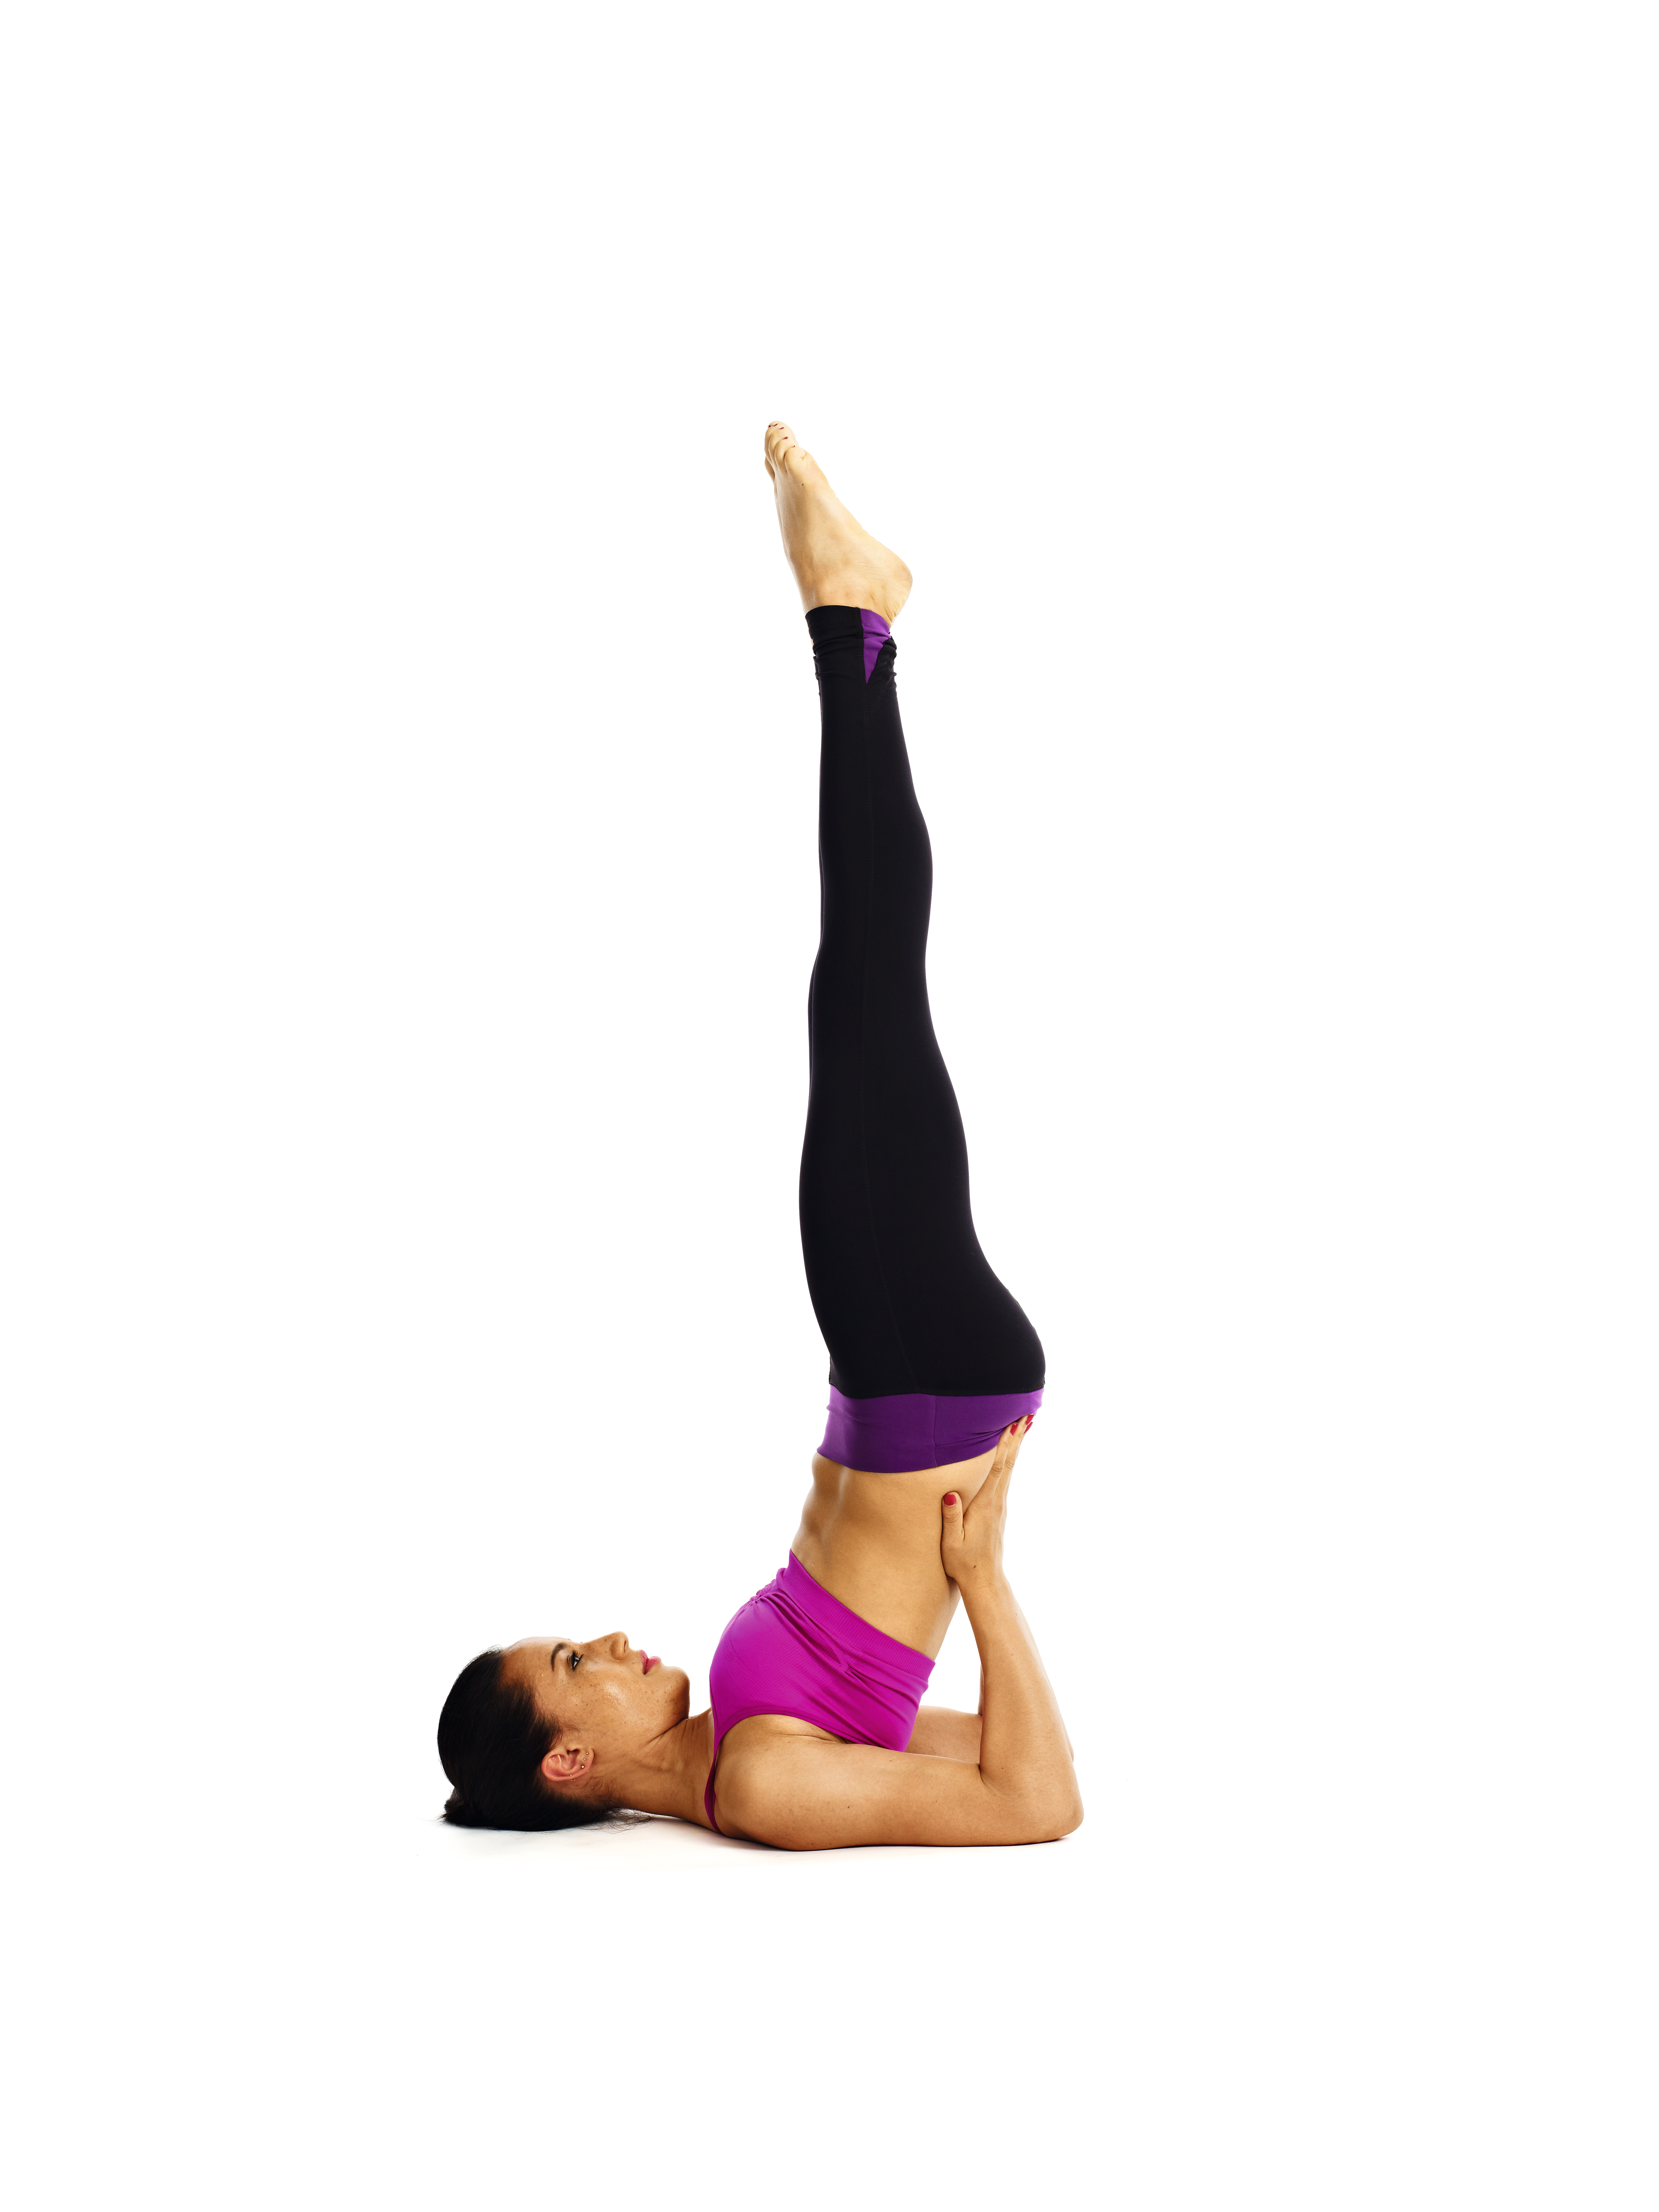
- Lie on your back. Exhale, tense your abdominals and lift your hips so your knees are overhead and bent and your hips are supported with your hands on your lower back. (A)
- Tuck your shoulders under and bring your elbows closer together, with your hands still supporting your back. (B)
- Straighten your legs in the air, firming your muscles and bringing your legs together; feel them working as if you’re in Mountain pose. (C)
- Bring your elbows further together. Point and stretch your toes, and squeeze your core and leg muscles.
- Take up to 25 deep breaths, then to come out of the pose, bend your knees and round your back as you slowly roll down to the floor. Keep your back supported with your hands! Or, you lower into Plough pose (below).
Tip: Keep your neck muscles soft. If they’re straining, hinge at your hips more and fold your legs diagonally over your face. This is half shoulder stand. Use a blanket under your shoulders if needed.
Plough
Halasana
Benefits: As with Shoulder stand (above), Plough pose also stretches your spine and neck, and tones your tummy.

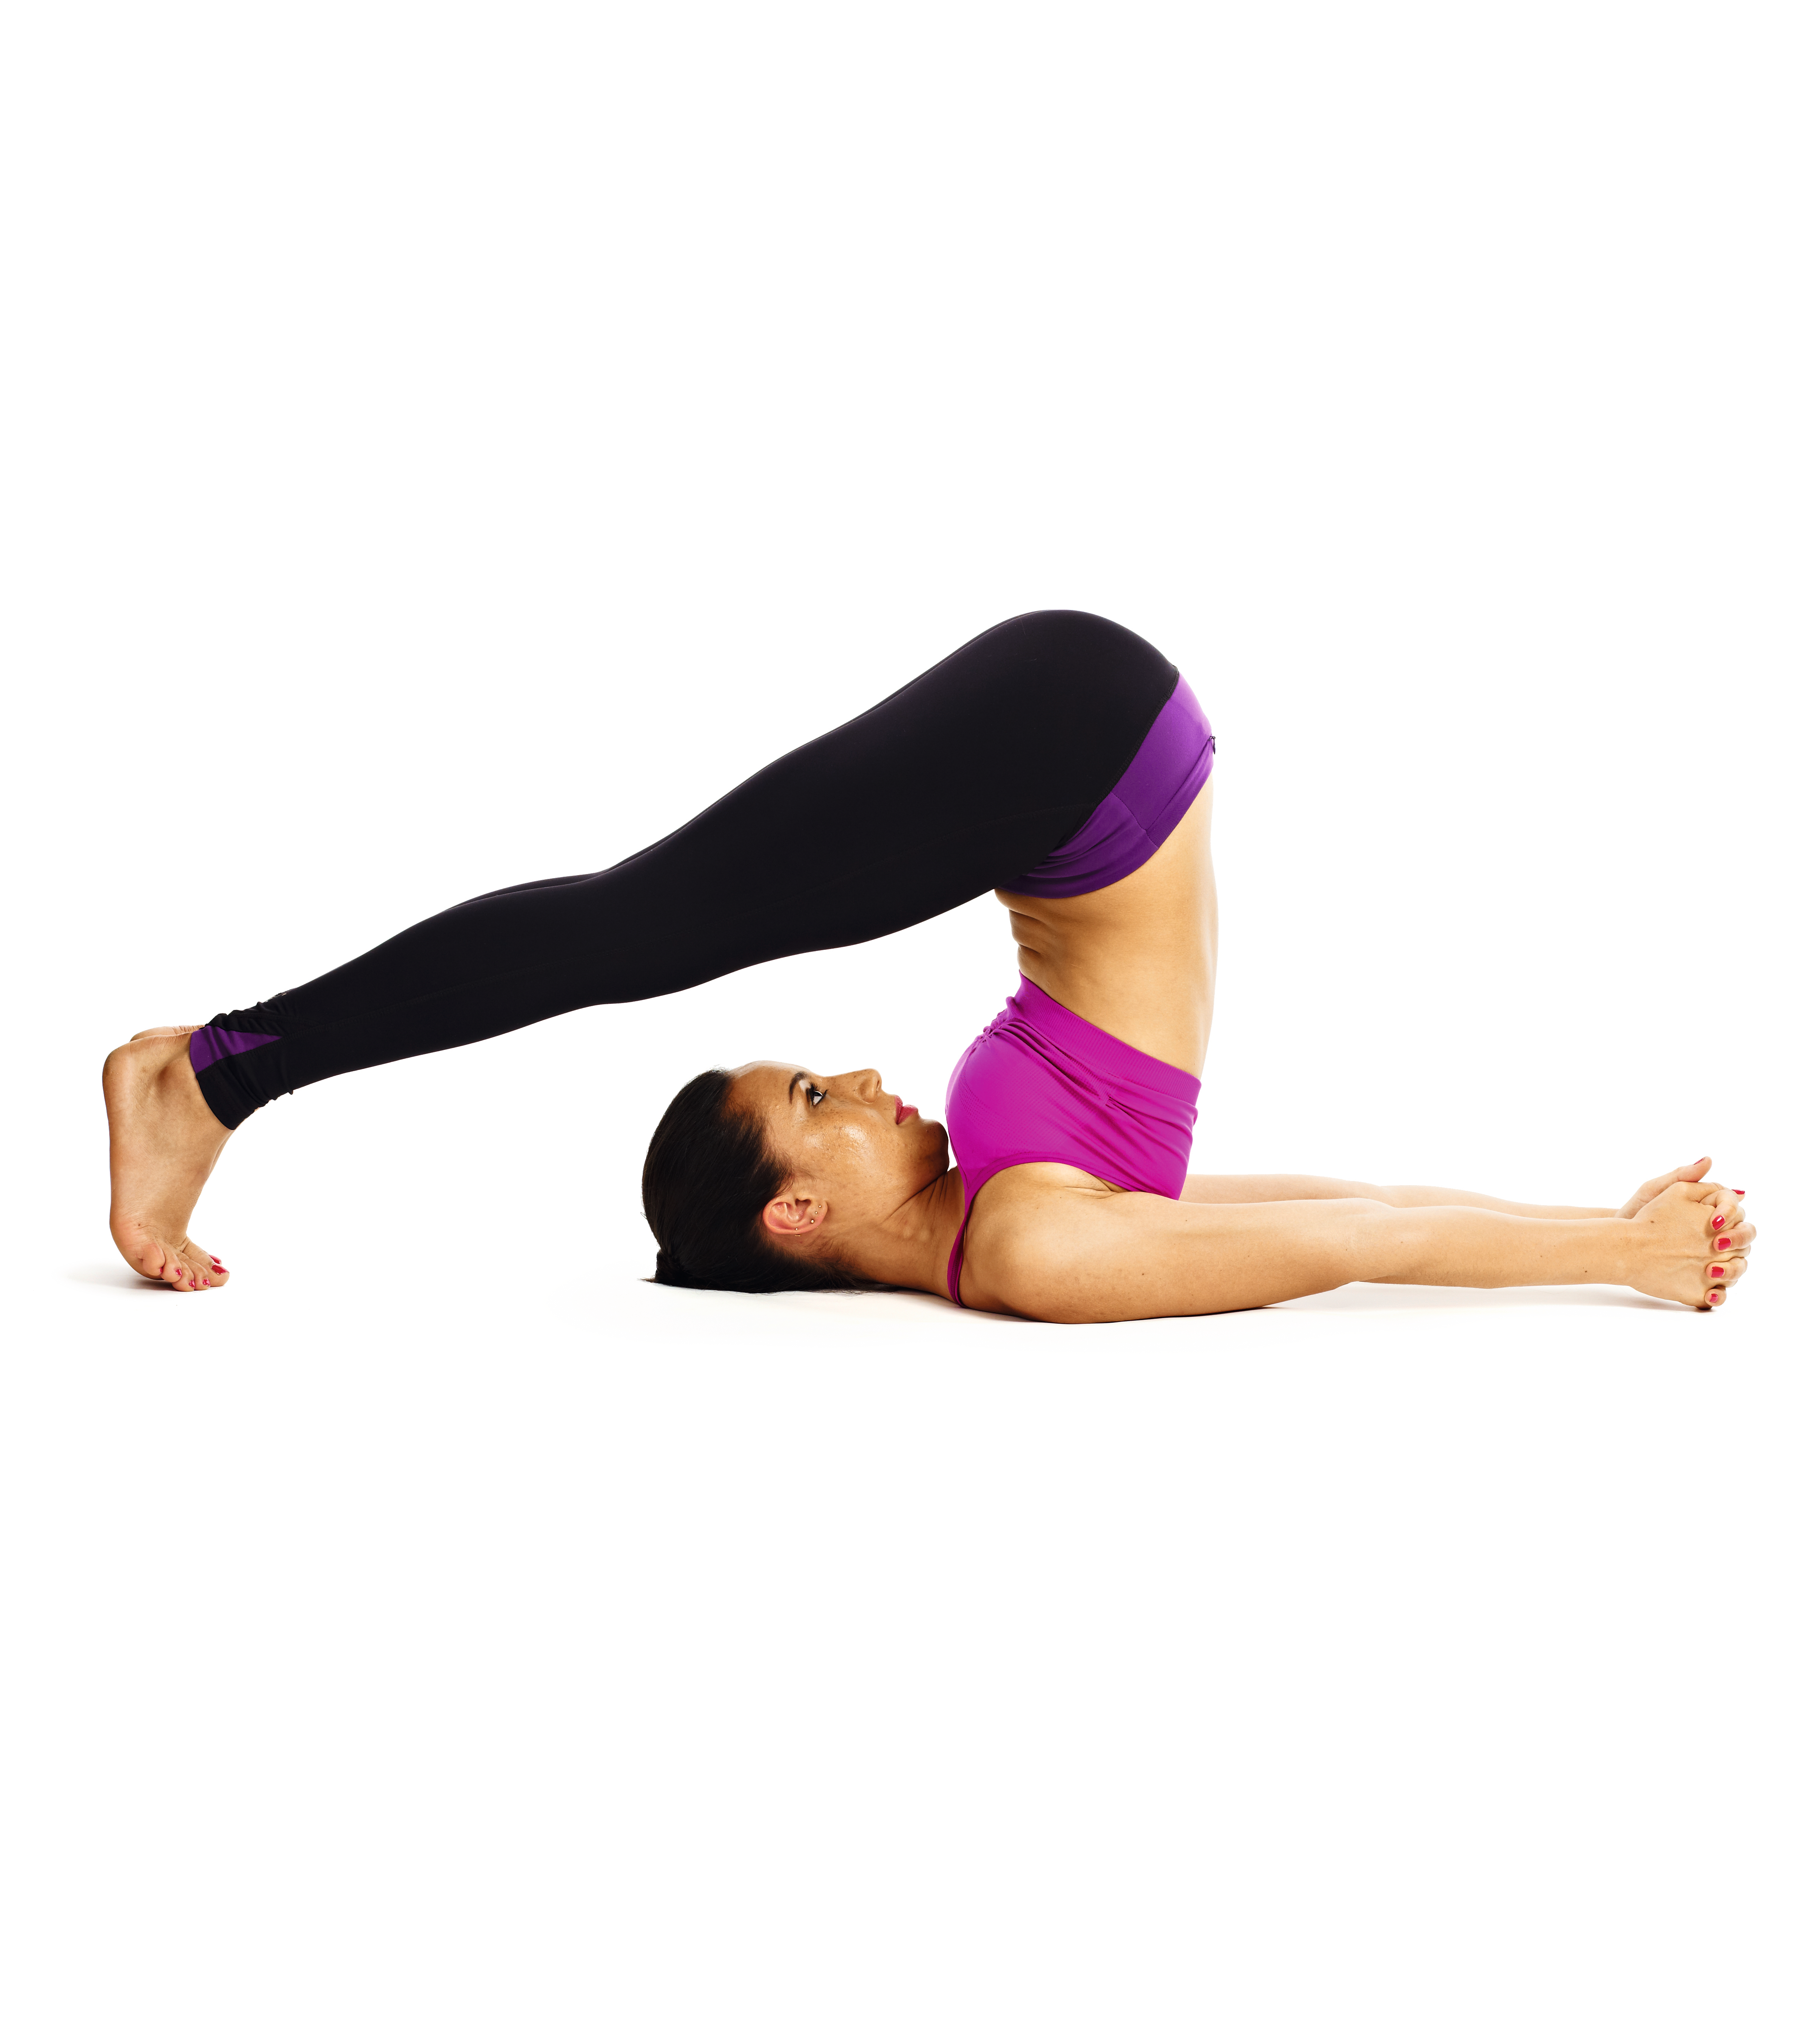
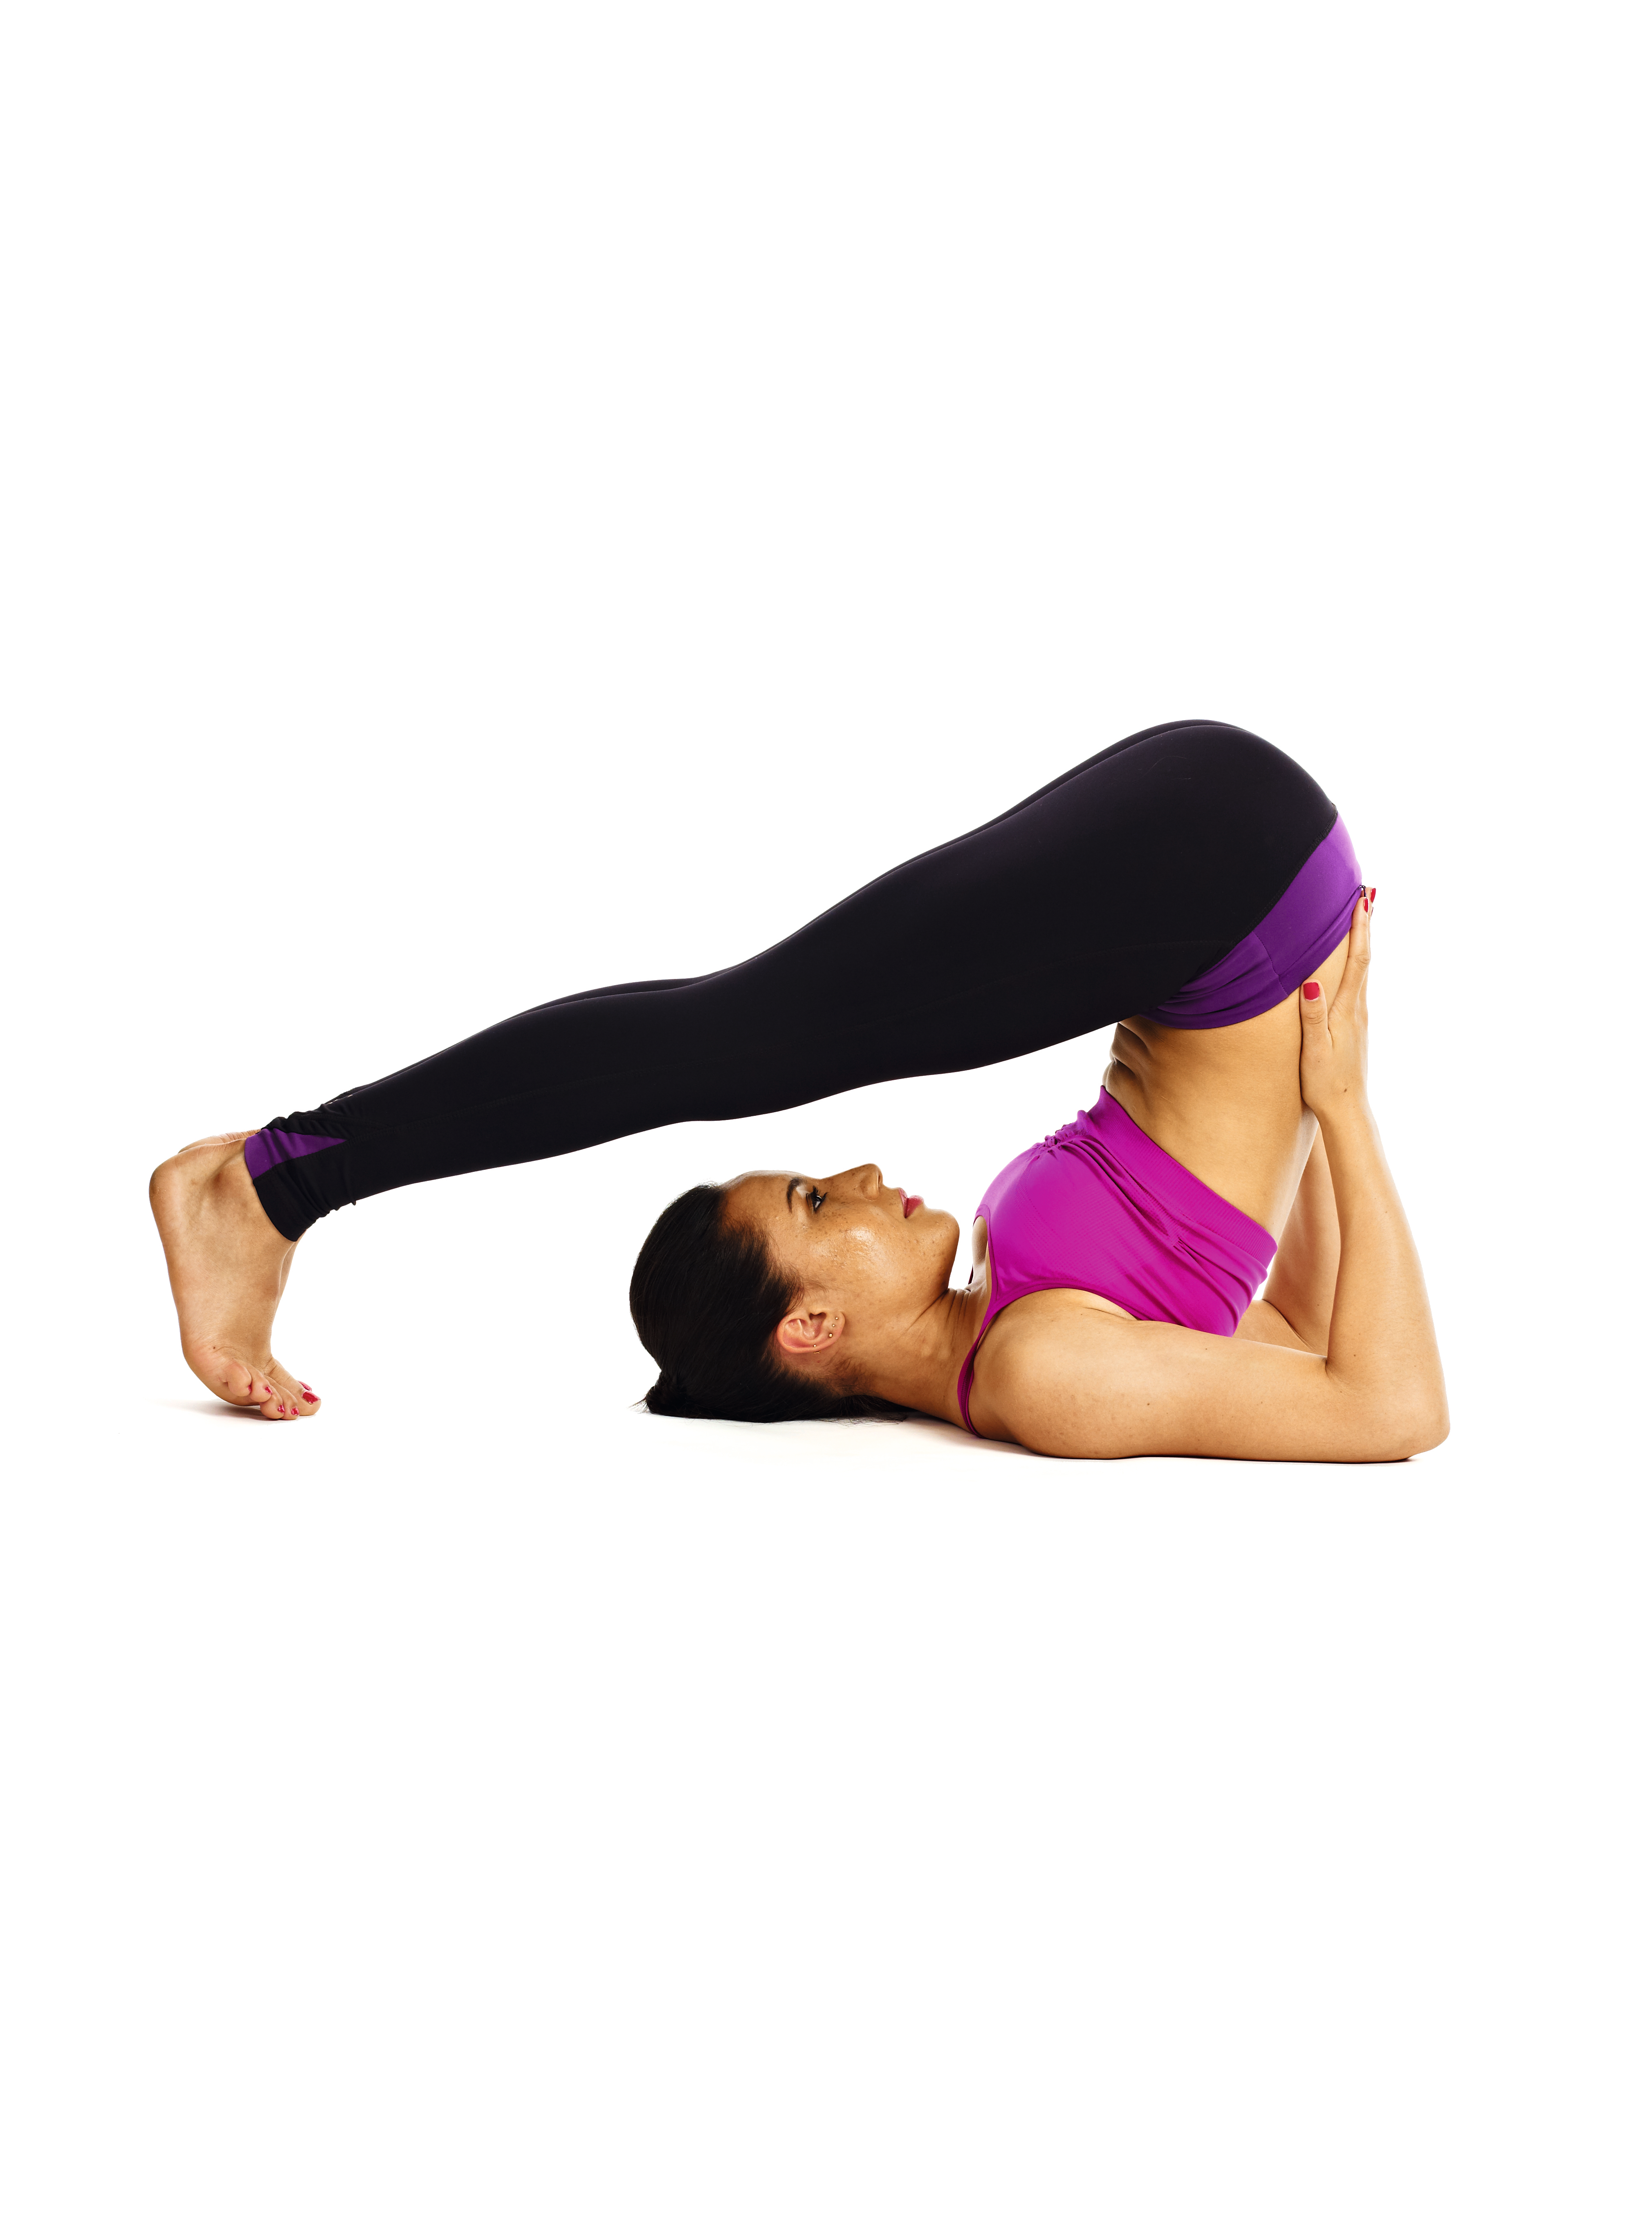
- From the Shoulder stand position, inhale deeply and, on the exhale, lower your feet to the floor over your head, toes tucked under, with your hands supporting your back. (A)
- Rest your toes on the floor, keeping your legs firm and straight. Keep your torso lifted and long, your abs pulled in tight, and your shoulder blades drawn together underneath you.
- Stretch your arms out on the floor in front of you and interlace your fingers. (B)
- Take 10–20 steady breaths, keeping your torso straight – don’t let it collapse.
- To come out of the pose, support your back with your hands, lift your feet off the floor, and slowly roll down one vertebrae at a time until
you’re laying flat. - Variation: If touching toes to the floor isn’t happening for you, rest your feet on a chair or against a wall and support your back with your hands.
Tip: Push your heels back in the pose to lengthen and strengthen your legs.

